

Art Centres
How to Buy Watercolor Brushes?
Watercolor brushes are an excellent way to create beautiful watercolor paintings and illustrations. They can be used in a variety of different ways, and with a little practice and creativity, you can produce some beautiful art.
Material of Pen Bristles
Brush hairs are ranked from good to terrible as follows: (the price is also fluctuating from high to low at the same time.)
Mink hair is superior to squirrel hair, other animal hair, and artificial fiber hair.
Various Function
In other words, the pen that is typically used for coloring is the one that is most frequently used while painting.
Coloring pen
Additionally, it is frequently necessary to employ both at once. Beginners should buy three or so at begin.
Tick pen
Specifically, the pen is used to make fine lines.
Having one is sufficient in most cases, which necessitates good front-gathering skills.
Do not get a pen that is so thin that it resembles barely a few hairs. Beginners will believe it will be simple to control, which is incorrect. In actuality, the water storage is awful. Before half of a line is drawn, there is no water.
Background pen
That is the pen that was used to create the background's halo coloring.
Beginners can acquire one first if they have a huge water storage capacity.
Brush size
The size will matter when purchasing a pen, but since there are differences in the actual sizes of the corresponding numbers brands and series, the actual size will take precedence.
In general, if you're drawing a 16K picture, the brush tip length for the upper color pen can be between 1.5 and 2.0 cm; the background pen can be longer, between 2.0 and 2.5 cm.
We offer watercolor supplies at affordable prices. Please contact us to buy what you need.
Top 5 Instructional Pottery Books
You've wanted to do this for a very long time, but you just haven't had the time. Starting from scratch with a new interest or skill is challenging. We are aware that it can be challenging, particularly when starting from scratch. This blog post was motivated by it. We offer the top 7 instructional pottery books you need to get you where you want to be, whether you want to learn as a hobby or advance in your art.
1. The Potter's Bible by Marylin Scott
Get this book if you've ever considered working on a potter's wheel. It has all the information you require to become the next great potter.
2. 250 Tips, Techniques, and Trade Secrets for Potters by Jacqui Atkin
Both professional and amateur potters will benefit much from this book. It's jam-packed with time-saving advice, industry expertise, and fresh technical information. simple to understand and follow.
3. Mastering the Potter's Wheel
Don't know where to begin if you want to learn how to throw the wheel? This detailed manual walks you through the entire process. It covers everything you require to begin producing lovely ceramics.
4. Glaze by Brian Taylor & Kate Doody
This book is a thorough guide on glazing and is a requirement for any ceramicist. The methods and recipes in this book will help you achieve the desired finish. You'll frequently refer back to this!
5. Pinch Pottery Paperback by Susan Hall
The process is easy, and the outcomes are stunning! Numerous tasks in this book are ideal for both novices and ceramicists. It's also fantastic that some of these projects can be done without a kiln using air-dry clay!
We offer pottery supplies at affordable prices. Please contact us to buy what you need.
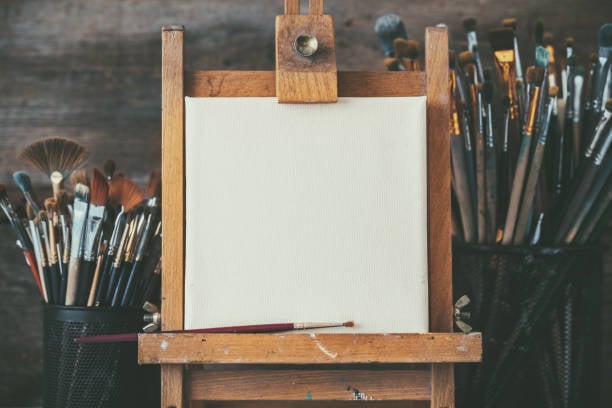
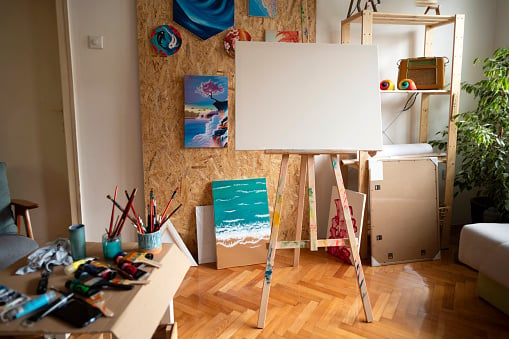
How to Select An Easel
An easel for painting is a device that holds a canvas or paperboard in a vertical position. The board may be flat on the easel, or it may have an angled surface to allow the artist to paint on both sides. When choosing an easel, there are many factors to consider. Here is the guide to help you choose a proper easel.
Using Period
For short-term use, long service life is not necessary. For instance, purchasing easels and then leaving after graduation is not convenient for students. Advertising firms occasionally only display the same location once. Use light, straightforward designs like wood then. It doesn't have to weigh a lot. It's really affordable.
You can purchase a hard miscellaneous Wood Easel made of beech or elm, which is more durable and has a long service life if you wish to use it for a prolonged period of time or you can send it to your younger siblings in the following grade after using it.
Functions
The sketch frame typically has three legs for the back support. Additionally, our business sells a four-legged frame with drawers that is both very inexpensive and useful for creating sketches;
Leaning forward is necessary for oil paintings. However, there is also a model that can lean forward in the three-legged rear support easel, which is a unique low-end easel that can be used for both sketching and oil painting; generally, it has a reasonably wide chassis and is outfitted with universal wheels;
Indoors or Outdoors
The majority of the shelves within are tall, sturdy, and steady. To maintain a limited range of inside movement, they are frequently fitted with universal wheels. Most of the shelves used for outdoor sketching have good folding properties. Most of them utilized painting boxes in the past for toner and watercolor painting. When stepping outside, some online users complained that watercolors have no decent shelves. In response, they closed the painting box's cover and drew on it. However, a professional multi-purpose easel is now available for sketching outside. The folding effect is quite good, and oil painting, watercolor, and traditional Chinese painting may all be employed.
We offer watercolor supplies at affordable prices. Please contact us to buy what you need.

How to Mix Watercolors
The process could appear difficult when you first begin to learn how to mix watercolors. In actuality, it's simple to grasp this lovely and bright medium! Once you have mastered the application of watercolor paint, you will discover that it is not only simple and enjoyable but also a highly calming and satisfying art form. It would help if you practiced watercolor mixing to get the colors you want for your watercolor artwork. Therefore, if you are familiar with the ins and outs of mixing watercolors, there is no need to purchase every single paint color. How to use watercolor paint will be correctly explained in this guide.
Grid Making
Mark every 2 cm as you measure along the horizontal and vertical axes with your pencil and ruler. Essentially, a 24 cm × 24 cm square with 2 cm x 2 cm blocks inside of it will be drawn on your page.
Axis With Colors
It's time to grab your paintbrushes and start painting after you've fixed the page to your work surface. Don't forget to bring along a few mason jars filled with water so you can wash your brush after each usage. Apply each color to its corresponding block in front of the horizontal axis's first row. This procedure will now be repeated for the vertical axis.
Dividing the Grid With Colors
Once more matching the colors in the horizontal and vertical axes, start with the corner on the top left-hand side of the page. You will now be traveling diagonally in the direction of the bottom right corner. By the time you're through, a diagonal line of vividly colored blocks ought to be visible.
Filling in the Color Blocks
Making color combinations to fill the remaining blocks on either side of our initial diagonal line is the second to last phase. All you have to do to choose the right colors is to match the vertical and horizontal axes' color sequences. Find the point on your website where two colors are interacting, then combine them there. Apply the mixture to the block after that.
Completing the Grid
It's time to finish the watercolor grid's remaining section. As long as there are variances in different hues and tints produced by employing the colors that cross along the grid, you don't need to worry about the order in which you place the colors.
We offer watercolor supplies at affordable prices. Please contact us to buy what you need.
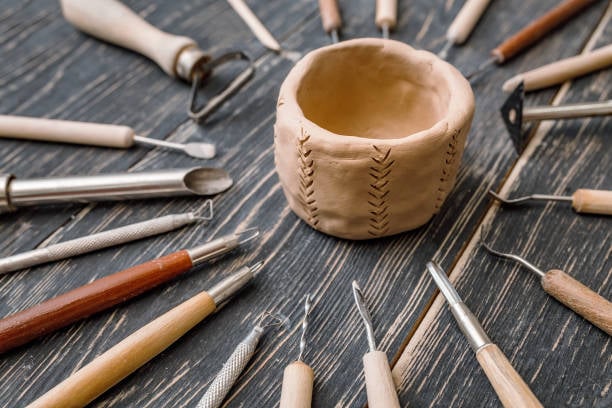
Build Your Own Pottery Kit
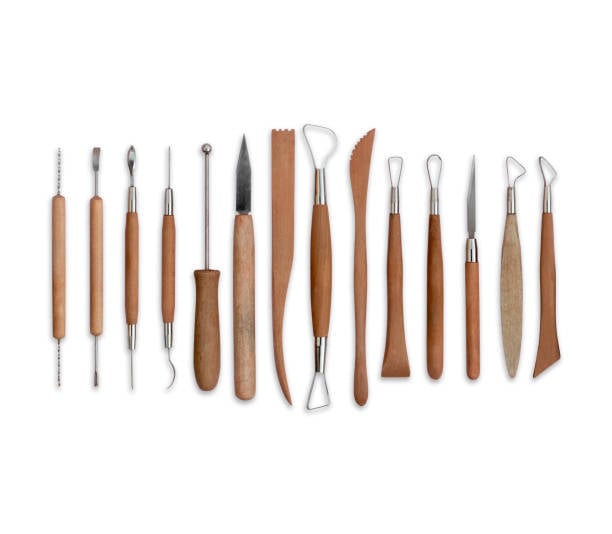
Building clay objects by hand and tossing clay objects on a potter's wheel are the two main ways to work with clay. Both disciplines make extensive use of basic ceramic tools.
Even though not all tools are required, the choice here will make working with clay much simpler and improve the final appearance. In light of this, the materials required for a fundamental toolset that every beginning potter should acquire are listed below.
Towels and Apron
Having an absorbent cotton towel on hand is a great idea because working with clay may be a messy endeavor. When working with clay, a towel is perfect for rough washing the hands, and when throwing, a wide towel draped across the knees is usually always a good idea. Like the women in the image, you could also wish to put on a straightforward, practical bib apron to protect your clothing.
Potter's Needles
needles are one of the most versatile tools in pottery and are commonly used by potters to make holes in clay or other materials.
There are different types of needles, such as wooden, metal, and plastic.
Potter's needles come in three sizes which are .020 inches (0.5 mm), .025 inches (0.6 mm), and .030 inches (0.8 mm).
Cut-Off Wires
These implements are helpful for both cutting huge clay lumps and extracting thrown objects from the potter's wheel.
Felting Knives
Knives are one of the most crucial tools in a potter's arsenal.
Fettling knives are used to remove excess clay from the surface of pots.
The knife is used in a scraping motion, sometimes with a twisting or chopping motion, to remove the clay.
This process is called fettling because it removes excess material and shapes the pot.
Ribs and Scrapers
Ribs and scrappers are used to shape and smooth pots as they are being formed on the wheel. They are used to create a variety of textures and patterns, such as ruffles, ridges, or wavy lines.
Loop, Wire, and Ribbon Tools
The Loop Tool: The loop tool is used to make loops. It is a thin wire with a handle at one end and a loop at the other.
The Ribbon Tool: The ribbon tool is used to make ribbons, coils, and spirals. It is a long wire with loops on either side of the handle.
The Wire Tool: The wire tool is used to make wires, spirals, and coils. It has a handle that ends in two loops that can be twisted together or apart to produce different shapes.
Our company offers the necessary clay tools you'll need to embark on a magnificent artistic adventure. Please feel free to contact us at +86 15958911665.
Watercolor Painting for Beginners
Watercolor painting is a popular form of art that has been around for centuries. It can be done on paper or on other surfaces like wood or fabric.
Painting with watercolor is not as easy as it seems, it takes skill and patience to become good at it. The paint needs to be diluted with water before use, and the color needs to be applied in thin layers so that the paper doesn't soak up too much of the paint. The artist also needs to know how to mix colors together so that they can create new ones when needed.
Despite these challenges, you can learn the fundamentals of watercolor painting with the help of this step-by-step guide.
Step1: Get Your Watercolor Painting Kit Ready
Watercolor painting is a fun and creative hobby. It can also be a great way to express your creativity. You might be wondering how to start watercolor painting. There are many ways to get started, but the easiest way is to buy some watercolors, paper, brushes and a water container.
For this tutorial, we will be using the following materials:
-watercolor paints
-a paintbrush
-paper -a water container (or container of clean water)
-palette (optional)
Step2: Find A Painting Workspace
Find a location where your materials can fit and where you can put your water so that it won't unintentionally spill on your work. To protect any underneath surfaces if you don't use a board, you might also think about placing newspaper or paper towels under your work area.
Step3: Make A Simple Color Chart
Making color swatches is one of the finest ways to improve your brush technique, color theory, and mixing abilities (or even a color chart or wheel). When considering watercolor ideas or organizing new projects, you can refer to your chart.
Water, watercolor paper, and your watercolor palette are the first three items you'll need to prepare a basic watercolor painting color chart. List the names of all the colors in your palette starting on the left side of the page and moving vertically. Move your list horizontally from left to right across the bottom of your paper. Then, by coordinating the colors and blending them in accordance with your preference, fill in the "grid" using your watercolor paints and brushes.
Step4: Warm Up
Try warm-up techniques and exercises to improve your painting abilities as the next stage in beginning a watercolor painting project. Exercises for practicing might range from creating watercolor paintings' sketches to practicing new brush techniques.
When you're just getting started, there is no right or wrong way to paint with watercolor. You're on the correct track as long as what you're doing encourages your sense of creativity and involvement in the process.
Basic tips for Color painting
Dry wash
On dried paper, it is a plain, consistent color. What matters most is that it appear substantial.
Wet on wet
The process involves drawing the outlines of a painting with a pencil, and then filling in those lines with washes of color. The washes are typically created by applying colors to a wet paper surface or by dipping the brush in water and then applying it to the paper.
Paint from light to dark
Avoid mixing too many pigments at once to avoid muddy hues.
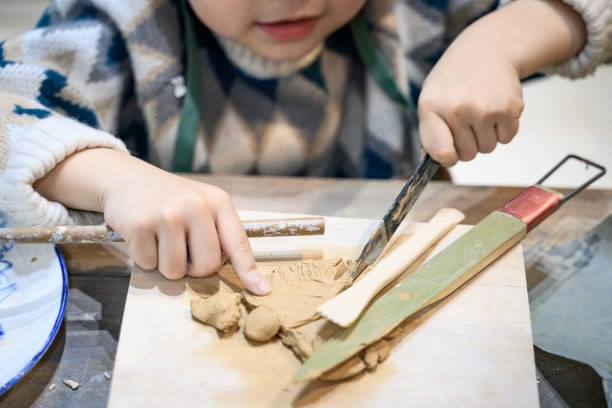
How to Start a Clay Sculpting?
The clay sculpture is a fantastic technique to spark your imagination. It can be challenging to know where to start if you're new to the medium and want to learn how to produce sculptures at home. The following information on clay sculptures for beginners will help you get started, from choosing the correct clay to enhancing skills.
What Clay You Should Choose?
You must choose the right clay before you begin your clay sculpture. The handling and finish of the various types of clay used for sculpture vary:
Oil-based modeling clay is a non-toxic, hard, and durable material that can be used to create anything from small figurines to large sculptures. It has many advantages for children, including being non-toxic and durable. However, it does not dry out like other modeling clay and can be difficult to shape.
Polymer-based modeling clay that is equally soft can be heated to set a composition. However, it is susceptible to cracking.
Water-based clay has many advantages and disadvantages. One of the biggest advantages is that it is environmentally friendly. It does not release any harmful chemicals into the environment when it is used to make products. Another advantage of water-based clay is that it is biodegradable, which means that if you make a mistake while sculpting and have to break the sculpture, you can just throw it in the ground and let nature take care of it. Some disadvantages are that water-based clay cannot be fired in a kiln or oven like traditional clay, so you have to use another material for this process.
For beginners learning to sculpt at home, the water-based clay is ideal out of the three options listed. Although it is frequently formed on a potter's wheel, it is by far the simplest material to work with when employing hand-building techniques to produce shapes and forms.
How to Make Your Clay Sculpting?
Now that you've figured out your water-based clay, it's time to get creative. You can learn how to produce clay sculptures using these five practical hints, from the very first idea to how to get better.
Get An Outline
The sculptor should always have a mental image of the piece before starting to work in clay. This is because it is easier to judge the proportions and shape of the sculpture when it has not been finalized.
When sketching, it is important to draw from different angles and perspectives so that the final sculpture will look natural.
Test the Wetness of Your Clay
Before you start sculpting clay, however, you’ll need to check if it’s wet enough as dried clay is difficult to work with.
The best way to make sure that the clay is wet enough is by pressing your finger into it. If your finger leaves an imprint on the surface of the clay, then it’s not wet enough and needs more water.
Dried clay is difficult to work with, so if you want a successful result, make sure your clay is moist.
Avoid clay figures
How to create clay sculptures is a popular query from novices. You may have seen these made by more skilled sculptors with expanded legs. Most likely, these painters supported the weight of the clay with armatures, which are long, metal skeleton constructions.
Although heavier materials like brass rods, aluminum wire, and other materials can be utilized for this, it is frequently simpler to practice clay sculpting at home with smaller shapes. Once you've mastered this, you should think about expanding your skill set by learning how to use armatures.
Looking for professional help
While some artistic techniques can be picked up via practice and observation, more complex clay sculpture techniques can be challenging and require professional supervision. Watch for classes or nearby studios and register to learn more. This offers you the ability to experiment with burning your finished pieces for permanence and will ultimately help you become a better clay sculptor.
Are you interested in trying clay sculpting but unsure of where to begin? Our company offers the necessary clay tools you'll need to embark on a magnificent artistic adventure. Please feel free to contact us at +86 15958911665.
How to Choose A Right Canvas for Your Painting?
A right canvas is one of the most important parts of a painting. The canvas needs to be the right size and shape, and it also needs to be stretched properly. If you are not careful, your painting will not look as good as it could.
The importance of a suitable canvas is often overlooked by many people who are new to painting. But, it is an essential part of the process that can make or break your artwork.
Why Use Canva for Your Painting?
Canvas is a very versatile painting surface. It is the most popular type of material that artists use to paint. There are many reasons why you might want to use canvas for your next painting project.
It is a very durable material. Canvas will not warp or buckle over time as other materials can. It also has a very smooth surface which makes it easier to paint on than other surfaces, such as paper or wood panels.
What Makes A Great Canvas?
The best canvases all share three qualities in common: they are well-built, carefully clothed, and constructed of premium materials. A quality canvas will fit snugly but not rip where it is rolled. The worst is a canvas that is improperly stretched! It is ideal to get a canvas that is already as tight as a drum. There are various ways for making a loose canvas tighter after purchase, such as spraying the back with water and letting it dry in the sun.
A good canvas will also be gessoed and primed, which will allow the paint to sit on top of the canvas rather than immediately soaking into its fibers. A canvas's label will state whether or not it has received two to three applications of gesso and has been primed. For larger paintings, the canvas frame is extremely important.
Types of Canvas
Canvases come in a variety of shapes and sizes to accommodate a range of needs and price points. Stretched canvas, canvas panels, canvas pads, and canvas rolls are the basic varieties.
Choosing a canvas is an important decision for any artist. It can make or break the painting. The type of painting, the type of paint, and the size of the canvas all play a role in what kind of canvas is best for your needs.
A good rule of thumb to follow is that if you are painting with acrylics on a large scale, then you should use a stretched canvas. If you are using oils or watercolors, then it is best to use an unstretched canvas.
Stretched Canvas
Stretched canvases are usually mounted on stretchers which come in many shapes and sizes depending on the size of the painting that needs to be created. The edges of the stretched canvases are then primed with gesso before paint is applied.
Canvas panels
Canvas panels have many benefits over traditional canvases. They are easier to use and transport because they come pre-stretched on a wooden frame that is easy to assemble. There are many different panel options available in different sizes, thicknesses, and weights so you can find the perfect one for your needs.
Canvas pads
Canvas pads are the perfect painting surface for novices, students, or just for practice. They are made of a durable cotton fabric that is stretched over a rigid backing. The canvas is primed with gesso and then stretched to provide a strong, smooth surface.
There are many benefits of using canvas pads for oil painting. First, they are much less expensive than stretched canvases. Second, they come in many different sizes to suit any project you might be working on. Third, they can be used over and over again which saves you money and time if you want to create multiple paintings on the same canvas size.
Canvas rolls
Canvas rolls are available if you're an experienced painter who prefers to prepare and stretch your own canvas or if you want to make very huge paintings. These canvas rolls are available primed or unprimed, in various weights, textures, and fibers, and are either composed of cotton or linen. They are typically sold in rolls or by the yard, which can be rather expensive.
Do some study and compare all the possibilities before making an investment in the canvas so you can pick the one that best suits your requirements and budget. We offer various canvases in different sizes, please contact us at +86 15958911665.
Get Crafty This Fall!
Fall is almost here! It's time to break out of the cozy sweaters, soak in the crisp autumn air, and take part in your favorite autumn activities with loved ones. This month, we're taking everything on our fall bucket list and turning it into a creative opportunity! From pumpkin decorating with the family to creating Halloween comics to spook your friends, we're giving you a list of ways to awaken your inner artist and embrace all that fall has to offer.
Nothing Says FALL Like A Pumpkin Patch!
Spending a crisp, sunny afternoon collecting pumpkins with the family is one of the greatest ways to greet fall. With this 20-color non-toxic permanent marker set, you can make this traditional autumn activity into a project that the whole family will enjoy. Allow everyone to select their ideal pumpkin before leaving for home to begin a creative pastime you can all enjoy together! Gather everyone at the table so they may decorate a pumpkin with a comical face or an abstract pattern. With the help of our watercolor or oil brushes, your family may smoothly move from thick swatches to small lines on a pumpkin's curving surface. Make this a recreational activity or a friendly competition with your family; In either case, you'll finish up with expressive pumpkins that you can proudly display around the house this fall. When you're finished decorating the pumpkins, use our canvases or other painting surfaces to carry on using these markers in a more conventional manner. This fall, expand on your family's creative explorations by using both tools!
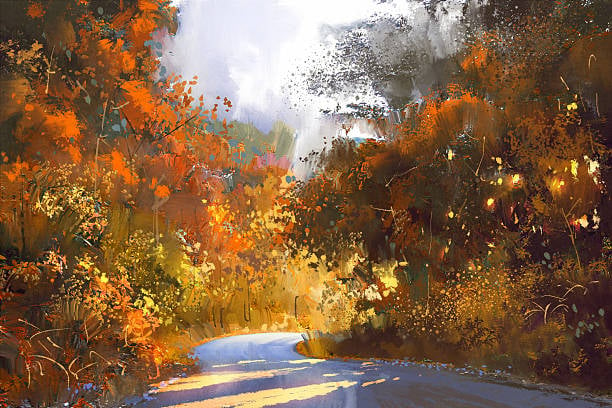
Fall Foliage and Gouache!
It's likely that when you think of fall, you see its stunning leaves. Leaves from trees that were once lush and green fell one by one, covering the ground in layers of orange, yellow, and red. Make it a point to fully appreciate the foliage this year because the vibrant scenery only lasts for a short time. To select the ideal picturesque location to spark your creativity, go on a nature stroll with some friends or your loved ones. You can engage in a fun, creative fall pastime with our painting sets. These art supplies are safe for use by artists of all skill levels and educational backgrounds.
Create leaf forms and add depth by layering these gorgeous earth tones in different ways. Encourage yourself (or a loved one) to genuinely appreciate nature and capture this season's beauty in a piece of art to remember it for future seasons.
Don't forget - it's Halloween Season!
Why not produce a work of art that is motivated by spooky movies and stories with Halloween just around the corner? You'll be able to draw eerie ghosts, haunted houses, or fashionable artwork with our Nylon Hair Acrylic Brush Sets for Oil Watercolor Painting. You and your friends might even collaborate to make a quick comic while watching a horror movie marathon! Our brushes blend seamlessly, enabling you to produce artwork with the most seamless value shifts. This set allows you to color or create with the tip size required for your project because each brush has both a broad chisel and a fine tip.
You'll have everything you need to produce spooky artwork and graphic stories in the spirit of Halloween, whether you're producing alone or with friends.
Grab your favorite materials right away and cross everything off your list of imaginative fall projects!