

Art Centres
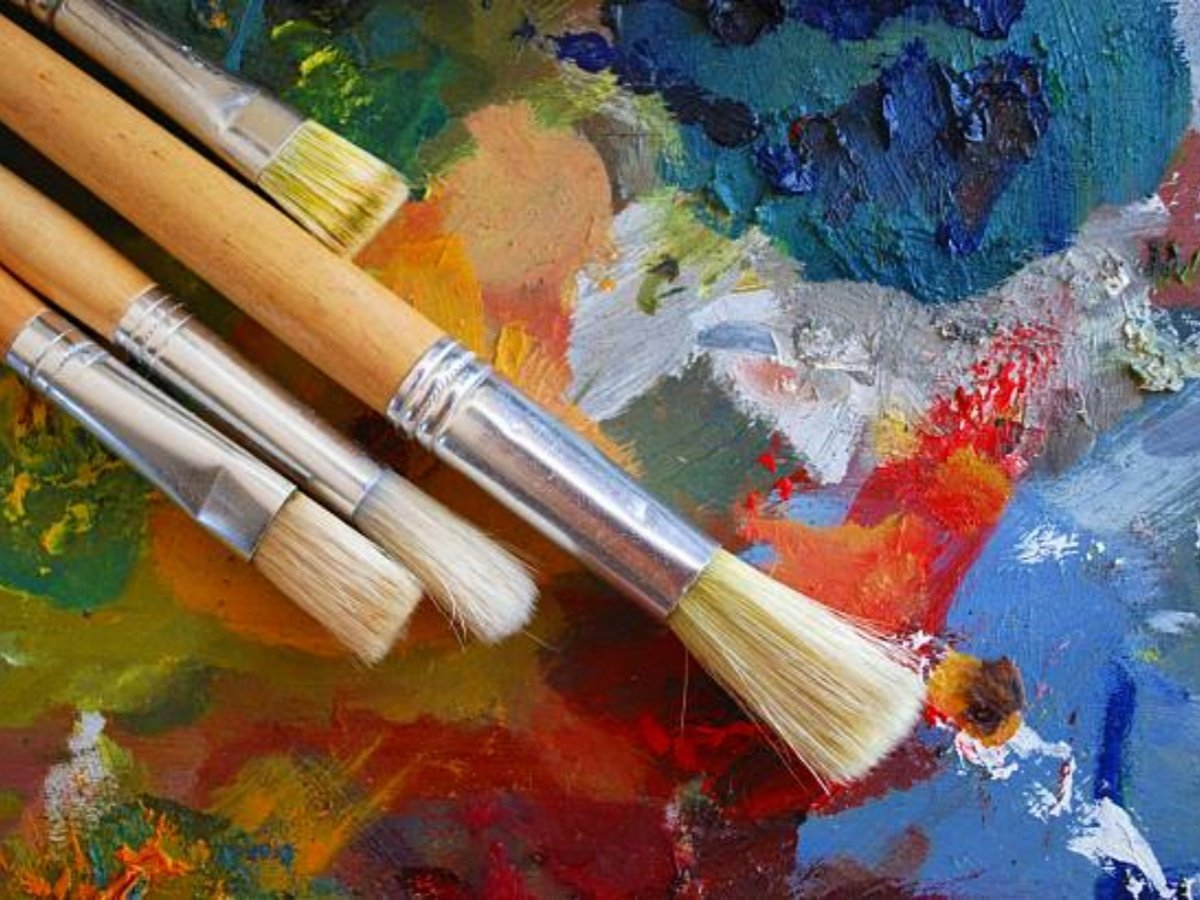
The Ultimate Guide to Artist Oil Paint Brushes
Choosing the Right artist oil paint brushes for Your Masterpiece
As an artist, one of the most important tools in your arsenal is the oil paint brush. With a wide range of options available, finding the perfect brush can be overwhelming. In this comprehensive guide, we will explore the different types of artist oil paint brushes, their uses, and how to choose the right brush for your artistic needs.
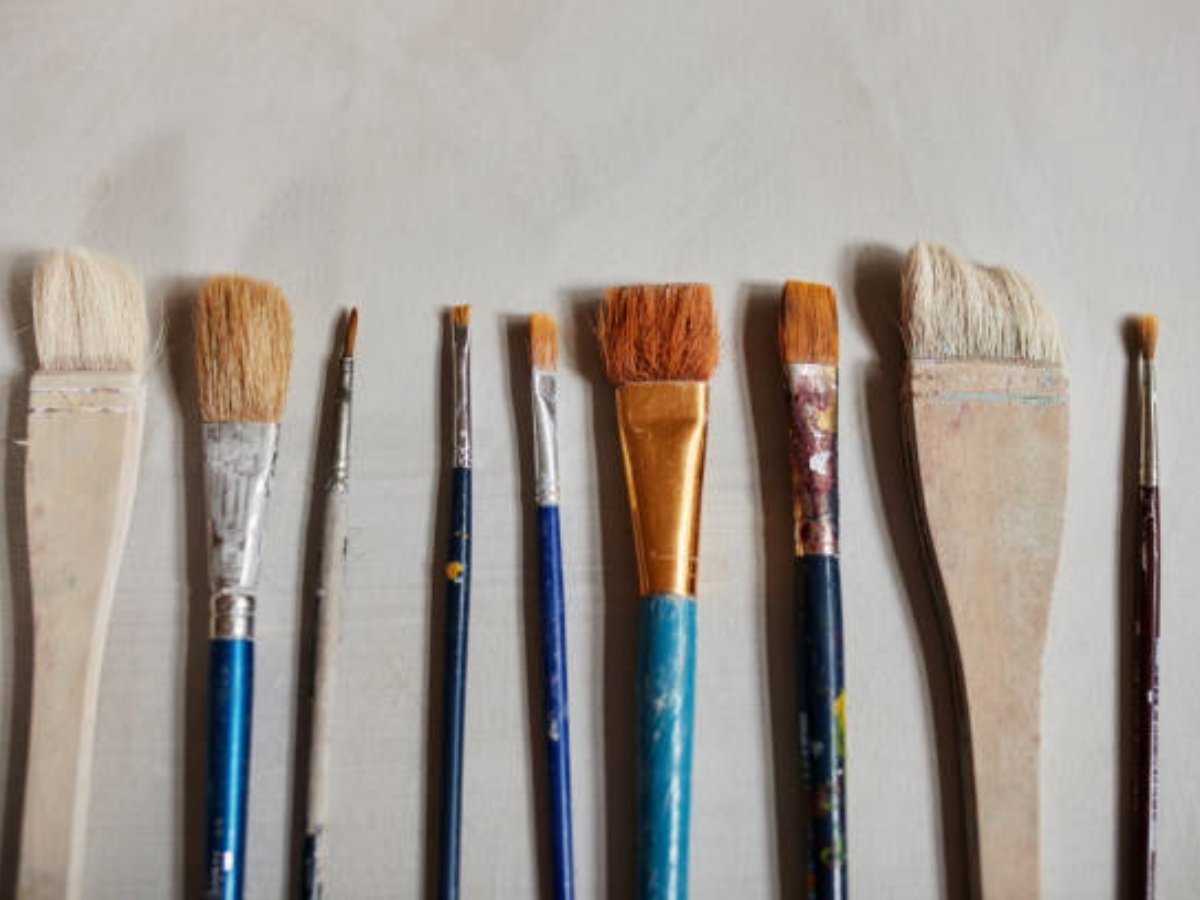
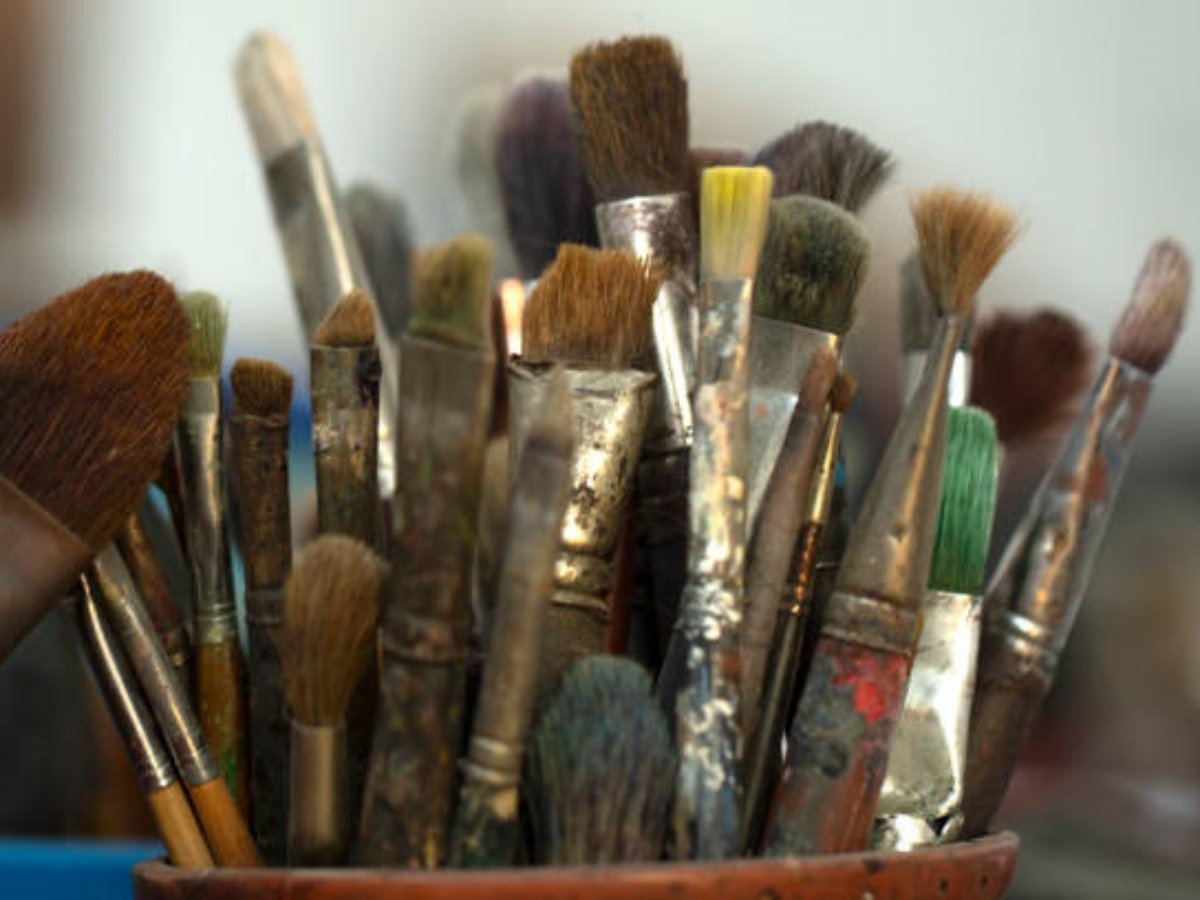
1. Understanding the Types of Artist Oil Paint Brushes
Artist oil paint brushes come in various shapes, sizes, and materials. The most common types include round brushes, flat brushes, filbert brushes, and fan brushes. Each brush type has its own unique characteristics and is designed to achieve specific effects.
2. Round Brushes: Versatile and Precise
Round brushes are one of the most versatile brush types and are commonly used for detailed work, such as creating fine lines, intricate details, and controlled strokes. They come in various sizes, ranging from extra fine to large, allowing artists to achieve different levels of precision.
3. Flat Brushes: Ideal for Broad Strokes and Blending
Flat brushes have a rectangular shape with square-cut bristles, making them perfect for creating broad strokes, filling large areas, and blending colors. They are commonly used for backgrounds, landscapes, and covering large canvas surfaces quickly.
4. Filbert Brushes: The Best of Both Worlds
Filbert brushes have an oval-shaped tip, combining the versatility of a round brush with the coverage of a flat brush. They are ideal for blending, creating soft edges, and painting curved shapes. Filbert brushes are often used in portrait painting and still life compositions.
5. Fan Brushes: Creating Textures and Special Effects
Fan brushes have bristles spread out in the shape of a fan, which allows artists to create unique textures, foliage, and special effects. They are perfect for painting trees, grass, and adding texture to a variety of subjects. Fan brushes are also great for blending and smoothing paint.
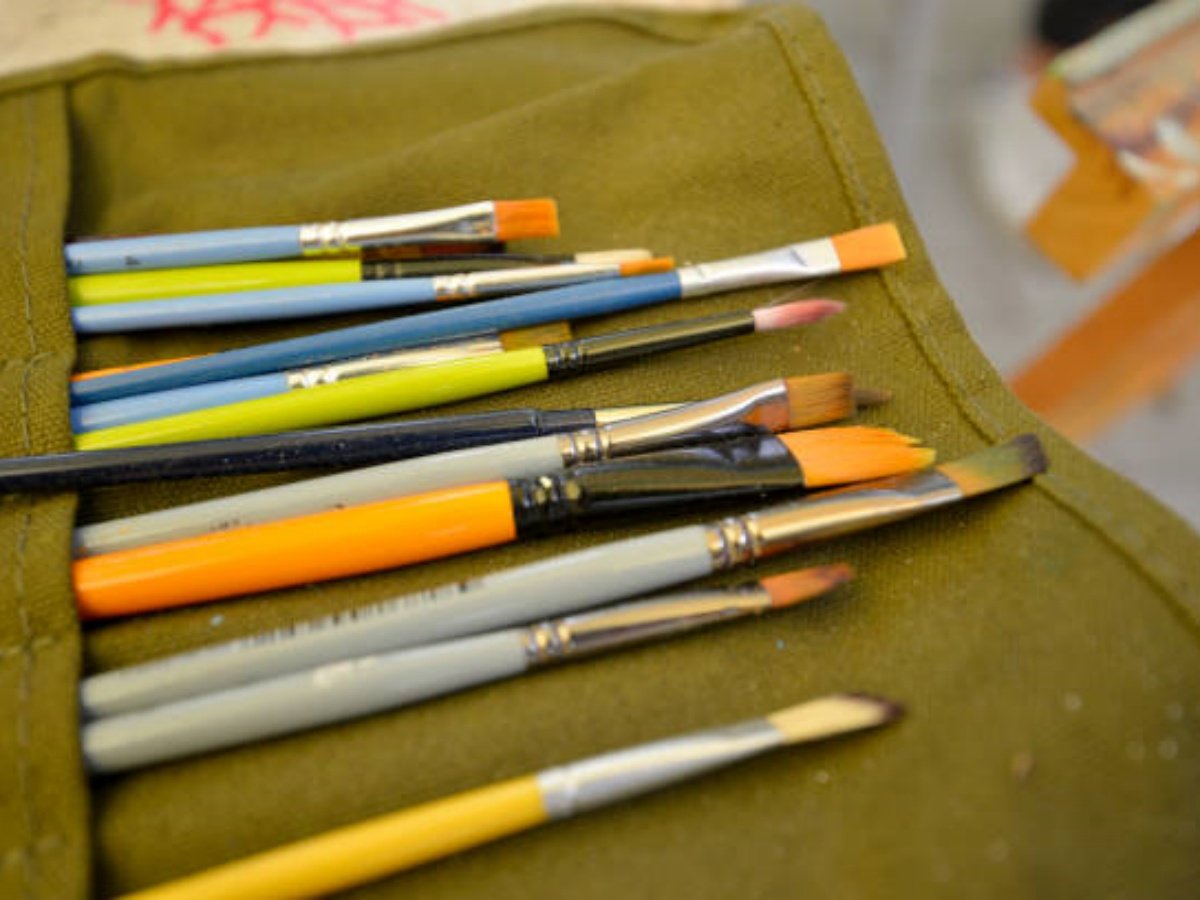
6. Choosing the Right Brush Size
When selecting artist oil paint brushes, the size of the brush is an important consideration. Smaller brushes, such as those with a size 0 or 1, are suitable for intricate details and fine lines. Larger brushes, like a size 10 or 12, are better for covering large areas and creating bold strokes.
7. Understanding Brush Materials
Artist oil paint brushes are made from various materials, including natural bristles and synthetic fibers. Natural bristle brushes, often made from hog or sable hair, are known for their ability to hold more paint and create smoother brushstrokes. Synthetic brushes, on the other hand, are more durable, easier to clean, and suitable for water-based paints.
8. Caring for Your Brushes
Proper care and maintenance of your artist oil paint brushes are essential for their longevity and performance. After each painting session, thoroughly clean your brushes with mild soap and warm water. Avoid leaving brushes standing in water or solvent, as it can damage the bristles. Store them with the bristles facing up or hang them to prevent deformation.
9. Recommended Brands for Artist Oil Paint Brushes
When it comes to choosing artist oil paint brushes, quality matters. Some reputable brands known for their excellent brush craftsmanship include Winsor & Newton, Princeton, Escoda, and Rosemary & Co. These brands offer a wide selection of brushes suitable for both beginners and professional artists.
10. The Perfect Brush for Your Masterpiece
Ultimately, the choice of artist oil paint brushes depends on your personal preference, painting style, and the effect you want to achieve. Experiment with different brush types, sizes, and materials to find the perfect tools that will bring your artistic vision to life. Remember, the right brush can make all the difference in creating a masterpiece.
Quote Inquiry
Contact us!
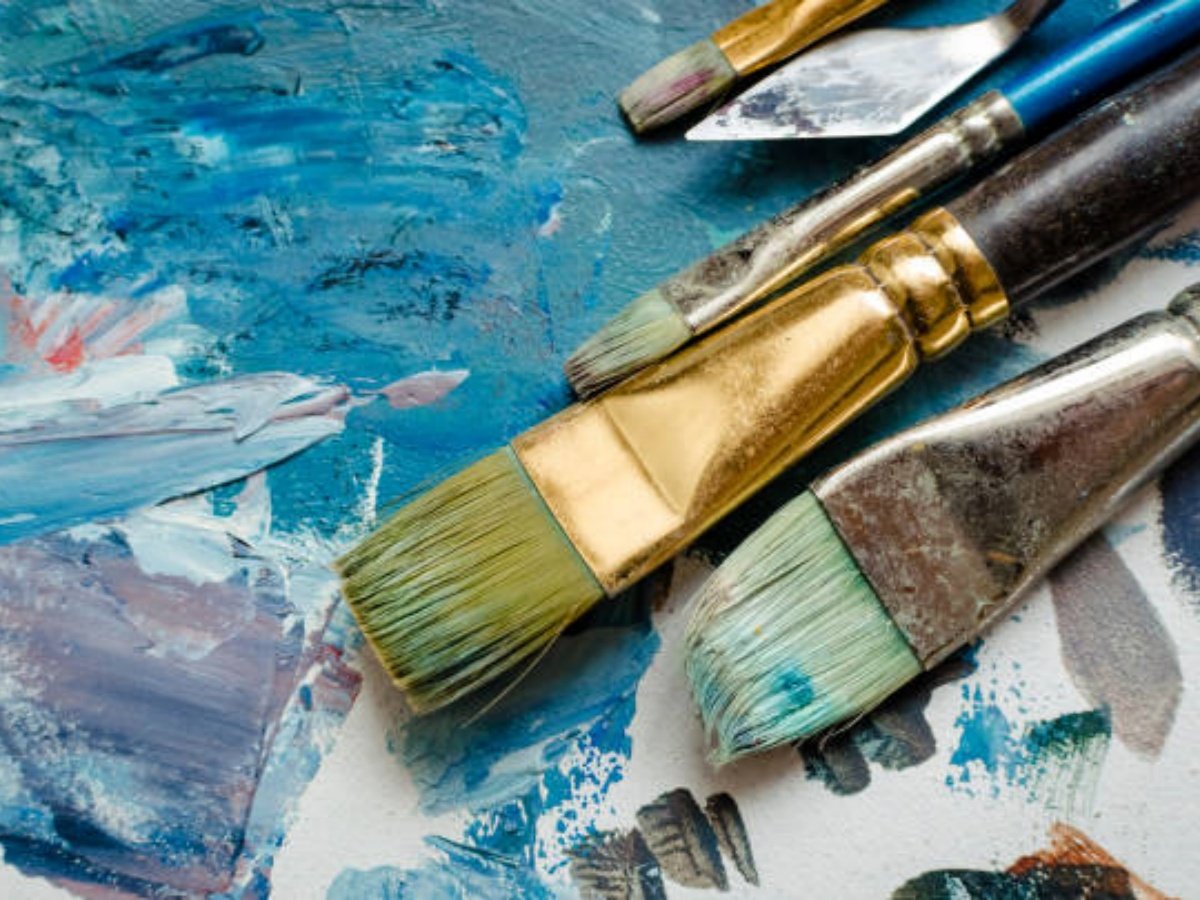
Professional Oil Paint Brushes: The Ultimate Guide for Artists
1. Understanding the Importance of professional oil paint brushes
When it comes to creating stunning oil paintings, the quality of your tools can make a significant difference. Professional oil paint brushes are essential for artists who want to achieve precise and vibrant results. In this article, we will explore the various aspects of professional oil paint brushes, from their construction to the different types available in the market.
2. Construction of Professional Oil Paint Brushes
Professional oil paint brushes are crafted with meticulous attention to detail, ensuring that they meet the demanding needs of artists. The bristles of these brushes are typically made from natural or synthetic materials. Natural bristles, such as those made from hog or sable hair, are highly regarded for their ability to hold and distribute oil-based paints effectively. On the other hand, synthetic bristles offer durability and are often more affordable.
3. Different Types of Professional Oil Paint Brushes
There are several types of professional oil paint brushes, each designed for specific painting techniques and effects. Some common types include:
Round brushes: These versatile brushes have a pointed tip and are ideal for creating fine lines, details, and controlled strokes.
Flat brushes: With their flat, rectangular shape, flat brushes are perfect for covering large areas and creating broad strokes. They can also be used for blending and glazing.
Fan brushes: Fan brushes feature bristles spread out in the shape of a fan. They are great for creating texture, blending colors, and adding foliage or fur-like details.
Filbert brushes: Filbert brushes have a flat, oval-shaped tip that allows for both precise lines and soft edges. They are excellent for blending and creating rounded shapes.
4. Choosing the Right Brush Size
When selecting professional oil paint brushes, size matters. Brushes come in a range of sizes, denoted by numbers. The higher the number, the larger the brush. Smaller brushes are ideal for intricate details, while larger brushes are better suited for covering larger areas. It's essential to have a variety of brush sizes to cater to different painting needs.
5. The Importance of Brush Care and Maintenance
To ensure the longevity of your professional oil paint brushes, proper care and maintenance are crucial. After each painting session, it's important to clean the brushes thoroughly using an appropriate solvent, such as odorless mineral spirits. Reshape the bristles and let them dry completely before storing them upright or lying flat. Avoid leaving brushes in water or solvents for extended periods, as this can damage the bristles.
6. Investing in Quality Brushes
While professional oil paint brushes may come with a higher price tag, they are a worthwhile investment for serious artists. High-quality brushes offer superior performance, durability, and precision. They hold more paint, provide better control, and enable you to achieve the desired effects with ease. Cheap brushes may result in frustration and compromise the quality of your artwork.
7. Exploring Specialty Brushes
In addition to the common types mentioned earlier, there are also various specialty brushes available for specific techniques. Some examples include:
Liner brushes: Liner brushes have long, thin bristles and are ideal for creating fine lines, lettering, and intricate details.
Mop brushes: Mop brushes have a large, rounded shape and are used for washes, blending, and applying large areas of color.
Rigger brushes: Rigger brushes have long, thin bristles that come to a fine point. They are often used for creating long, continuous lines, such as tree branches or rigging in a seascape.
8. Finding the Perfect Brush for Your Style
Every artist has their own unique style and preferences when it comes to brushes. Some prefer the springiness of natural bristles, while others appreciate the durability of synthetic brushes. Experimenting with different types and brands of professional oil paint brushes is key to finding the perfect fit for your artistic needs.
9. Tips for Extending the Lifespan of Your Brushes
To make the most of your investment in professional oil paint brushes, consider these tips for extending their lifespan:
Use the appropriate brush for each painting technique to avoid unnecessary wear and tear.
Store brushes in a clean and dry area, away from excessive heat or humidity.
Avoid using excessive force or bending the bristles, as this can damage their shape.
Regularly inspect your brushes for any loose or damaged bristles, and replace them if necessary.
10. Conclusion: Elevate Your Art with Professional Oil Paint Brushes
Professional oil paint brushes are essential tools that can elevate your artwork to new heights. By understanding the construction, types, and care of these brushes, you can make informed decisions when selecting the right ones for your artistic endeavors. Investing in high-quality brushes and maintaining them properly will not only enhance your painting experience but also contribute to the creation of stunning masterpieces.
Quote Inquiry
Contact us!
How to Clean Oil Painting Brushes: A Comprehensive Guide
Introduction
Oil painting brushes are essential tools for artists, allowing them to create stunning works of art. However, the process of cleaning these brushes can be daunting and time-consuming. In this comprehensive guide, we will provide you with step-by-step instructions on how to clean oil painting brushes effectively, ensuring their longevity and optimal performance.
Why is Cleaning Oil Painting Brushes Important?
Before we dive into the cleaning process, let's understand why it is crucial to clean your oil painting brushes regularly. Failure to clean your brushes properly can lead to several issues:
Hardened bristles that become stiff and unusable
Contamination of colors, resulting in muddy or undesired hues
Reduced brush lifespan due to dried paint buildup
Loss of brush shape and flexibility
By adopting a proper cleaning routine, you can maintain the quality of your brushes and ensure consistent, vibrant results in your artwork.
Gathering the Necessary Materials
Before you begin the cleaning process, gather the following materials:
Mild dish soap or brush cleaner
Container for cleaning solution
Lint-free cloths or paper towels
Brush comb or old toothbrush
Warm water
Having these items ready will make the cleaning process more efficient and ensure you have everything you need at hand.
Step-by-Step Guide to Cleaning Oil Painting Brushes
Now that you have all the necessary materials, let's walk through the step-by-step process of cleaning your oil painting brushes:
Step 1: Remove Excess Paint
Start by gently wiping off any excess paint from your brush using a lint-free cloth or paper towel. This step helps prevent the paint from drying and clogging the bristles.
Step 2: Prepare the Cleaning Solution
Fill a container with warm water and add a small amount of mild dish soap or brush cleaner. Swirl the water gently to create a soapy solution.
Step 3: Soak the Brushes
Submerge the bristles of your oil painting brushes into the soapy solution. Make sure not to wet the ferrule (the metal part that connects the bristles to the handle) as it can loosen the glue over time.
Step 4: Gently Clean the Bristles
Using your fingers, gently massage the bristles in a circular motion to loosen the paint. Alternatively, you can use a brush comb or an old toothbrush to gently scrub the bristles, starting from the base and working towards the tip.
Step 5: Rinse the Brushes
Once the bristles are clean, rinse them under warm running water. Continue rinsing until the water runs clear, indicating the removal of all soap residue and paint.
Step 6: Repeat if Necessary
If your brushes are heavily stained or have stubborn paint buildup, you may need to repeat the cleaning process. Remember to be gentle and avoid excessive force that can damage the bristles.
Step 7: Shape the Brushes
After cleaning, reshape the bristles of your brushes by gently squeezing them with your fingers. This step ensures that the bristles dry in their original shape, maintaining their functionality.
Step 8: Blot the Brushes
Use a lint-free cloth or paper towel to blot the excess water from the bristles. Gently squeeze the bristles with the cloth, starting from the ferrule and moving towards the tip.
Step 9: Dry the Brushes
Lay your brushes flat on a clean surface or hang them upside down to dry. Avoid storing the brushes upright while wet, as this can cause water to seep into the ferrule and loosen the bristles.
Step 10: Store Properly
Once your brushes are completely dry, store them in a clean, dry place. Avoid storing them in airtight containers or plastic bags, as proper air circulation is necessary to prevent mold growth.
Conclusion
Cleaning oil painting brushes is an essential task for any artist. By following the step-by-step guide outlined in this article, you can ensure the longevity and optimal performance of your brushes. Remember to clean your brushes after each painting session and establish a regular cleaning routine to maintain their quality. With well-maintained brushes, you can continue creating beautiful oil paintings for years to come.
Quote Inquiry
Contact us!
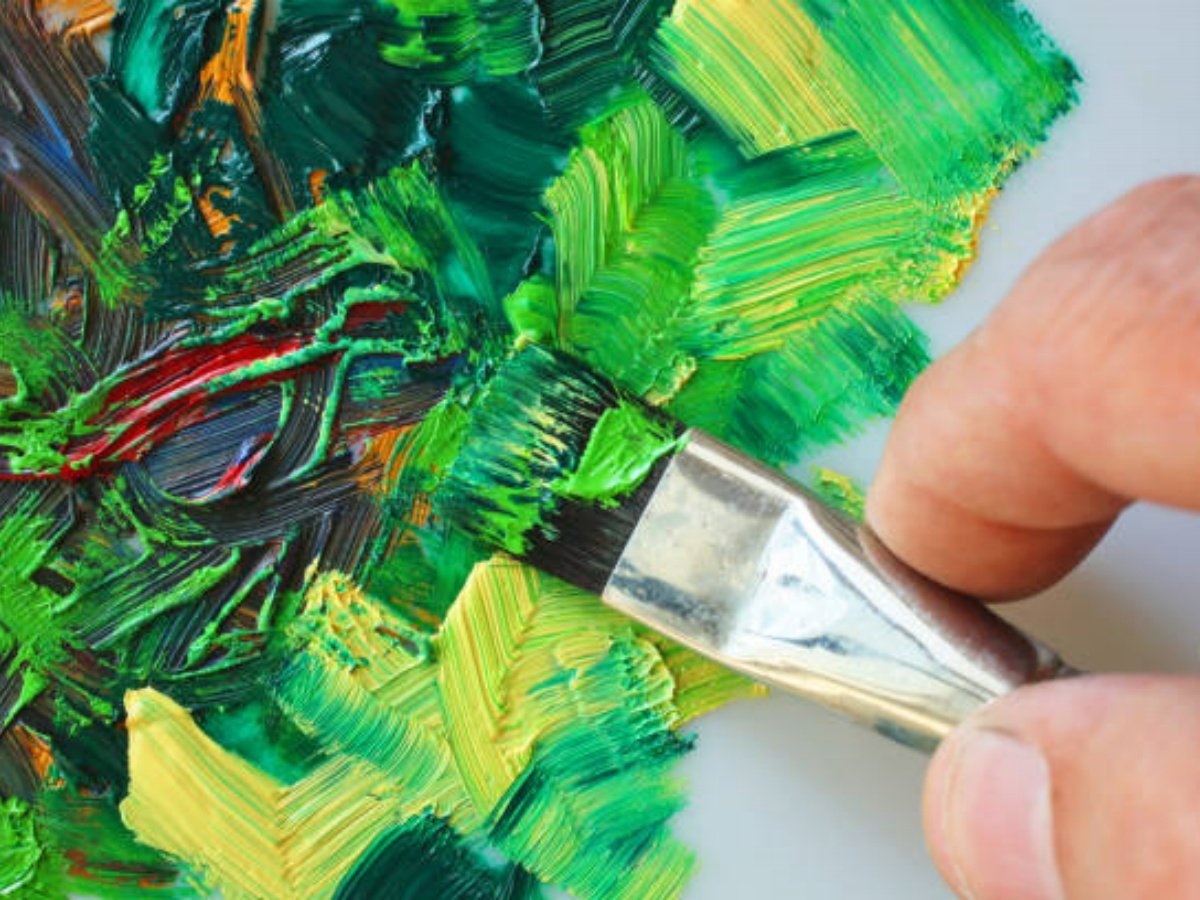
The Ultimate Guide to Brushes for Oil Painting
Choosing the Right brushes for oil painting
When it comes to oil painting, the choice of brushes plays a crucial role in achieving the desired results. With a wide variety of brush types available, it can be overwhelming for artists to select the right ones for their artwork. This article aims to guide you through the process of choosing brushes for oil painting, ensuring that you have the necessary tools to create stunning masterpieces.
The Importance of Brush Types
Brushes are not just tools; they are an extension of the artist's hand. Different brush types are designed to create various effects and textures, allowing artists to express their creativity. Understanding the different brush types and their uses is essential for any oil painter.
Hog Bristle Brushes
Hog bristle brushes are the most commonly used brushes for oil painting. They are made from the coarse hairs on the back of a hog, which makes them sturdy and durable. These brushes are ideal for applying thick layers of paint, creating texture, and blending colors. The stiffness of hog bristle brushes allows artists to manipulate the paint effectively.
Sable Brushes
Sable brushes are known for their soft and fine bristles, which are usually made from the tail hair of the kolinsky sable. These brushes are excellent for creating smooth and precise brushstrokes. Sable brushes are highly regarded for their ability to hold a large amount of paint and maintain a fine point, making them perfect for detailed work and glazing techniques.
Synthetic Brushes
Synthetic brushes are made from various synthetic fibers, such as nylon or polyester. These brushes are a more affordable alternative to natural hair brushes. They are versatile and can be used for both oil and acrylic painting. Synthetic brushes are known for their springiness and durability, making them suitable for a wide range of painting techniques.
Brush Shapes and Sizes
Brushes come in various shapes and sizes, each serving a specific purpose. The most common brush shapes for oil painting are flat, round, filbert, and fan.
Flat Brushes
Flat brushes have a square-shaped tip and are ideal for creating broad strokes, covering large areas, and achieving sharp edges. They are versatile and can be used for both precise details and bold applications of paint.
Round Brushes
Round brushes have a pointed tip and are great for creating thin lines, fine details, and controlled brushstrokes. They are also useful for blending and smoothing edges.
Filbert Brushes
Filbert brushes have an oval-shaped tip with rounded edges, combining the properties of both flat and round brushes. They are perfect for blending, softening edges, and creating curved strokes. Filbert brushes are a popular choice among portrait painters.
Fan Brushes
Fan brushes have bristles spread out in the shape of a fan. They are primarily used for creating texture, such as foliage, grass, or clouds. Fan brushes can also be used for blending and softening edges.
Caring for Your Brushes
Proper brush care is essential to maintain the longevity and performance of your brushes. After each painting session, clean your brushes thoroughly with an appropriate solvent, such as odorless mineral spirits, to remove any excess paint. Gently reshape the bristles and allow them to dry completely before storing them horizontally or upright.
Investing in Quality Brushes
While it may be tempting to opt for cheaper brushes, investing in high-quality brushes can greatly enhance your painting experience. Quality brushes tend to have better bristle retention and shape, allowing for more precise control and longer-lasting performance. They may require a higher upfront investment, but they will pay off in the long run.
Conclusion
Choosing the right brushes for oil painting is crucial for every artist. Understanding the different brush types, shapes, and sizes will empower you to create the desired effects and bring your artistic vision to life. Remember to invest in quality brushes and practice proper brush care to ensure their longevity. With the right brushes in hand, you can unleash your creativity and embark on an exciting journey of oil painting.
Quote Inquiry
Contact us!

Types of Oil Painting Brushes: A Comprehensive Guide to Choosing the Right Brush
The Importance of Choosing the Right Oil Painting Brush
When it comes to oil painting, the choice of brushes plays a crucial role in the outcome of your artwork. Different types of oil painting brushes are designed to create various effects, textures, and details, allowing artists to fully express their creativity. In this article, we will explore the different types of oil painting brushes and their unique characteristics.
Hog Bristle Brushes: Ideal for Bold and Textured Strokes
Hog bristle brushes are one of the most popular choices among oil painters. Made from the coarse hair of hogs, these brushes are known for their durability and ability to hold a large amount of paint. They are ideal for creating bold and textured strokes, making them perfect for expressive and impasto techniques.
Sable Brushes: Perfect for Precise and Detailed Work
Sable brushes are made from the hair of the sable, a type of weasel. These brushes are known for their softness and ability to hold a fine point, making them perfect for precise and detailed work. Sable brushes are often used for intricate details, such as facial features or intricate patterns.
Synthetic Brushes: A Versatile and Affordable Option
Synthetic brushes are made from synthetic fibers, such as nylon or polyester. They are a versatile and affordable option for oil painters, especially for those who are just starting out. Synthetic brushes can mimic the characteristics of natural hair brushes and are available in a wide range of shapes and sizes.
Round Brushes: Versatile and Essential for Every Painter
Round brushes are one of the most versatile brush shapes and are essential for every painter's toolkit. They come in various sizes and can be used for a variety of techniques, including blending, detailing, and creating smooth, controlled strokes. Whether you're a beginner or an experienced artist, round brushes are a must-have.
Flat Brushes: Ideal for Large Areas and Straight Lines
Flat brushes, as the name suggests, have a flat, rectangular shape. They are ideal for covering large areas of canvas quickly and efficiently. Flat brushes are also great for creating straight lines and edges. Depending on the size, they can be used for both broad strokes and fine details.
Fan Brushes: Creating Texture and Soft Blending
Fan brushes have a unique shape with bristles fanned out in a semicircular pattern. These brushes are excellent for creating texture, such as foliage or fur, as well as soft blending. Fan brushes are also commonly used for dry brushing techniques, where only a small amount of paint is applied to the surface.
Filbert Brushes: A Combination of Round and Flat
Filbert brushes have a rounded shape with a flat tip, combining the characteristics of both round and flat brushes. They are versatile and can be used for a wide range of techniques, including blending, softening edges, and creating broad strokes. Filbert brushes are often favored by portrait painters for their ability to create smooth transitions and delicate details.
Angular Brushes: Perfect for Precise Edges and Angular Strokes
Angular brushes have bristles cut at an angle, creating a chiseled edge. These brushes are perfect for achieving precise edges and angular strokes. They are commonly used for painting architectural details, landscapes, or any subject with sharp angles or straight lines.
Mop Brushes: Soft and Ideal for Washes and Blending
Mop brushes have a large, round shape with soft bristles. They are designed for creating soft washes, blending colors, and applying thin glazes. Mop brushes can hold a large amount of water or paint, making them perfect for creating smooth gradients and subtle transitions in your oil paintings.
Dagger Brushes: Creating Bold Lines and Textures
Dagger brushes have a flat shape with a slanted edge, resembling a dagger. These brushes are excellent for creating bold lines, textures, and expressive strokes. They can be used for both precise details and broader marks. Dagger brushes are a favorite among landscape painters for creating grass, foliage, or tree branches.
Quote Inquiry
Contact us!
The Best Way to Clean Oil Paint Brushes: A Comprehensive Guide
The best way to clean oil paint brushes: A Comprehensive Guide
Introduction: Properly cleaning oil paint brushes is essential for maintaining their quality and ensuring their longevity. Oil paint can be notoriously difficult to remove from brushes, but with the right techniques and tools, you can easily restore your brushes to their original state. In this article, we will explore the best methods and practices for cleaning oil paint brushes, ensuring that you can continue creating beautiful works of art without worrying about damaging your brushes.
1. Understanding the Importance of Cleaning Oil Paint Brushes
Before delving into the best cleaning methods, it is crucial to understand why cleaning oil paint brushes is so important. Oil paint contains pigments and binders that can become stiff and dry, making your brushes unusable if not properly cleaned. Neglecting to clean your brushes can result in bristles that are caked with dried paint, making it difficult to achieve smooth and even brushstrokes. Additionally, hardened paint can damage the delicate bristles, leading to fraying and a shorter lifespan for your brushes.
2. Cleaning Brushes Immediately After Use
One of the most effective ways to ensure easy and efficient cleaning of oil paint brushes is to clean them immediately after each use. Leaving oil paint to dry on your brushes can make the cleaning process much more challenging. Therefore, make it a habit to clean your brushes as soon as you finish using them. This will prevent the paint from hardening and ensure that your brushes stay in optimal condition.
3. Removing Excess Paint
Before diving into the cleaning process, it is essential to remove as much excess paint from your brushes as possible. You can do this by gently wiping the brush against the edge of your palette or a rag. This step will help prevent excess paint from polluting the cleaning solvent, making the cleaning process more effective.
4. Preparing the Cleaning Solvent
The next step is to prepare the cleaning solvent. There are several options available, but one of the most commonly used is odorless mineral spirits. Fill a container with a sufficient amount of the solvent, ensuring that it is deep enough to fully submerge the bristles of your brushes. The solvent will help dissolve the oil paint, making it easier to remove from the brushes.
5. Soaking the Brushes
Once you have prepared the cleaning solvent, it is time to soak your brushes. Gently dip the bristles of your brushes into the solvent, ensuring that they are fully submerged. Allow the brushes to soak for a few minutes, allowing the solvent to loosen the paint. Avoid leaving the brushes in the solvent for too long, as it can damage the bristles.
6. Gently Agitating the Brushes
After soaking the brushes, gently agitate them in the cleaning solvent. This can be done by moving the brushes back and forth or in a circular motion, ensuring that the solvent reaches all parts of the bristles. Agitating the brushes will help dislodge any remaining paint particles, making the cleaning process more thorough.
7. Rinsing the Brushes
Once you have agitated the brushes, remove them from the cleaning solvent and rinse them thoroughly under warm water. Use your fingers to comb through the bristles, ensuring that all traces of paint and solvent are removed. Rinse the brushes until the water runs clear, indicating that they are free from any remaining paint.
8. Drying the Brushes
After rinsing, gently squeeze out any excess water from the brushes and reshape the bristles with your fingers. Avoid using excessive force, as this can damage the delicate bristles. Lay the brushes flat on a clean towel or hang them upside down to dry. Ensure that the bristles are not touching any surfaces, as this can cause them to become misshapen. Allow the brushes to air dry completely before storing or using them again.
9. Cleaning Stubborn Paint Residue
If you encounter stubborn paint residue that is difficult to remove, you can use a brush cleaner specifically designed for oil paint. Apply a small amount of the cleaner to the bristles and gently work it in using your fingers. Rinse the brushes thoroughly afterward, following the previous steps, to ensure that all traces of the cleaner and paint are removed.
10. Storing Clean Brushes Properly
After cleaning and drying your oil paint brushes, it is important to store them properly to maintain their shape and quality. Store your brushes upright or hang them upside down to prevent the bristles from becoming misshapen. Avoid storing them in a tightly closed container or bag, as this can lead to the growth of mold or mildew. Instead, allow the brushes to breathe and dry completely before storing them in a well-ventilated area.
Quote Inquiry
Contact us!
Cleaning Oil Brushes: Tips and Techniques for Maintaining Your Art Supplies
Introduction
Oil painting is a beautiful and versatile art form, but it comes with its own set of unique challenges, including the proper cleaning and maintenance of oil brushes. Keeping your brushes clean is crucial for preserving their longevity and ensuring optimal performance. In this article, we will discuss various techniques and tips for effectively cleaning oil brushes, allowing you to focus on your artistic expression without worrying about the condition of your tools.
1. The Importance of Cleaning Oil Brushes
Before diving into the specifics of cleaning oil brushes, it's essential to understand why this process is so important. Oil paint can be particularly stubborn and difficult to remove from brushes, and allowing paint to dry on the bristles can lead to irreversible damage. Regular cleaning not only maintains the brushes' shape and bristle quality but also prevents cross-contamination of colors, ensuring true and accurate color mixing during your painting process.
2. Preparing for Cleaning
Before starting the cleaning process, gather the necessary materials. You will need a container, such as a jar or a brush cleaning tank, odorless mineral spirits or a brush cleaner specifically designed for oil brushes, paper towels or lint-free cloths, and a brush holder or drying rack.
3. Removing Excess Paint
The first step in cleaning oil brushes is to remove as much excess paint as possible. You can do this by gently wiping the brush against the edge of your palette or a paper towel. Be careful not to press too hard, as this can damage the bristles. Repeat this process until the brush no longer leaves visible traces of paint.
4. Initial Rinse
After removing the excess paint, it's time for an initial rinse. Fill your container with a small amount of odorless mineral spirits or brush cleaner, enough to cover the bristles but not the ferrule (the metal part that holds the bristles). Swirl the brush gently in the liquid, ensuring that the solvent reaches all the bristles. This step helps to loosen and dissolve the remaining paint.
5. Brush Shampooing
Once the initial rinse is complete, it's time to move on to shampooing the brush. Apply a small amount of brush cleaner or mild soap to the palm of your hand. Gently swirl the brush in the cleaner, working up a lather. Be careful not to crush or twist the bristles excessively, as this can cause damage. Rinse the brush thoroughly under lukewarm water, continuously reshaping the bristles with your fingers until no soap residue remains.
6. Repeat if Necessary
In some cases, especially if the brush was heavily saturated with paint, you may need to repeat the shampooing process to ensure a thorough clean. Take your time and be patient, as this step is crucial for maintaining the brushes' performance and longevity. Avoid using hot water, as it can damage the bristles.
7. Drying and Reshaping
After cleaning, gently squeeze out excess water from the bristles and reshape them to their original form. Avoid using excessive force or pulling on the bristles, as this can lead to irreparable damage. Place the brushes in a brush holder or drying rack with the bristles facing upward to allow them to air dry completely. Avoid storing brushes in an upright position while wet, as water can seep into the ferrule and cause damage.
8. Deep Cleaning for Stubborn Paint
If you encounter stubborn or dried paint on your brushes, a deep cleaning may be necessary. There are specialized brush cleaners available that can help break down tough paint residues. Follow the manufacturer's instructions carefully and consider using protective gloves during the process to avoid skin irritation.
9. Maintaining Brush Quality
To maintain the quality and performance of your oil brushes, it's crucial to establish a regular cleaning routine. Clean your brushes immediately after each painting session to prevent paint from drying and accumulating. Avoid leaving brushes soaking in solvents for extended periods, as this can damage the bristles. Additionally, store your brushes in a dry and clean environment, protecting them from dust and excessive heat.
10. Conclusion
Properly cleaning oil brushes is an essential aspect of an artist's routine. By following the techniques and tips provided in this article, you can ensure the longevity and performance of your brushes, allowing you to focus on your artistic journey without the worry of deteriorating tools. Remember to clean your brushes promptly after each use and establish a regular maintenance routine. With proper care, your oil brushes will continue to serve as reliable tools for your creative expression.
Quote Inquiry
Contact us!
How to Clean Oil Brushes: A Complete Guide
how to clean oil brushes: A Complete Guide
Oil brushes are essential tools for artists working with oil paints. However, cleaning them properly is crucial to maintain their quality and longevity. In this article, we will provide you with a step-by-step guide on how to clean oil brushes effectively, ensuring they stay in excellent condition for years to come.
1. Gather the Necessary Supplies
Before you begin the cleaning process, gather the following supplies:
Mild dish soap or specialized brush cleaner
Two clean containers
Odorless mineral spirits or turpentine
Lint-free cloths or paper towels
A brush cleaning mat or a textured surface
Having these supplies ready will make the cleaning process more efficient.
2. Remove Excess Paint
Start by removing any excess paint from the brushes. Wipe them gently against the edge of your palette or a paper towel. Be careful not to press too hard or bend the bristles.
3. Clean with Odorless Mineral Spirits or Turpentine
Pour a small amount of odorless mineral spirits or turpentine into one of the clean containers. Dip the brush into the solvent, ensuring that only the bristles come into contact with it. Swirl the brush gently in the container to loosen the remaining paint.
Remember to work in a well-ventilated area or use a brush cleaner system to minimize exposure to solvents.
4. Rinse with Soap and Water
After cleaning the brush with mineral spirits, it's time to rinse it with soap and water. Wet the brush bristles and apply a small amount of mild dish soap or specialized brush cleaner. Gently massage the bristles with your fingers, working the soap into the brush. Rinse the brush under lukewarm water until the water runs clear.
5. Repeat if Necessary
If you notice any remaining paint or staining on the brush, repeat steps 3 and 4 until the brush is clean. Take your time and be thorough, as leaving any paint residue can affect the performance of the brush in future painting sessions.
6. Shape the Bristles
After cleaning, gently shape the bristles of the brush with your fingers, restoring their original form. Avoid squeezing or pulling the bristles forcefully, as this can damage them.
7. Dry the Brushes Properly
Once the brushes are clean and reshaped, it's important to dry them properly before storing or using them again. Blot the excess water from the bristles using a lint-free cloth or paper towel. Avoid rubbing the bristles, as this can cause fraying.
Next, lay the brushes flat on a clean surface or hang them upside down to dry. This prevents water from seeping into the ferrule (the metal part that holds the bristles) and weakening the glue that holds the bristles together. Ensure that the brushes are completely dry before storing them.
8. Store Properly
Storing your oil brushes properly is essential for their longevity. Once dry, place the brushes in a brush holder or wrap them in a breathable material, such as a cloth or paper towel. Avoid storing them in an airtight container, as this can lead to mold or mildew growth.
9. Regular Maintenance
To keep your oil brushes clean and in good condition, it's important to establish a regular cleaning routine. After each painting session, remove excess paint and clean the brushes using the steps mentioned above. This prevents paint from drying and hardening, making future cleanings easier.
10. Seek Professional Cleaning if Necessary
If you encounter stubborn paint buildup or have neglected your brushes for an extended period, it may be necessary to seek professional cleaning. Professional brush cleaners have specialized tools and techniques to remove tough paint residues without damaging the bristles.
By following these steps and maintaining a regular cleaning routine, you can ensure that your oil brushes remain in optimal condition, allowing you to create beautiful artwork for years to come.
Quote Inquiry
Contact us!
How to Clean Oil Paint Brushes: A Comprehensive Guide
How to clean oil paint brushes: A Comprehensive Guide
Introduction: Keeping your oil paint brushes clean is essential for maintaining their longevity and ensuring optimal painting results. In this article, we will provide you with a comprehensive guide on how to clean oil paint brushes effectively, ensuring that you can continue creating beautiful artwork without any hassle.
1. Understanding the Importance of Cleaning Oil Paint Brushes
Cleaning oil paint brushes is crucial for several reasons. Firstly, it helps to prevent the buildup of dried paint on the bristles, which can lead to stiffness and loss of shape. Secondly, regular cleaning ensures that the colors on your palette remain true, as contaminated brushes can introduce unwanted pigments into your mixtures. Lastly, proper cleaning extends the lifespan of your brushes, saving you money in the long run.
2. Gathering the Necessary Materials
Before diving into the cleaning process, ensure that you have the following materials on hand:
Mild liquid soap or brush cleaner
Odorless mineral spirits or turpentine
A container for cleaning solution
Paper towels or lint-free cloths
A brush comb or wire brush
Having these materials readily available will make the cleaning process more efficient and effective.
3. Removing Excess Paint
Prior to cleaning, remove excess paint from your brushes using a rag or paper towel. Gently squeeze the bristles to remove as much paint as possible, wiping it off onto the towel. This step helps prevent contamination of the cleaning solution and makes the subsequent cleaning process easier.
4. Cleaning with Mild Soap and Water
If you have been working with water-mixable oil paints, you can start by cleaning your brushes with mild soap and water. Rinse the brushes under warm running water and apply a small amount of soap to your palm or directly onto the bristles. Gently massage the bristles in a circular motion, working the soap into the paint-laden areas. Rinse the brushes thoroughly until the water runs clear.
5. Cleaning with Odorless Mineral Spirits or Turpentine
For traditional oil paints, cleaning with odorless mineral spirits or turpentine is necessary to remove the oil-based pigments effectively. Begin by pouring a small amount of mineral spirits or turpentine into a container. Swirl the brush in the solution, ensuring that the bristles are fully submerged. Use a gentle scrubbing motion to work the solvent into the bristles, loosening the paint. Repeat this process until the solvent remains clear.
6. Rinse and Repeat
After cleaning your brushes with mineral spirits or turpentine, it is crucial to rinse them thoroughly. Run the brushes under warm water and gently massage the bristles to remove any remaining solvent. Repeat this rinsing process until the water runs clear, indicating that all traces of paint and solvent have been removed.
7. Drying the Brushes
Once your brushes are clean, it's essential to dry them properly to prevent damage. Gently squeeze the bristles to remove excess water, being careful not to deform the shape. Lay the brushes flat on a clean, lint-free cloth or paper towel, ensuring that they are not touching each other. Allow them to air dry completely before storing or using them again.
8. Brush Maintenance and Storage
Proper brush maintenance and storage are crucial to keep your brushes in optimal condition. After cleaning, reshape the bristles gently using your fingers or a brush comb. Avoid using excessive force, as this can damage the bristles. Store your brushes either horizontally or vertically in a brush holder or container, ensuring that they are not crushed or bent.
9. Troubleshooting Common Issues
Occasionally, you may encounter stubborn paint residue or dried paint on your brushes. In such cases, you can use a brush cleaner specifically designed for oil paint or a mixture of warm water and vinegar. Soak the brushes in the cleaning solution for a few hours or overnight, then follow the cleaning process outlined above.
10. Regular Cleaning Routine
To maintain the longevity and performance of your oil paint brushes, it's essential to establish a regular cleaning routine. Clean your brushes immediately after each painting session to prevent the paint from drying and hardening on the bristles. By making cleaning a habit, you will ensure that your brushes remain in excellent condition for years to come.
Quote Inquiry
Contact us!