

Art Centres

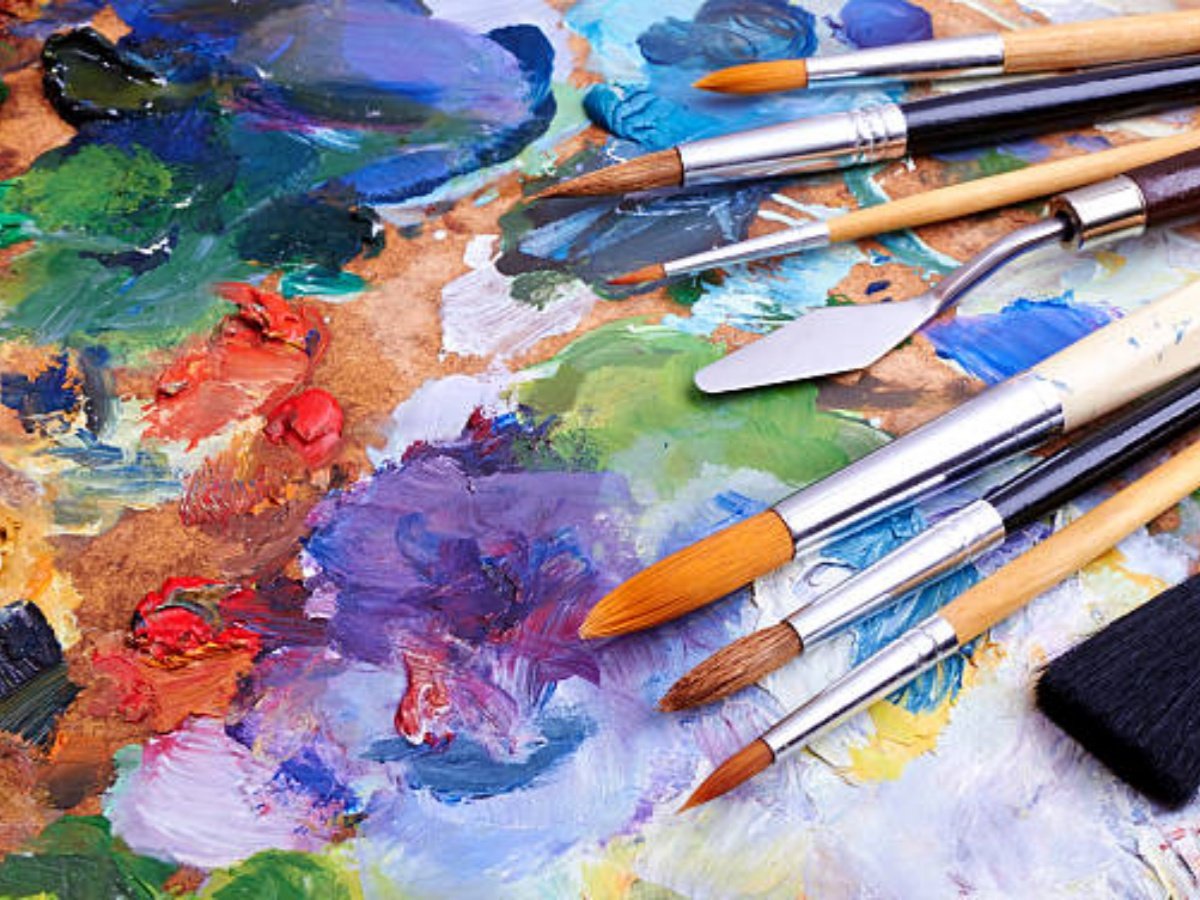
Is There a Difference Between Oil and Acrylic Paint Brushes?
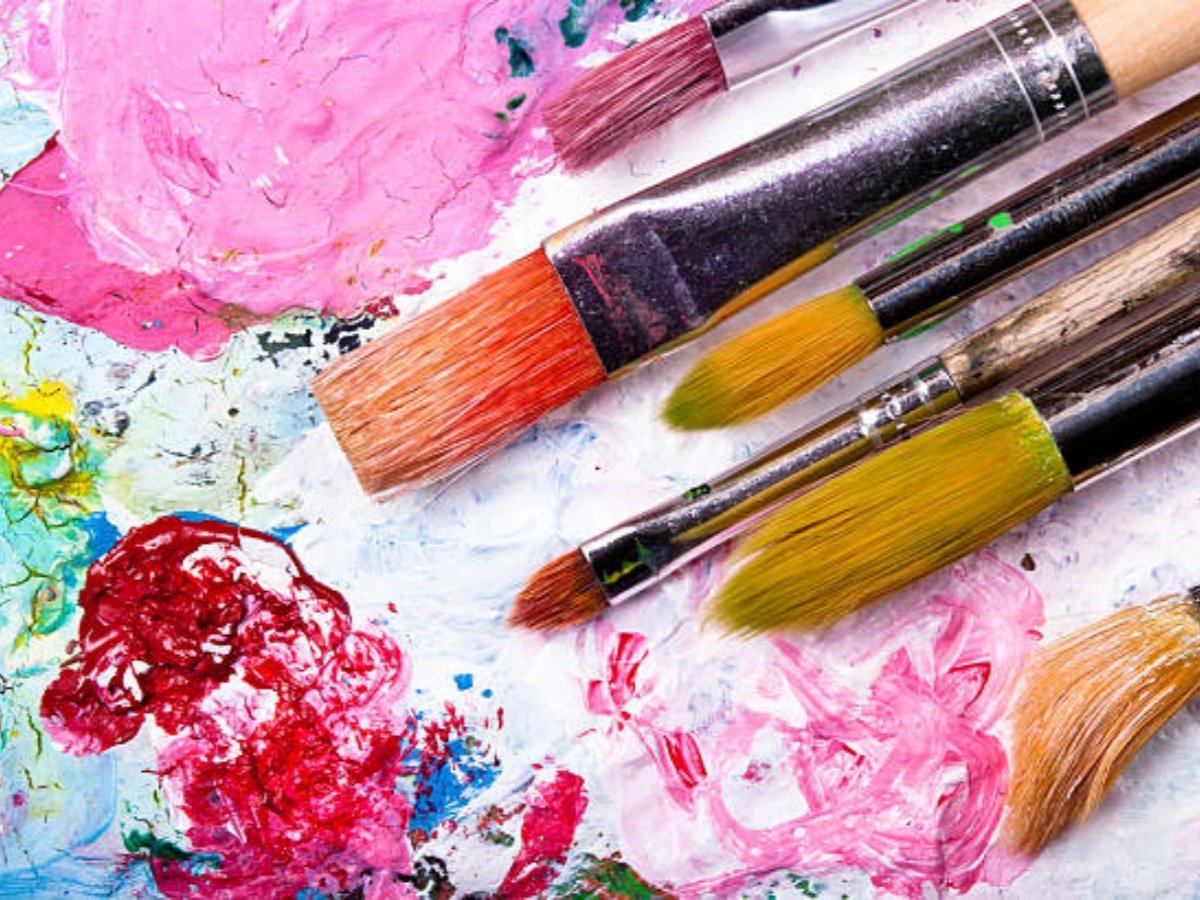
The Distinction Between Oil and Acrylic Paint Brushes
For artists, choosing the right tools is crucial to achieving their desired creative vision. When it comes to painting, the choice of brushes can greatly impact the outcome of a work. One common question among artists is whether there is a difference between oil and acrylic paint brushes. In this article, we will explore the characteristics, uses, and key distinctions between these two types of brushes.
1. Understanding the Nature of Oil Paint Brushes
Oil paint brushes are specifically designed to work with oil-based paints. They typically have long and durable bristles, often made from natural materials such as hog or sable hair. These natural fibers are well-suited for handling the thick consistency of oil paints and can hold a significant amount of paint, allowing for smooth and controlled application.
2. The Unique Qualities of Acrylic Paint Brushes
Acrylic paint brushes, on the other hand, are specially designed for use with acrylic paints. They can be made from both natural and synthetic materials, such as nylon or polyester. Unlike oil brushes, acrylic brushes have shorter and stiffer bristles, which are better suited for the thinner consistency of acrylic paints. This allows for more precise and detailed work, as well as easier clean-up.
3. Compatibility and Versatility between Oil and Acrylic Paint Brushes
While oil brushes are primarily used for oil painting and acrylic brushes for acrylic painting, it is important to note that both types of brushes can be used interchangeably to some extent. Acrylic brushes can handle oil paints, although they may wear out more quickly due to the abrasive nature of the oil-based paints. Conversely, oil brushes can be used with acrylic paints, but they may struggle to maintain their shape and crispness over time.
4. Considerations for Brush Care
Proper brush care is essential for maintaining the longevity and performance of your brushes, regardless of whether they are used for oil or acrylic painting. After each use, it is important to clean your brushes thoroughly with an appropriate cleaning solution. For oil brushes, this typically involves using solvents such as mineral spirits or turpentine, while acrylic brushes can be cleaned with water or mild soap. Additionally, storing brushes horizontally or vertically with the bristles facing up can help preserve their shape and prevent damage.
5. Price and Availability between Oil and Acrylic Paint Brushes
Another aspect to consider when choosing between oil and acrylic brushes is the price and availability. Generally, oil brushes tend to be more expensive due to the higher quality natural bristles used in their construction. Synthetic brushes, commonly used for acrylic painting, are generally more affordable. Additionally, acrylic brushes are widely available in art supply stores, while finding a wide variety of oil brushes may require more specialized shops or online retailers.
6. Achieving Different Effects between Oil and Acrylic Paint Brushes
Oil and acrylic brushes can also produce different effects on the canvas due to their distinct characteristics. Oil brushes, with their longer bristles and ability to hold more paint, are well-suited for creating textured and blended effects. Acrylic brushes, with their shorter bristles, are better for achieving finer details and crisp edges. Understanding these differences can help artists choose the right brushes for their desired artistic outcome.
7. Durability and Longevity between Oil and Acrylic Paint Brushes
Considering the durability and longevity of brushes is important, especially for artists who paint frequently or on a professional level. Oil brushes, particularly those made from high-quality natural hair, tend to be more durable and can withstand the rigors of oil painting for a longer period. Synthetic acrylic brushes, while less durable, can still last a long time if properly cared for.
8. Cleaning Challenges between Oil and Acrylic Paint Brushes
Cleaning brushes after painting sessions is a necessary task, but it can sometimes be challenging. Oil brushes require more intensive cleaning with solvents, which can be time-consuming and potentially hazardous. On the other hand, acrylic brushes can be easily cleaned with water or mild soap, making the cleaning process much simpler and safer.
9. Environmental Considerations between Oil and Acrylic Paint Brushes
Artists who are conscious of environmental impact may also consider the ecological aspects of their brush choices. Synthetic brushes used for acrylic painting are generally considered more environmentally friendly as they do not rely on animal products. Oil brushes, particularly those made from natural fibers like sable hair, may raise ethical concerns for some artists.
10. Personal Preference and Experimentation
Ultimately, the choice between oil and acrylic brushes often comes down to personal preference and experimentation. Some artists may find that certain brushes suit their painting style or techniques better than others. It is important to try out different brushes and see which ones feel most comfortable and yield the desired results. The journey of artistic exploration is often accompanied by a willingness to try new tools and techniques.
Quote Inquiry
Contact us!

How Long Do Oil Paint Brushes Last: A Comprehensive Guide
how long do oil paint brushes last: A Comprehensive Guide
Oil paint brushes are essential tools for artists working with oil paints. They come in various shapes, sizes, and bristle types, each serving a specific purpose in the artistic process. But how long do oil paint brushes last? In this article, we will explore the lifespan of oil paint brushes, factors that affect their durability, and tips for maintaining their quality. Whether you're a professional artist or a beginner, understanding how long your brushes will last can help you make informed decisions about your art supplies.
The Lifespan of Oil Paint Brushes
The lifespan of oil paint brushes can vary depending on several factors, including the quality of the brush, the care it receives, and the frequency of use. On average, a well-maintained oil paint brush can last anywhere from several months to several years.
Quality of the Brush
The quality of the brush plays a significant role in determining its lifespan. High-quality brushes are typically made with finer materials, such as natural bristles or synthetic fibers designed to mimic natural bristles. These brushes tend to be more durable and can withstand the rigors of oil painting for a longer time.
On the other hand, low-quality brushes may have bristles that easily shed or deform with use, resulting in a shorter lifespan. It's worth investing in good-quality brushes if you're serious about oil painting and want your brushes to last.
Care and Maintenance of Oil Paint Brushes
Proper care and maintenance are crucial for extending the lifespan of your oil paint brushes. Here are some tips to help you keep your brushes in top condition:
1. Clean Your Brushes Properly
After each painting session, thoroughly clean your brushes using an appropriate solvent, such as odorless mineral spirits or brush cleaner. Gently swirl the brush in the solvent to remove any oil paint residue. Rinse the brush with water and reshape the bristles with your fingers. Avoid using hot water, as it can damage the bristles.
2. Store Your Brushes Properly
When not in use, store your brushes properly to protect them from damage. Avoid leaving them submerged in a container of solvent or water, as this can cause the bristles to become weak and brittle. Instead, lay them flat or hang them with the bristles facing up to maintain their shape.
3. Use Brush Guards
Consider using brush guards, which are protective covers that slide over the bristles of your brushes. These guards help maintain the shape of the bristles and protect them from becoming frayed or misshapen.
4. Avoid Excessive Pressure
When painting, avoid applying excessive pressure on the bristles, as this can cause them to bend or break. Instead, use gentle and controlled strokes to preserve the integrity of the brush.
Frequency of Use of Oil Paint Brushes
The frequency with which you use your oil paint brushes can also affect their lifespan. Brushes that are used frequently may wear out more quickly than those used less often. However, this doesn't mean you should avoid using your brushes to prolong their lifespan. Brushes are meant to be used, and regular use can actually help keep them in good condition.
Signs of Wear and Replacement of Oil Paint Brushes
Over time, oil paint brushes will naturally show signs of wear. Here are some common signs that indicate it's time to replace your brushes:
1. Frayed or Split Bristles
If the bristles of your brush start to fray or split, it's a clear indication that the brush has reached the end of its lifespan. Frayed bristles can affect the quality of your brush strokes and make it difficult to achieve the desired level of detail in your paintings.
2. Loss of Shape
If your brush has lost its original shape and the bristles no longer form a neat point or edge, it may be time to replace it. A brush with a compromised shape can make it challenging to achieve precise and controlled brushwork.
3. Poor Performance
If you notice a decline in the performance of your brush, such as difficulty holding paint or uneven application, it's a sign that the brush is nearing the end of its lifespan. A worn-out brush may not be able to deliver the desired results and may hinder your artistic process.
Conclusion
In conclusion, the lifespan of oil paint brushes can vary depending on factors such as the quality of the brush, care and maintenance, and the frequency of use. By investing in high-quality brushes, practicing proper care and maintenance, and recognizing the signs of wear and replacement, you can ensure that your oil paint brushes last for a considerable amount of time. Remember, your brushes are valuable tools in your artistic journey, and taking care of them will contribute to the quality of your artwork.
Quote Inquiry
Contact us!
Easy Way to Clean Oil Paint Brushes: The Ultimate Guide
Introduction
Cleaning oil paint brushes can be a daunting task, especially if you are new to the world of art. However, with the right techniques and tools, it doesn't have to be a hassle. In this article, we will explore the easy way to clean oil paint brushes, ensuring that your brushes stay in great condition and ready for your next artistic masterpiece.
1. Gather Your Materials to Clean Oil Paint Brushes
Before you begin the cleaning process, it's essential to gather all the necessary materials. This will save you time and ensure that you have everything you need at hand. Here are the items you will need:
A container or jar
Odorless mineral spirits or paint thinner
Soap or brush cleaner
Water
Old towels or paper towels
2. Remove Excess Paint to Clean Oil Paint Brushes
The first step in cleaning oil paint brushes is to remove any excess paint. You can do this by gently wiping the brush against the edge of your palette or a clean rag. This will help prevent the paint from drying and clogging the bristles later on.
3. Rinse with Solvent to Clean Oil Paint Brushes
Next, pour a small amount of odorless mineral spirits or paint thinner into a container or jar. Dip the brush into the solvent and swirl it around gently. This will help dissolve the oil paint and loosen it from the bristles.
4. Repeat if Necessary
If the bristles are still coated with paint after the initial rinse, repeat the process. You may need to use a fresh batch of solvent to ensure effective cleaning. Be sure to swirl the brush gently and avoid applying too much pressure, as this can damage the bristles.
5. Wash with Soap to Clean Oil Paint Brushes
Once the paint has been dissolved, it's time to wash the brush with soap or brush cleaner. Wet the bristles and apply a small amount of soap or cleaner. Gently work the soap into the bristles, making sure to reach the base of the brush. Rinse thoroughly with water until no traces of paint or soap remain.
6. Reshape the Bristles to Clean Oil Paint Brushes
After washing, gently reshape the bristles with your fingers. This will help restore their original form and ensure that they dry evenly. Avoid pulling or twisting the bristles, as this can cause them to become misshapen or fall out.
7. Dry the Oil Paint Brushes
Place the cleaned brushes on a flat surface or hang them upside down to dry. This will allow any remaining water or solvent to drain out. It's important to let the brushes dry completely before using them again to prevent the growth of mold or mildew.
8. Store Properly of the Oil Paint Brushes
Once your brushes are dry, store them properly to maintain their shape and longevity. Avoid leaving them standing upright in a cup or jar, as this can cause the bristles to bend and lose their shape. Instead, store them flat or hang them with the bristles facing downward.
9. Regular Maintenance
Cleaning your oil paint brushes after each use is essential for their longevity. However, regular maintenance is also important. Every few months, consider giving your brushes a deep clean by soaking them in a brush cleaner overnight. This will help remove any dried paint or residue that may have accumulated over time.
10. Final Thoughts
Cleaning oil paint brushes doesn't have to be a daunting task. By following the easy steps outlined in this article, you can ensure that your brushes stay in great condition and are ready for your next artistic endeavor. Remember to always clean your brushes thoroughly after each use and store them properly to prolong their lifespan. Happy painting!
Quote Inquiry
Contact us!
How to Clean Brushes After Oil Painting
The Importance of Cleaning Brushes After Oil Painting
Oil painting can be a messy and rewarding artistic process, but it's essential to properly clean your brushes afterward to maintain their longevity and ensure the best results in future painting sessions. Neglecting to clean your brushes can lead to hardened bristles, ruined paint colors, and even the need for costly replacements. In this article, we will guide you through the step-by-step process of how to clean brushes after oil painting effectively.
Gather Your Materials of Cleaning Brushes
Before diving into the cleaning process, gather the necessary materials to make the task easier and more efficient. You will need:
A container or jar to hold the cleaning solution
An appropriate cleaning solvent (such as odorless mineral spirits or turpentine)
A brush cleaning soap or mild dish soap
A cleaning mat or old towel
A brush cleaner or comb
Removing Excess Paint from Brushes
Start by removing any excess paint from the brushes. Wipe them gently against the edge of your palette or a piece of paper towel, being careful not to damage the bristles. This step will prevent excess paint from contaminating your cleaning solution and make the cleaning process more effective.
Preparing the Cleaning Solution for Cleaning Brushes
Fill a container or jar with an appropriate cleaning solvent. Odorless mineral spirits or turpentine are commonly used for oil painting brush cleaning. Make sure to use these solvents in a well-ventilated area and follow the manufacturer's instructions for proper usage.
Soaking the Brushes
Submerge the brushes bristle-deep into the cleaning solution. Allow them to soak for a few minutes, which will help dissolve the remaining paint and loosen it from the bristles. Avoid leaving the brushes in the solution for too long, as prolonged exposure can damage the bristles.
Gently Cleaning the Brushes
After soaking, take one brush at a time and gently massage the bristles with your fingers. This will help remove any remaining paint residue. Avoid using excessive force or scrubbing, as it can damage the bristles. If the brushes have hardened paint, use a brush cleaner or comb to gently loosen it.
Rinsing the Brushes
Once you have thoroughly cleaned the brushes, rinse them under warm running water. Gently squeeze the bristles from the ferrule towards the tip to remove any remaining cleaning solution and paint residue. Continue rinsing until the water runs clear, indicating that the brushes are clean.
Drying the Brushes
After rinsing, gently reshape the bristles with your fingers to their original shape. Lay the brushes flat on a clean towel or mat and allow them to air dry completely. Avoid using a hairdryer or any other heat source, as it can cause the bristles to become brittle and damaged.
Conditioning the Brushes
Once the brushes are dry, it's essential to condition them to preserve their softness and flexibility. Apply a small amount of brush cleaning soap or mild dish soap to your hand and gently work it into the bristles. Rinse the brushes again under running water to remove the soap residue.
Storing the Brushes Properly
After cleaning and conditioning, store your brushes properly to maintain their shape and prevent damage. Store them horizontally or vertically with the bristles facing upward, preferably in a brush holder or container to avoid bending the bristles. Avoid storing brushes in airtight containers, as it can lead to mold and mildew growth.
Conclusion
By following these steps, you can ensure that your brushes remain in excellent condition and ready for your next oil painting session. Regularly cleaning and maintaining your brushes will not only prolong their lifespan but also contribute to the quality of your artwork. Remember to clean your brushes after each painting session to prevent paint buildup and enhance your artistic experience.
Quote Inquiry
Contact us!
What to Use to Clean Oil Paint Brushes: The Ultimate Guide
Introduction:
As an artist, one of the most important tools in your arsenal is your paint brushes. Whether you are a beginner or a professional, it is crucial to properly clean and maintain your oil paint brushes to ensure their longevity and optimal performance. In this comprehensive guide, we will explore the various methods and materials you can use to clean oil paint brushes effectively.
1. The Importance of Cleaning Oil Paint Brushes:
Before we delve into the different cleaning methods, let's first understand why it is essential to clean your oil paint brushes after each use. Oil paints are known for their rich pigmentation and slow drying time, which can make them challenging to remove from brushes. Failure to clean your brushes thoroughly can result in stiff bristles, decreased paint application, and ultimately, a shorter lifespan for your valuable tools.
2. Squeeze Out Excess Paint:
The first step in cleaning your oil paint brushes is to remove as much paint as possible. To do this, gently squeeze the bristles from the ferrule to the tip, using a clean cloth or paper towel. This will help prevent the paint from drying and clogging the bristles.
3. Choosing the Right Cleaning Solvent:
When it comes to selecting a cleaning solvent for your oil paint brushes, there are several options available. One of the most commonly used solvents is mineral spirits, also known as white spirit. It is a petroleum-based solvent that effectively breaks down oil paint without damaging the bristles. Other alternatives include odorless mineral spirits and citrus-based solvents. It is essential to choose a solvent that suits your preferences and provides effective cleaning results.
4. Cleaning with Mineral Spirits of Oil Paint Brushes:
To clean your oil paint brushes using mineral spirits, follow these steps:
a) Pour a small amount of mineral spirits into a container.
b) Swirl the brush in the solvent, allowing the paint to dissolve.
c) Gently agitate the bristles against the bottom of the container to dislodge any stubborn paint.
d) Remove the brush and wipe off any excess solvent on a clean cloth or paper towel.
e) Repeat the process if necessary, until the brush is clean.
5. Odorless Mineral Spirits of Cleaning Oil Paint Brushes:
If you are sensitive to strong odors or prefer a less toxic alternative, odorless mineral spirits can be a suitable option. They work similarly to regular mineral spirits but have been specially formulated to have a lower odor. Follow the same cleaning steps outlined in paragraph 4, but use odorless mineral spirits instead.
6. Citrus-Based Solvents:
For those who prefer eco-friendly options, citrus-based solvents can be an excellent choice. These solvents are derived from natural citrus oils and are biodegradable. They effectively dissolve oil paint and offer a pleasant, citrus fragrance. Follow the same cleaning steps mentioned previously, but replace mineral spirits with a citrus-based solvent.
7. Brush Cleaning Soaps:
In addition to solvents, brush cleaning soaps or detergents can also be used to clean oil paint brushes. These soaps are specifically designed for artists and are formulated to remove oil paint effectively. To clean your brushes with brush cleaning soap, follow the instructions provided by the manufacturer.
8. Avoiding Harsh Cleaning Methods:
While it may be tempting to use harsh cleaning methods such as hot water or harsh chemicals to clean your oil paint brushes, it is important to avoid them. Hot water can damage the bristles and cause them to lose their shape, while harsh chemicals can deteriorate the brush's quality over time. Stick to the recommended cleaning solvents and soaps mentioned earlier for the best results.
9. Drying and Storing of Oil Paint Brushes:
After cleaning your oil paint brushes, it is crucial to allow them to dry properly before storing them. Lay your brushes flat or hang them upside down to ensure any remaining moisture drips away from the ferrule. Avoid storing brushes in airtight containers, as this can lead to mold or mildew growth. Instead, use a brush holder or wrap them loosely in a breathable material.
10. Regular Maintenance:
Cleaning your oil paint brushes after each use is essential, but regular maintenance is equally important. This includes periodically deep cleaning your brushes by soaking them in solvent overnight to remove any dried paint residue. Additionally, reshape your brushes with your fingers or a brush shaper while they are still wet to maintain their proper form.
Quote Inquiry
Contact us!
How to Clean Oil Based Paint Off Brushes: A Comprehensive Guide
how to clean oil based paint off brushes: A Comprehensive Guide
Introduction
Oil-based paints are known for their durability and rich colors, making them a popular choice for many artists and DIY enthusiasts. However, cleaning oil-based paint off brushes can be a challenging task if not done correctly. In this comprehensive guide, we will explore various methods and techniques to help you effectively clean oil-based paint off your brushes, ensuring their longevity and optimal performance.
Understanding Oil-Based Paints
Before diving into the cleaning process, it is essential to have a basic understanding of oil-based paints. Unlike water-based paints, oil-based paints contain pigments suspended in an oil-based binder, typically linseed oil. These paints take longer to dry and create a durable, glossy finish. However, their composition makes them more challenging to clean off brushes.
Preventing Paint Drying on Brushes
Prevention is key when it comes to cleaning oil-based paint off brushes. To minimize the drying time and prevent paint from hardening on your brushes, consider the following tips:
Work in small sections to avoid leaving the paint on brushes for extended periods.
Keep a container of paint thinner or mineral spirits nearby to periodically dip your brushes into while working.
Use a palette knife to scrape excess paint off brushes before cleaning.
Cleaning Brushes Immediately After Use
One of the most effective ways to ensure easy cleaning is to clean your brushes immediately after use. Follow these steps:
Wipe off excess paint using a rag or paper towel.
Fill a small container with paint thinner or mineral spirits.
Dip the bristles of the brush into the container and swirl it around gently.
Remove the brush and wipe off any remaining paint on a rag or paper towel.
Rinse the brush with warm soapy water to remove any residual paint thinner or mineral spirits.
Gently reshape the bristles and lay the brush flat to dry.
Deep Cleaning of Oil-Based Paint Brushes
Over time, oil-based paint can build up on the bristles even if you clean them immediately after use. Deep cleaning is necessary to remove stubborn paint residues. Here's how to do it:
Fill a container with paint thinner or mineral spirits.
Place the brush in the container, ensuring the bristles are fully submerged.
Let the brush soak for several hours or overnight.
Remove the brush and rinse it under warm soapy water.
Gently massage the bristles to remove any remaining paint.
Rinse the brush thoroughly and reshape the bristles.
Allow the brush to air dry before storing.
Using Specialized Brush Cleaners
If you frequently work with oil-based paints and find that traditional cleaning methods are not effective, consider using specialized brush cleaners. These products are formulated specifically for removing tough oil-based paint residues from brushes. Follow the instructions provided by the manufacturer for best results.
Storing Oil-Based Paint Brushes
Proper storage of your oil-based paint brushes is vital to maintain their quality and prolong their lifespan. Follow these guidelines:
Once the brushes are fully dry, store them upright in a brush holder or wrap them in wax paper.
Avoid storing brushes in sealed containers or plastic bags, as this can lead to a buildup of moisture.
Keep brushes away from extreme temperatures and direct sunlight.
Reviving Hardened Brushes
If you accidentally left your oil-based paint brushes to dry without cleaning them, there is still hope to revive them. Follow these steps:
Soak the hardened brushes in a container filled with paint thinner or mineral spirits.
Allow the brushes to soak for several hours or overnight.
Gently massage the bristles to loosen the hardened paint.
Repeat the soaking and massaging process until the paint starts to dissolve.
Rinse the brushes under warm soapy water and reshape the bristles.
Allow the brushes to air dry completely.
Safe Disposal of Paint Thinner and Mineral Spirits
Proper disposal of paint thinner and mineral spirits is essential for environmental safety. Follow these guidelines:
Check with your local waste management facility for specific instructions on disposing of hazardous materials.
Never pour paint thinner or mineral spirits down the drain or into the soil.
Store used solvents in a sealed container and take them to a designated disposal facility.
Conclusion
Cleaning oil-based paint off brushes may require some extra effort, but it is crucial for maintaining the quality and longevity of your brushes. By following the steps outlined in this comprehensive guide, you can effectively clean your brushes and ensure they remain in optimal condition for future use. Remember to clean your brushes immediately after use, deep clean them periodically, and consider using specialized brush cleaners when necessary. With proper care and maintenance, your oil-based paint brushes will continue to deliver exceptional results for years to come.
Quote Inquiry
Contact us!
How to Clean Oil Paint Brushes Without Paint Thinner
how to clean oil paint brushes without paint thinner
Introduction: The Importance of Cleaning Oil Paint Brushes
Oil paint brushes are essential tools for artists, but they can quickly become clogged and stiff with dried paint. Proper cleaning and maintenance of your brushes are crucial to ensure their longevity and optimal performance. While many artists rely on paint thinner to clean their brushes, there are alternative methods that are more environmentally friendly and safer for your health. In this article, we will explore various techniques on how to clean oil paint brushes without the use of paint thinner.
1. Removing Excess Paint
Before starting the cleaning process, it is important to remove as much excess paint from your brushes as possible. You can do this by wiping the bristles against a rag or paper towel. Alternatively, you can gently squeeze the bristles with a cloth, working from the ferrule (metal part that holds the bristles) towards the tips. This step will make the cleaning process more efficient.
2. Using Soap and Water for Cleaning Oil Paint Brushes
One of the simplest and most effective methods to clean oil paint brushes without paint thinner is by using soap and water. Start by rinsing the brushes under warm water to remove any remaining paint. Then, apply a small amount of mild dish soap or hand soap to the bristles. Gently rub the soap into the bristles using your fingers, working the soap up towards the ferrule. Rinse the brush thoroughly under warm water until the water runs clear.
3. Vinegar and Linseed Oil Mixture
If you prefer a more natural cleaning solution, you can create a mixture of vinegar and linseed oil. Fill a container with equal parts vinegar and linseed oil, and swirl the brush in the mixture for a few minutes. The vinegar helps to break down the paint, while the linseed oil conditions the bristles. Afterward, rinse the brush with warm soapy water and allow it to air dry.
4. Using Baby Oil to Clean Oil Paint Brushes
Baby oil is another effective alternative to paint thinner for cleaning oil paint brushes. Simply pour a small amount of baby oil onto a cloth or paper towel and gently rub the bristles until the paint starts to dissolve. Rinse the brush under warm water and wash with soap to remove any remaining oil residue.
5. Using Murphy's Oil Soap of Cleaning Oil Paint Brushes
Murphy's Oil Soap, a popular household cleaner, can also be used to clean oil paint brushes. Fill a container with warm water and add a small amount of Murphy's Oil Soap. Swirl the brush in the solution, ensuring that the soap reaches the bristles. Rinse the brush thoroughly under warm water and repeat the process if necessary.
6. Using Rubbing Alcohol on Cleaning Oil Paint Brushes
Rubbing alcohol is known for its ability to dissolve oil-based substances, making it a useful tool for cleaning oil paint brushes. Dip the bristles of the brush into a container filled with rubbing alcohol and swirl it around for a few minutes. Rinse the brush under warm water and wash with soap to remove any residue.
7. Creating a DIY Brush Cleaner
If you prefer to make your own brush cleaner, you can mix equal parts liquid dish soap and vegetable oil. Stir the mixture well and apply it to the bristles. Gently rub the bristles with your fingers to work the cleaner into the paint, and then rinse the brush under warm water.
8. Using a Brush Cleaning Solvent
For stubborn and dried-on paint, you may need a stronger cleaning solution. Look for a brush cleaning solvent specifically designed for oil paint brushes. Follow the instructions on the product, as different solvents may have different application methods. Remember to rinse the brush thoroughly after using a solvent and wash it with soap to remove any residue.
9. Brush Conditioning of Cleaning Oil Paint Brushes
After cleaning your oil paint brushes, it is important to condition them to keep the bristles soft and flexible. You can do this by applying a small amount of hair conditioner or baby oil to the bristles and gently working it in with your fingers. Leave the conditioner on for a few minutes, then rinse the brush thoroughly with warm water.
10. Proper Storage of Oil Paint Brushes
Proper storage of your oil paint brushes is essential to maintain their shape and performance. After cleaning, reshape the bristles gently with your fingers and lay the brushes flat or hang them upside down to dry. Avoid storing them upright, as this can cause the bristles to bend or splay. Additionally, protect the brushes by storing them in a brush holder or wrapping them in a soft cloth.
Conclusion
Cleaning oil paint brushes without paint thinner is not only environmentally friendly but also safer for your health. By using alternative methods such as soap and water, vinegar and linseed oil mixture, baby oil, Murphy's Oil Soap, rubbing alcohol, DIY brush cleaner, and brush cleaning solvents, you can effectively remove paint from your brushes without compromising their quality. Remember to condition and properly store your brushes to prolong their lifespan and ensure optimal performance.
Quote Inquiry
Contact us!
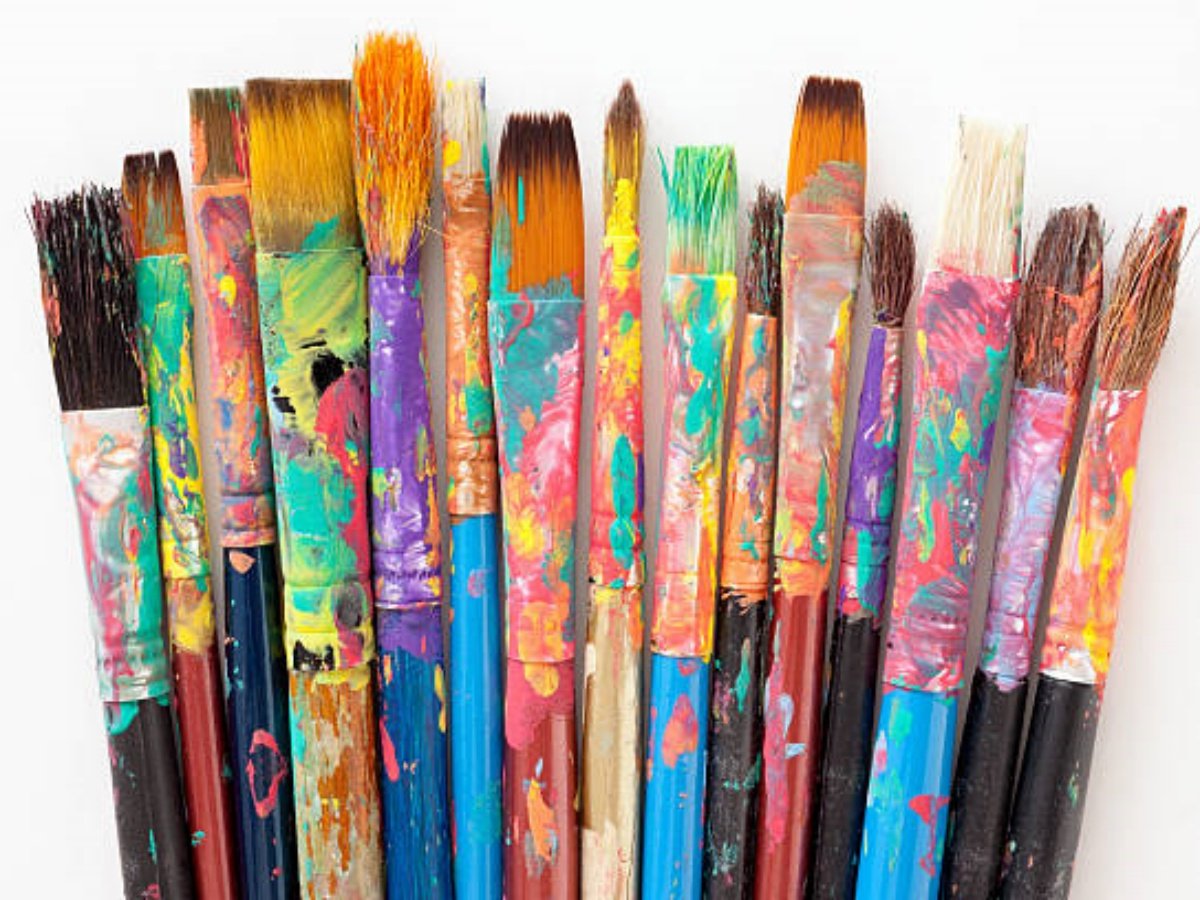
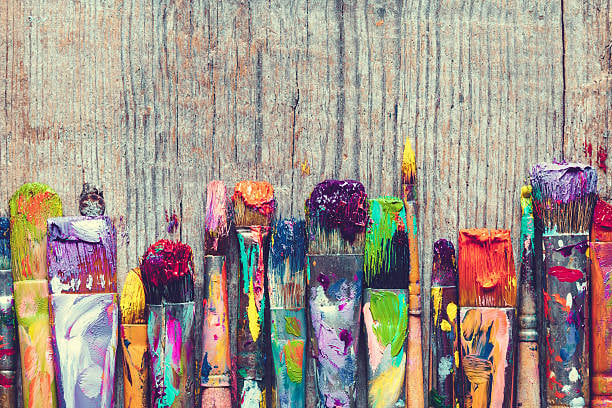
The Ultimate Guide to Paint Brushes for Oil Paint: Everything You Need to Know
1. Understanding the Importance of paint brushes for oil paint
When it comes to oil painting, the choice of paint brushes is crucial. The quality and type of brush you use can greatly impact the outcome of your painting. Whether you're a beginner or an experienced artist, it's important to understand the different aspects of paint brushes for oil paint and how they can enhance your artwork.
2. Different Types of Paint Brushes for Oil Paint
There are several types of paint brushes specifically designed for oil paint. Each type has its own unique characteristics and is suited for different painting techniques. Some of the most commonly used paint brushes for oil paint include bristle brushes, hog hair brushes, synthetic brushes, and fan brushes. Understanding the differences between these brushes can help you choose the right one for your specific needs.
3. Bristle Brushes: The Workhorse of Oil Painting
Bristle brushes are often the go-to choice for oil painters due to their durability and versatility. These brushes are made from natural hog hair bristles, which are strong and resilient. Bristle brushes can hold a large amount of paint and are ideal for creating bold, textured strokes. They are particularly well-suited for impasto techniques and working with thick, heavy-bodied oil paint.
4. Hog Hair Brushes: A Staple for Oil Painting
Hog hair brushes, also known as bristle brushes, are made from the coarse hair of hogs. These brushes are known for their stiffness and resilience, making them perfect for oil painting. The firm bristles allow for greater control and precision, especially when it comes to creating texture and detail in your artwork. Hog hair brushes come in a variety of shapes and sizes, making them suitable for a wide range of painting techniques.
5. Synthetic Brushes: A Versatile Alternative
Synthetic brushes are a popular choice for artists who prefer to avoid animal hair brushes. These brushes are made from synthetic fibers such as nylon or polyester, which mimic the characteristics of natural hair brushes. Synthetic brushes are durable, easy to clean, and maintain their shape well. They are available in a wide range of shapes and sizes, making them suitable for various painting techniques, including oil painting.
6. Fan Brushes: Adding Texture and Depth
Fan brushes are unique in their shape, with bristles spread out like a fan. These brushes are ideal for creating texture, blending colors, and adding depth to your oil paintings. Fan brushes are often used for foliage, grass, and other natural elements. They can also be used to create soft, wispy strokes and to remove excess paint or blend colors together.
7. Choosing the Right Size and Shape
When selecting paint brushes for oil paint, it's important to consider the size and shape of the brush. The size of the brush determines the width of the stroke, while the shape determines the type of stroke you can create. Round brushes are versatile and can be used for both detail work and broader strokes. Flat brushes are ideal for creating sharp edges and covering large areas. Filbert brushes have a rounded, flat tip, making them suitable for blending and creating soft edges.
8. Caring for Your Paint Brushes
Proper care and maintenance of your paint brushes are essential to ensure their longevity and optimal performance. After each painting session, clean your brushes thoroughly with a mild soap or brush cleaner. Avoid using harsh solvents as they can damage the bristles. Gently reshape the brush and let it dry completely before storing it. Store your brushes upright or flat to prevent them from bending or fraying.
9. Investing in Quality Brushes
While it may be tempting to opt for cheaper brushes, investing in high-quality brushes can make a significant difference in your artwork. Quality brushes tend to have better bristle retention, allowing for more control and precision. They also tend to last longer and provide better results. Consider your budget and painting style when choosing brushes, but remember that quality brushes are a worthwhile investment in your artistic journey.
10. Experimenting and Finding Your Favorites
Every artist has their own preferences when it comes to paint brushes for oil paint. It's important to experiment with different types, sizes, and shapes to find the brushes that best suit your style and techniques. Don't be afraid to try new brushes and explore different brands. Over time, you'll develop a collection of favorite brushes that help you achieve your desired effects and bring your artistic vision to life. paint brushes for oil paint, oil painting brushes, bristle brushes, hog hair brushes, synthetic brushes, fan brushes, choosing the right brush, caring for paint brushes, investing in quality brushes, experimenting with brushes The Ultimate Guide to Paint Brushes for Oil Paint: Everything You Need to Know Discover the world of paint brushes for oil paint with our comprehensive guide. Learn about the different types, sizes, and shapes, as well as how to care for and choose the right brushes for your oil painting needs.
Quote Inquiry
Contact us!
10 Essential Oil Brushes for Photoshop: A Comprehensive Guide
1. Understanding oil brushes for photoshop
Oil brushes for Photoshop are digital tools that replicate the effects of traditional oil painting techniques. These brushes allow digital artists to create realistic and textured oil painting effects in their artwork. Whether you are a professional artist or an enthusiastic hobbyist, incorporating oil brushes into your digital art can add depth and richness to your creations.
2. Types of Oil Brushes for Photoshop
There are various types of oil brushes available for Photoshop, each offering unique textures and effects. Some popular types include:
Round Brushes: These brushes resemble traditional round oil brushes and are ideal for creating smooth and controlled strokes.
Flat Brushes: Flat brushes are perfect for creating broad strokes and covering large areas with paint.
Fan Brushes: Fan brushes have a distinctive shape and are great for blending and creating texture.
Filbert Brushes: Filbert brushes have a rounded tip with flat sides, making them versatile for both fine details and broader strokes.
Palette Knife Brushes: These brushes mimic the effects of palette knives, allowing artists to create thick impasto textures.
3. Top 10 Oil Brushes for Photoshop
Here are ten highly recommended oil brushes for Photoshop:
Real Oil Brushes by GrutBrushes: This set offers a collection of realistic oil brushes with varying textures and opacities.
Painterly Brushes by Kyle T. Webster: Known for their expressive and textured strokes, these brushes are widely used by digital artists.
Impasto Brushes by RetroSupply Co.: These brushes are designed to create thick impasto textures, adding depth and dimension to your artwork.
Oil Brushes by Guerillacraft: This set includes a range of oil brushes with different bristle textures, perfect for creating realistic oil painting effects.
Oil Paint Brushes by Creative Veila: With a focus on versatility, this brush set offers a variety of oil brushes suitable for different painting styles.
Oil Painter Brushes by Pixelbuddha: This collection features high-quality oil brushes that emulate the look and feel of traditional oil painting.
Thick Oil Brushes by Design Rocket: These brushes are specifically designed to create thick, textured strokes, ideal for expressive oil paintings.
Oil Brushes by Eldar Zakirov: Created by a professional digital artist, this set includes brushes that mimic the behavior of real oil brushes.
Oil Brushes by Shmoxd: These brushes offer a realistic oil painting experience, allowing artists to achieve stunning oil effects in their digital artwork.
Oil Painting Brushes by GrutBrushes: This set provides a wide range of oil brushes, including brushes for creating smooth gradients and detailed textures.
4. How to Install Oil Brushes in Photoshop
Installing oil brushes in Photoshop is a simple process:
Download the brush file, usually in .ABR format, from the brush creator's website or a trusted source.
Open Photoshop and go to the "Brushes" panel.
Click on the menu icon in the top-right corner of the "Brushes" panel and select "Import Brushes".
Navigate to the downloaded brush file and click "Open".
The oil brushes will now appear in your brushes panel, ready for use.
5. Tips for Using Oil Brushes in Photoshop
To make the most of your oil brushes in Photoshop, consider the following tips:
Experiment with different brush sizes and opacities to achieve varied textures and effects.
Adjust the brush settings, such as flow and blending modes, to customize the brush behavior to your liking.
Use layers to build up your artwork gradually, allowing for easy adjustments and corrections.
Practice with different brush strokes and techniques to develop your own unique style.
Take advantage of Photoshop's blending modes and layer effects to enhance the realism of your oil paintings.
6. Benefits of Using Oil Brushes in Photoshop
Using oil brushes in Photoshop offers several advantages:
Cost-Effective: Digital oil brushes eliminate the need for expensive traditional painting supplies.
Mistake-Friendly: Digital artwork allows for easy undoing and refining, making it forgiving for beginners.
Unlimited Options: With digital brushes, you have access to a vast range of textures and effects that may not be feasible with traditional mediums.
Efficiency: Digital artwork can be created and edited quickly, allowing for faster iterations and experimentation.
No Drying Time: Unlike traditional oil paintings, digital oil artwork doesn't require drying time, allowing for immediate sharing and printing.
7. Inspiring Examples of Oil Brush Artwork
Take a look at these inspiring examples of artwork created using oil brushes in Photoshop:
[Insert images of artwork with appropriate credits]
8. Exploring Advanced Techniques with Oil Brushes
Once you have mastered the basics of using oil brushes in Photoshop, you can explore advanced techniques such as:
Creating realistic skin tones and textures
Adding depth and dimension through layering
Emulating the effects of different brush strokes and brush types
Exploring the interplay of light and shadow
Experimenting with color harmonies and contrasts
9. Frequently Asked Questions about Oil Brushes for Photoshop
Q: Can I use oil brushes in other digital art software?
A: While some brush sets may be compatible with other software, it's essential to check the compatibility before purchasing or using them.
Q: Can I create my own oil brushes in Photoshop?
A: Yes, Photoshop allows you to create custom brushes, including oil brushes. Experiment with different settings and textures to create brushes that suit your artistic style.
Q: Are oil brushes suitable for beginners?
A: Yes, oil brushes can be used by artists of all skill levels. They offer a range of effects that can be explored at your own pace.
10. Enhance Your Digital Art with Oil Brushes for Photoshop
By incorporating oil brushes into your digital artwork, you can elevate your creations to new levels of realism and artistic expression. Experiment with different brush types, techniques, and settings to discover the endless possibilities of digital oil painting.
Quote Inquiry
Contact us!