

Art Centres
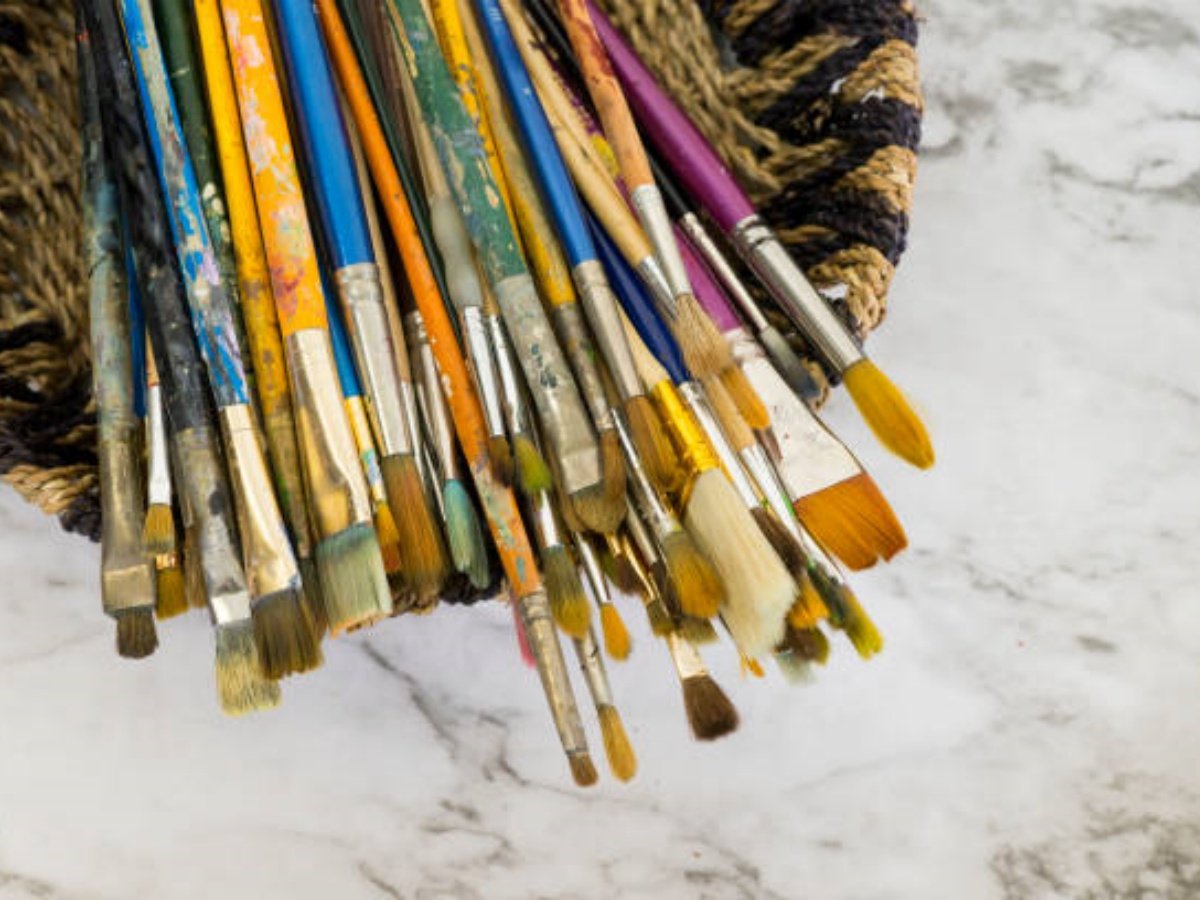
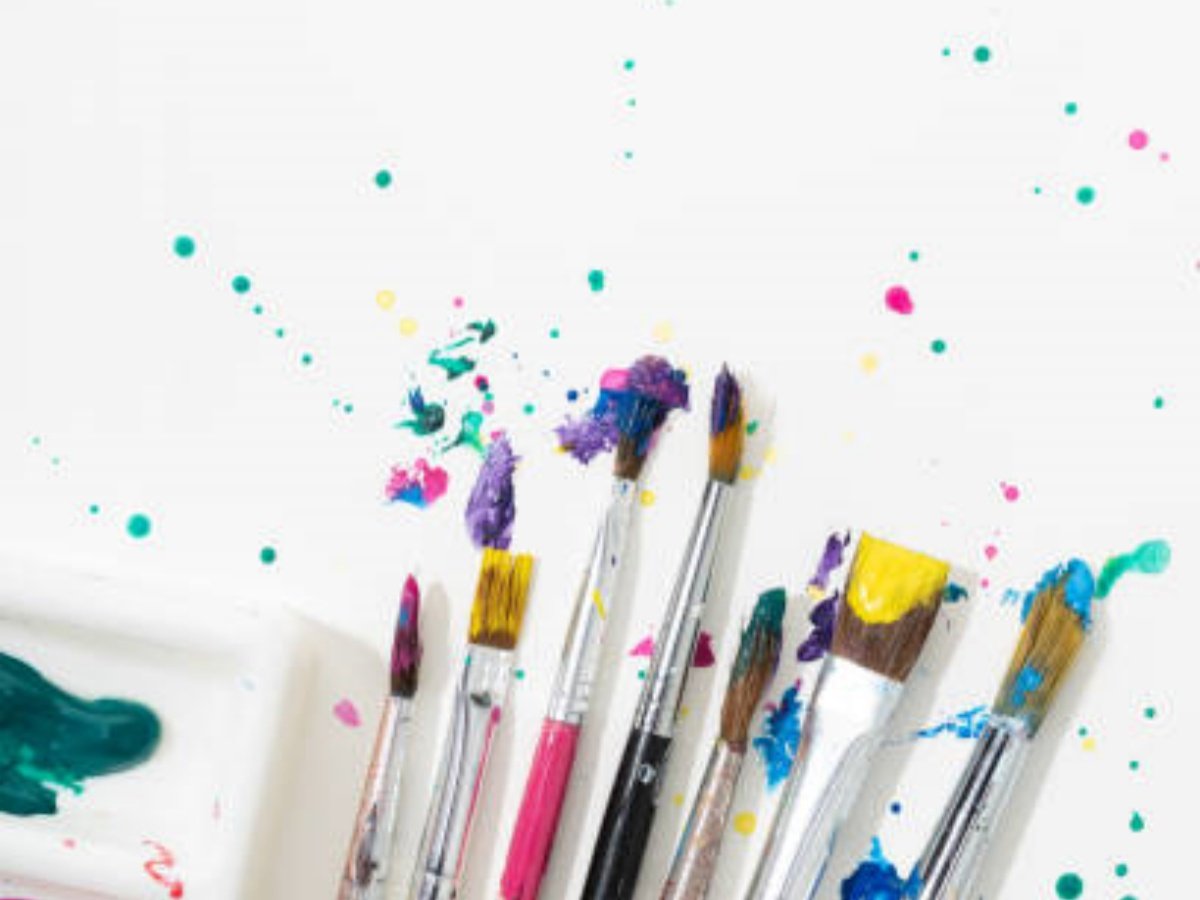
How to Clean Oil Paint Brushes Between Colors
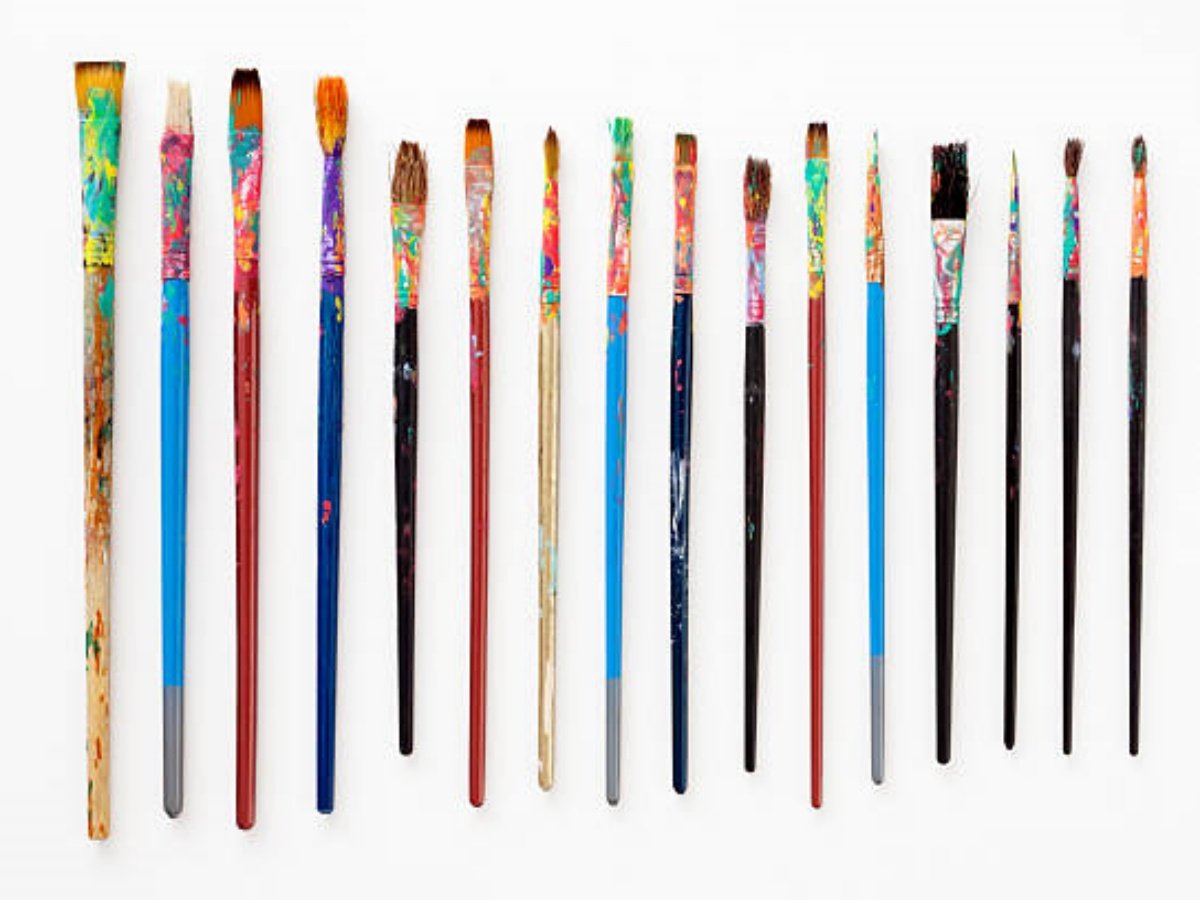
how to clean oil paint brushes between colors
Keeping your oil paint brushes clean and in good condition is essential for achieving great results in your artwork. When working with multiple colors, it is important to properly clean your brushes between each color change to prevent color contamination and ensure accurate color mixing. In this article, we will guide you through the step-by-step process of cleaning oil paint brushes between colors, so you can maintain the integrity of your artwork and prolong the life of your brushes.
Understanding the Importance of Cleaning Oil Paint Brushes Between Colors
Before we delve into the cleaning process, let's take a moment to understand why it is crucial to clean oil paint brushes between colors. Oil paints have a high pigment density, and if you don't clean your brushes properly, the residual paint can mix with the next color you use, leading to muddy and less vibrant results. Additionally, dried paint can accumulate in the bristles over time, causing them to become stiff and less effective in applying paint. By cleaning your brushes between colors, you ensure that each color remains pure and vibrant, and your brushes stay in excellent condition.
Gather Your Materials
Before you begin the cleaning process, gather the necessary materials. You will need:
Mineral spirits or odorless mineral spirits
Two or more containers for cleaning and rinsing
Soap or brush cleaner
Old cloth or paper towels
A brush holder or drying rack
Having these materials ready will help streamline the cleaning process and make it more efficient.
Step-by-Step Guide to Cleaning Oil Paint Brushes Between Colors
Now that you have everything you need, follow these steps to clean your oil paint brushes between colors:
Step 1: Remove Excess Paint
Start by removing as much excess paint as possible from your brush. You can do this by gently wiping the brush against the inner rim of your paint container or on a piece of clean cloth or paper towel. This step helps minimize the amount of paint that needs to be cleaned off later.
Step 2: Clean the Brush
Pour a small amount of mineral spirits or odorless mineral spirits into a container. Swirl the brush in the solvent, making sure to cover the bristles completely. This will help dissolve and remove the oil paint. Repeat this process until the solvent remains clear after swirling the brush.
Step 3: Rinse the Brush
After cleaning the brush with mineral spirits, rinse it under running water to remove any remaining solvent and paint residue. Gently squeeze the bristles to ensure thorough rinsing. Avoid using hot water, as it can damage the brush.
Step 4: Use Soap or Brush Cleaner
If the brush still has some residual paint, apply a small amount of soap or brush cleaner to the bristles. Work the soap into a lather by gently rubbing the bristles against your palm or using a brush cleaning pad. Rinse the brush again under running water until the water runs clear.
Step 5: Dry the Brush
After rinsing, gently squeeze out any excess water from the brush using your fingers or a clean cloth. Reshape the bristles if necessary and lay the brush flat or place it in a brush holder or drying rack to air dry completely. Avoid using a hairdryer or any other heat source, as it can cause damage to the bristles.
Tips for Maintaining Clean Brushes
Keeping your brushes clean between colors is important, but there are also some additional tips you can follow to maintain clean brushes and prolong their lifespan:
Tip 1: Clean Brushes Immediately After Use
Try to clean your brushes as soon as you finish using them, especially if you are taking a break or switching colors. This prevents the paint from drying and makes the cleaning process much easier.
Tip 2: Use Separate Brushes for Different Colors
If you frequently work with multiple colors, consider using separate brushes for each color. This eliminates the need for cleaning between color changes and reduces the risk of color contamination.
Tip 3: Store Brushes Properly
After your brushes are completely dry, store them in a brush holder or wrap them in a clean cloth or paper towel to protect the bristles. Avoid storing brushes with the bristles facing down, as this can cause damage and distortion.
Conclusion
Cleaning oil paint brushes between colors is an essential part of maintaining the quality of your artwork and prolonging the lifespan of your brushes. By following the step-by-step process outlined in this article and implementing the tips for maintaining clean brushes, you can ensure that each color remains pure and vibrant in your artwork. Take the time to properly clean your brushes, and you will be rewarded with outstanding results in your oil paintings.
Quote Inquiry
Contact us!
How to Remove Oil Paint from Brushes: A Comprehensive Guide
The Ultimate Guide on how to remove oil paint from brushes
Oil painting is a popular medium among artists due to its rich colors and versatility. However, cleaning oil paint brushes can be a daunting task if not done properly. In this article, we will explore various methods and techniques to effectively remove oil paint from brushes, ensuring their longevity and optimal performance.
1. Using Mineral Spirits to remove oil paint from brushes
Mineral spirits, also known as paint thinner, is a commonly used solvent for cleaning oil paint brushes. Start by wiping off excess paint from the brush using a rag or paper towel. Then, pour a small amount of mineral spirits into a container and dip the brush into it. Gently swirl the brush around, allowing the mineral spirits to dissolve the paint. Repeat this process until the brush is clean, and then rinse it with soap and water.
2. Utilizing Turpentine
Turpentine is another effective solvent for removing oil paint from brushes. Similar to mineral spirits, begin by wiping off excess paint. Then, pour a small amount of turpentine into a container and soak the brush in it. Swirl the brush around to loosen the paint, and continue until the brush is clean. Rinse the brush with soap and water afterward.
3. Trying Dish Soap and Oil
If you prefer a more natural approach, dish soap and oil can be used to clean oil paint brushes. Mix a small amount of dish soap with vegetable oil in a container. Dip the brush into the mixture and gently work it into the bristles. Rinse the brush under warm water, repeating the process until the paint is completely removed. Finally, wash the brush with soap and water to remove any residual oil.
4. Using Vinegar to remove oil paint from brushes
Vinegar is a versatile household item that can also be utilized for cleaning oil paint brushes. Fill a small container with vinegar and soak the brush in it for several hours or overnight. The vinegar will help break down the paint, making it easier to remove. Afterward, rinse the brush with soap and water to eliminate any vinegar smell.
5. Employing a Brush Cleaner
Brush cleaners specifically designed for oil paint removal are available in art supply stores. These cleaners are formulated to effectively dissolve oil paint without damaging the bristles. Follow the instructions provided with the brush cleaner, as different products may have varying application methods. Rinse the brush thoroughly after cleaning.
6. Trying a Hot Water Soak to remove oil paint from brushes
In some cases, a hot water soak can effectively remove oil paint from brushes. Boil water in a pot and then remove it from heat. Carefully place the brush in the hot water, making sure the bristles are fully submerged. Allow the brush to soak for several minutes, and then gently scrub it with a brush cleaner or soap. Rinse thoroughly afterward.
7. Using a Wire Brush to remove oil paint from brushes
For brushes with dried or hardened paint, a wire brush can be used to remove the stubborn residue. Carefully comb through the bristles, applying gentle pressure to loosen the paint. Be cautious not to damage the brush fibers. Once the majority of the paint is removed, proceed with one of the previously mentioned cleaning methods to fully clean the brush.
8. Trying Alcohol to remove oil paint from brushes
Isopropyl alcohol, commonly known as rubbing alcohol, can be an effective solvent for removing oil paint from brushes. Dip the brush into a small container of alcohol and gently scrub the bristles. This method is particularly useful for quick cleaning when switching between colors during a painting session. Rinse the brush with soap and water afterward.
9. Using a Brush Spinner
A brush spinner is a handy tool that can speed up the cleaning process and remove excess paint from brushes. Simply attach the brush to the spinner and dip it into a container of solvent or water. Turn on the spinner, and the centrifugal force will quickly remove the paint from the bristles. Rinse the brush afterward to ensure all remaining paint is removed.
10. Proper Brush Maintenance
Preventive maintenance is key to keeping your oil paint brushes in good condition. After each painting session, remove excess paint using a rag or paper towel. Then, rinse the brush with solvent or water until the water runs clear. Gently reshape the bristles and allow the brush to air dry. Proper storage, such as hanging brushes upside down or storing them in a brush holder, will also help maintain their shape and prevent paint buildup.
how to remove oil paint from brushes, cleaning oil paint brushes, removing oil paint, oil paint brush cleaning, brush maintenance, oil painting tips How to Remove Oil Paint from Brushes: A Comprehensive Guide Learn effective methods and techniques for removing oil paint from brushes. Keep your brushes clean and prolong their lifespan with these expert tips.
Quote Inquiry
Contact us!
Where to Wash Paint Brushes: A Comprehensive Guide
where to wash paint brushes: A Comprehensive Guide
Painting can be a messy endeavor, and one of the most frustrating aspects is cleaning your paint brushes afterward. Properly washing your paint brushes is essential to maintain their quality and prolong their lifespan. In this article, we will explore various options and techniques for where to wash paint brushes, ensuring that you can keep your brushes in excellent condition for future use.
1. Cleaning Brushes at the Sink
One of the most common and convenient places to wash paint brushes is at the sink. Start by rinsing the brushes in warm water until most of the paint has been removed. Then, apply a small amount of mild dish soap to the bristles and gently massage it in. Rinse the brushes thoroughly until the water runs clear.
2. Washing Brushes Outdoors
When dealing with oil-based paints or strong chemical solvents, it's best to wash your brushes outdoors. Find a suitable spot in your garden or patio where you can set up a bucket filled with warm soapy water. Follow the same steps as washing at the sink, but make sure to dispose of the water responsibly afterward.
3. Utilizing a Brush Cleaner
If you're looking for an efficient way to clean your paint brushes, consider investing in a brush cleaner. These products are specifically designed to remove paint residues and restore the bristles to their original condition. Simply follow the instructions provided with the cleaner for the best results.
4. Using a Paint Thinner
For brushes used with oil-based paints, a paint thinner can be an effective option. Pour a small amount of paint thinner into a container and dip the bristles into it. Swirl the brush around to loosen the paint, and then rinse it with warm soapy water. Remember to handle paint thinners with caution and in a well-ventilated area.
5. Taking Advantage of Brush Cleaning Solutions
For stubborn paint or dried-on residues, brush cleaning solutions can come to the rescue. These solutions are designed to break down paint particles and make them easier to remove. Soak your paint brushes in the solution for the recommended duration and then follow up with a thorough rinse.
6. Exploring DIY Brush Cleaning Methods
Not everyone has access to specialized products for cleaning paint brushes. In such cases, you can try a DIY approach. One popular method is using vinegar and hot water. Mix equal parts of vinegar and hot water in a container and let the brushes soak for about an hour. Rinse them afterward to remove any remaining vinegar smell.
7. Trying the Laundry Soap Technique
Another DIY option is using laundry soap to clean your paint brushes. Fill a container with warm water and add a small amount of laundry soap. Swirl the brushes in the soapy water, ensuring that the bristles are thoroughly coated. Rinse the brushes well and allow them to air dry.
8. Seeking Professional Brush Cleaning Services
If you're not confident in your ability to clean your paint brushes effectively, or if you simply prefer to leave it to the professionals, consider seeking the services of a brush cleaning professional. These experts have the knowledge and tools to clean your brushes thoroughly, ensuring their longevity and optimal performance.
9. Caring for Brushes During Painting Sessions
Prevention is better than cure, especially when it comes to cleaning paint brushes. To minimize the effort required to clean your brushes afterward, be sure to keep them in good condition during painting sessions. Regularly wipe excess paint off the brushes using a cloth or paper towel, and avoid letting the paint dry on the bristles.
10. Storing Brushes Properly
After washing your paint brushes, it's crucial to store them properly to maintain their shape and quality. Allow the brushes to air dry completely before storing them upright in a container or hanging them from hooks. Avoid placing heavy objects on top of them, as this can cause the bristles to become misshapen.
Quote Inquiry
Contact us!
What Are the Best Paint Brushes for Artists: A Comprehensive Guide
The Importance of Choosing the Right Paint Brushes
Paint brushes are the most essential tools for artists, allowing them to express their creativity on canvas. With numerous options available in the market, selecting the best paint brushes can be a daunting task. In this article, we will guide you through the factors to consider when choosing paint brushes, and recommend some of the top options for artists.
Brush Types: Finding the Perfect Fit
When it comes to paint brushes, there is no one-size-fits-all solution. Different brush types are designed for specific painting techniques and mediums. Let's explore some of the most popular brush types:
Hog Bristle Brushes
Hog bristle brushes are known for their durability and stiffness, making them ideal for oil and acrylic painting. The natural bristles have split ends, which hold more paint and provide excellent control. These brushes are suitable for both large-scale paintings and textured brushstrokes.
Synthetic Brushes
Synthetic brushes are an excellent alternative to natural hair brushes. Made with synthetic fibers, such as nylon or polyester, these brushes are versatile and can be used for various mediums. They are particularly popular among watercolor artists due to their ability to hold water and create smooth washes.
Sable Brushes
Sable brushes are renowned for their high-quality and precision. Made from the fur of the Siberian weasel, these brushes are incredibly soft and hold a fine point. Sable brushes are favored by watercolor and gouache artists who require delicate detailing and precise control.
Mixed Media Brushes
Mixed media brushes are designed to handle a variety of mediums. These brushes often combine different types of bristles, such as synthetic and natural hair, to offer artists the versatility they need. They are an excellent choice for artists who enjoy experimenting with different painting techniques.
Brush Shapes: Exploring the Possibilities
Aside from the brush type, the shape of the brush plays a crucial role in achieving specific effects. Here are some popular brush shapes:
Round Brushes
Round brushes are the most versatile and commonly used brush shape. They come in various sizes and are suitable for a wide range of techniques, including creating fine lines, filling in small areas, and blending colors.
Flat Brushes
Flat brushes have a rectangular shape with straight bristles, making them ideal for creating bold, even strokes and covering larger areas. They are commonly used in acrylic and oil painting for blocking in shapes and creating smooth backgrounds.
Fan Brushes
Fan brushes have bristles spread out in a fan shape, enabling artists to create textured effects, such as foliage, grass, or hair. They are also useful for blending and softening edges.
Filbert Brushes
Filbert brushes have an oval-shaped tip with rounded edges, combining the versatility of a round brush with the coverage of a flat brush. They are often used for blending, creating soft edges, and painting foliage.
Choosing the Right Brush Size
The size of a paint brush is denoted by a number, with smaller numbers indicating smaller brushes. The ideal brush size depends on the scale of your artwork and the level of detail you wish to achieve. Here are some general guidelines to consider:
Large Brushes (Size 12 and above)
Large brushes are suitable for covering large areas quickly and are often used for backgrounds or broad strokes. They are also ideal for impasto techniques, where thick layers of paint are applied.
Medium Brushes (Size 6 to 10)
Medium brushes are versatile and can be used for both small details and broader strokes. They are suitable for most painting techniques and are a must-have in any artist's toolkit.
Small Brushes (Size 0 to 4)
Small brushes are perfect for intricate details, fine lines, and adding delicate touches to your artwork. They offer precise control but may require more time and patience.
Top 5 Paint Brushes for Artists
Now that we have covered the factors to consider when choosing paint brushes, let's dive into our top recommendations:
1. Winsor & Newton Series 7 Kolinsky Sable Brushes
These high-quality sable brushes are favored by professional watercolor artists for their exceptional precision and durability. They come in various sizes, allowing for detailed work and intricate brushstrokes.
2. Princeton Select Artiste Synthetic Brushes
These synthetic brushes are a budget-friendly option without compromising quality. They are suitable for various mediums and offer excellent control and flexibility.
3. Grumbacher Goldenedge Golden Toray Brushes
These synthetic brushes mimic the performance of natural sable brushes at a more affordable price. They are ideal for watercolor and acrylic painting, providing sharp edges and consistent flow.
4. Da Vinci Maestro Series 35 Kolinsky Sable Brushes
These premium sable brushes are known for their exceptional quality and long-lasting performance. They are favored by professional artists who require precise control and delicate detailing.
5. Blick Masterstroke Red Sable Brushes
These red sable brushes offer a combination of quality and affordability. They are suitable for oil, acrylic, and watercolor painting, providing excellent spring and snap.
Quote Inquiry
Contact us!
What Are Paint Brushes Made Of: A Comprehensive Guide
The Anatomy of a Paint Brush
Paint brushes are essential tools for artists and DIY enthusiasts alike. They come in various sizes, shapes, and bristle types, each serving a specific purpose. Understanding what paint brushes are made of can help you make informed decisions when selecting the right brush for your project. In this article, we will explore the different materials used in making paint brushes and how they affect the overall performance.
Natural Bristles: A Classic Choice
For centuries, natural bristles have been the go-to choice for many artists. These bristles are typically made from animal hair, such as hog, sable, or squirrel. Natural bristle brushes are known for their ability to hold and distribute paint smoothly. Hog bristle brushes, in particular, are popular for oil-based paints, while sable brushes excel with watercolor and delicate techniques.
Synthetic Bristles: Versatility and Durability
Synthetic bristles have gained popularity in recent years due to their versatility and durability. Made from nylon or polyester filaments, these brushes are ideal for use with acrylic and water-based paints. Synthetic bristles are also less prone to shedding and maintain their shape well, making them a reliable choice for both beginners and professionals.
Blended Bristles: The Best of Both Worlds
Blended bristle brushes combine the characteristics of natural and synthetic bristles, offering artists a balanced approach. By blending natural bristles with synthetic fibers, manufacturers create brushes that are more affordable than pure sable brushes but still provide a similar level of performance. Blended bristle brushes are often favored for oil and acrylic painting techniques.
Brush Handles: Comfort and Control
While bristles are the star of the show, brush handles play a crucial role in an artist's experience. Handles are typically made from wood, plastic, or metal. Wood handles are favored for their durability and ergonomic design. They offer a comfortable grip and allow for better control over brush strokes. Plastic handles, on the other hand, are lightweight and affordable, making them a popular choice for beginners. Metal handles are less common but offer unique benefits such as heat resistance, making them suitable for certain specialized applications.
Ferrules: Securing the Bristles
The ferrule is the metal band that holds the bristles in place and attaches them to the brush handle. Most ferrules are made from nickel-plated brass, which provides a balance between durability and affordability. Higher-quality brushes may feature ferrules made from aluminum or even gold-plated brass. The quality of the ferrule is essential as it affects the overall lifespan and performance of the brush.
Brush Shapes: Matching the Task
Paint brushes come in a wide variety of shapes, each designed for specific tasks. Some common brush shapes include flat, round, filbert, angular, and fan. Flat brushes are excellent for large areas and bold strokes, while round brushes are versatile and suitable for detail work. Filbert brushes feature a rounded edge, making them ideal for blending and softening edges. Angular brushes have a slanted edge, perfect for creating precise lines and shapes. Fan brushes are unique and are often used for special effects and texture creation.
Maintaining Your Brushes: Cleaning and Storage
Proper maintenance ensures the longevity of your paint brushes. After each use, thoroughly clean your brushes using appropriate solvents for the type of paint you used. For oil-based paints, use mineral spirits or turpentine, while soap and water are suitable for water-based paints. Gently reshape the bristles and allow them to air dry completely before storing them. Store brushes upright or hang them to prevent deformation of the bristles.
Choosing the Right Brush for Your Project
With the various options available, selecting the right brush for your project can be overwhelming. Consider the type of paint you will be using, the desired technique, and the surface you will be working on. Natural bristle brushes are excellent for oil-based paints, while synthetic brushes are better suited for water-based paints. For versatility, blended bristle brushes offer a balanced option. Experiment with different brush shapes to achieve the desired effects.
Exploring Specialized Brushes
In addition to the standard brush types, there are specialized brushes designed for specific applications. For example, foam brushes are commonly used for applying varnish or stains, while stencil brushes have stiff bristles ideal for stenciling. Palette knives are not technically brushes but are essential tools for applying thick paint and creating texture. By understanding the various specialized brushes available, you can expand your artistic capabilities.
Conclusion
Paint brushes are more than just tools; they are extensions of an artist's creativity. Knowing what paint brushes are made of helps you make informed choices and achieve the desired results in your artwork. Whether you prefer natural, synthetic, or blended bristles, understanding their characteristics and how they interact with different paints will enhance your painting experience. So, grab your brushes and let your creativity flow!
Quote Inquiry
Contact us!
How to Keep Paint Brushes from Drying Out: Tips and Tricks
Introduction
Keeping your paint brushes in good condition is essential for any artist or DIY enthusiast. Paint brushes that dry out can become stiff, lose their shape, and become difficult to use. To help you avoid this frustrating problem, we have compiled a list of effective tips and tricks to keep your paint brushes from drying out.
1. Clean Your Brushes Properly
One of the most important steps in preventing paint brushes from drying out is to clean them properly after each use. Rinse the brushes thoroughly in warm water to remove excess paint. Then, use a mild soap or brush cleaner to remove any remaining paint. Gently reshape the bristles and lay the brushes flat to dry.
2. Use a Brush Holder
Investing in a brush holder can help prevent your paint brushes from drying out. A brush holder keeps your brushes suspended in water or solvent, preventing the paint from drying and hardening on the bristles. Make sure to choose a brush holder that is suitable for the type of paint you are using.
3. Store Brushes Properly
Proper storage is crucial to keeping your paint brushes in good condition. After cleaning and drying your brushes, store them in a cool, dry place. Avoid storing them in direct sunlight or near a heat source, as this can cause the bristles to become brittle and dry out.
4. Condition the Bristles
To keep your paint brushes soft and supple, you can condition the bristles with a brush conditioner or natural oil. Simply apply a small amount of conditioner or oil to the bristles and work it in gently with your fingers. This will help prevent the bristles from drying out and becoming stiff.
5. Avoid Excessive Pressure
Applying excessive pressure while painting can cause the paint to penetrate deep into the bristles, making it difficult to remove. This can lead to the bristles drying out and becoming stiff. Try to use a light touch and avoid pressing too hard on the canvas or surface you are painting on.
6. Use Moisture-Retaining Wraps
If you need to take a break while painting, you can use moisture-retaining wraps to keep your brushes from drying out. These wraps are specifically designed to maintain moisture and prevent the paint from drying on the bristles. Simply wrap the brush in the moisture-retaining wrap and secure it tightly.
7. Rehydrate Dried Brushes
If you accidentally let your paint brushes dry out, don't worry! There are ways to rehydrate them. Soak the dried brushes in warm water for a few minutes to soften the dried paint. Then, gently comb through the bristles with your fingers or a brush comb to remove the softened paint. Rinse the brushes thoroughly and reshape the bristles before allowing them to dry.
8. Use Brush Restorers
If your paint brushes have become stiff and dried out, you can try using brush restorers to revive them. Brush restorers are specially formulated products that help dissolve dried paint and restore the flexibility of the bristles. Follow the instructions on the product carefully and allow the brushes to soak for the recommended amount of time.
9. Avoid Long-Term Storage in Water
While storing your brushes in water can prevent them from drying out temporarily, it is not recommended for long-term storage. Leaving your brushes submerged in water for extended periods can cause the bristles to swell and lose their shape. Instead, opt for proper cleaning and storage methods as mentioned earlier.
10. Invest in Quality Brushes
Lastly, investing in high-quality paint brushes can make a significant difference in their lifespan and performance. Quality brushes are often made with better materials and craftsmanship, which can help prevent them from drying out or losing their shape. Take the time to research and choose brushes that are suitable for your specific painting needs.
Quote Inquiry
Contact us!
How to Clean Acrylic Paint Brushes Between Colors
how to clean acrylic paint brushes between colors
Introduction:
Acrylic paint brushes are essential tools for artists working with acrylic paints. These brushes come in various shapes and sizes, each serving a different purpose. However, when working on a painting with multiple colors, it is important to clean your brushes properly between each color change. In this article, we will guide you through the process of cleaning acrylic paint brushes between colors, ensuring that your brushes remain in great condition and your colors stay vibrant.
1. Gather Your Supplies of clean acrylic paint brushes
Before you begin cleaning your acrylic paint brushes, it is important to gather all the necessary supplies. You will need:
Mild dish soap or brush cleaner
Warm water
Two containers for water (one for rinsing and one for cleaning)
Lint-free cloth or paper towels
Brush conditioner or hair conditioner (optional)
2. Remove Excess Paint of clean acrylic paint brushes
The first step in cleaning your acrylic paint brushes between colors is to remove any excess paint. You can do this by gently wiping the brush on a lint-free cloth or paper towel. Be careful not to press too hard, as this may damage the bristles.
3. Rinse with Warm Water
Next, rinse your brush under warm water. This will help to remove any remaining paint from the bristles. Make sure to use warm water, as hot water can damage the brush. Hold the brush by the handle and run it under the water, gently massaging the bristles with your fingers to loosen any paint.
4. Cleanse with Mild Soap of clean acrylic paint brushes
After rinsing, it is time to cleanse your brush with mild dish soap or brush cleaner. Squeeze a small amount of soap onto your palm or into a container. Gently swirl the brush in the soap, working the bristles to remove any paint residue. Make sure to clean both the bristles and the ferrule (the metal part that connects the bristles to the handle).
5. Rinse Again of clean acrylic paint brushes
Once you have cleaned the brush with soap, rinse it again under warm water. This step is crucial to ensure that all the soap residue is removed. Repeat the process of gently massaging the bristles with your fingers to thoroughly rinse the brush.
6. Condition the Brush (Optional)
If you want to keep your brushes in optimal condition, you can use a brush conditioner or hair conditioner. Apply a small amount to the bristles and gently work it in with your fingers. This helps to keep the bristles soft and prevents them from becoming stiff or frayed.
7. Dry the Brush
After cleaning and conditioning (if desired), it's time to dry your brush. Start by gently squeezing out any excess water from the bristles. Then reshape the bristles to their original shape by gently running your fingers through them. Finally, lay the brush flat on a clean lint-free cloth or paper towel to air dry. Avoid drying your brushes upright, as this can cause water to seep into the ferrule and loosen the bristles.
8. Store Properly
Once your brushes are completely dry, it is important to store them properly. Avoid leaving them standing in a cup or jar with the bristles facing up, as this can cause the bristles to bend or lose their shape. Instead, store your brushes horizontally or vertically with the bristles facing down to prevent damage.
9. Clean Between Colors of clean acrylic paint brushes
To clean your brush between colors while working on a painting, you can use a brush cleaning container. Fill one container with water for rinsing, and another with water and a small amount of brush cleaner. After using a color, rinse the brush in the rinsing container to remove the excess paint. Then, dip it into the cleaning container and swirl it around to remove any remaining color. Rinse the brush again in the rinsing container before switching to a new color.
10. Maintain Regular Cleaning
Lastly, it is important to maintain regular cleaning of your acrylic paint brushes to keep them in good condition. Clean your brushes thoroughly after each painting session, even if you are not changing colors. This will help to prevent the buildup of paint and ensure that your brushes last longer.
Conclusion
Cleaning acrylic paint brushes between colors is an essential practice for artists using acrylic paints. By following the steps outlined in this article, you can keep your brushes clean, maintain vibrant colors, and prolong the life of your brushes. Remember to gather your supplies, remove excess paint, rinse with warm water, cleanse with mild soap, rinse again, condition (if desired), dry properly, store correctly, clean between colors, and maintain regular cleaning. With these tips, your acrylic paint brushes will always be ready for your next artistic endeavor.
Quote Inquiry
Contact us!
How to Restore a Paint Brush: The Ultimate Guide
how to restore a paint brush: The Ultimate Guide
Paint brushes are essential tools for any artist or DIY enthusiast, but over time they can become worn out and lose their effectiveness. Instead of throwing away your old paint brushes and spending money on new ones, why not learn how to restore them? In this comprehensive guide, we will show you step-by-step how to bring new life to your old paint brushes and ensure they last for years to come.
1. Understanding the Importance of Brush Maintenance
Before we delve into the restoration process, it's crucial to understand why maintaining your paint brushes is essential. Regular cleaning and proper storage not only extend the lifespan of your brushes but also ensure optimal performance. Neglecting brush maintenance can lead to bristle damage, paint buildup, and ultimately, a subpar painting experience.
2. Cleaning Your Paint Brushes
The first step in restoring a paint brush is to thoroughly clean it. Start by rinsing the brush under warm water to remove any excess paint. Then, apply a small amount of mild dish soap or brush cleaner to the bristles. Use your fingers or a brush cleaning tool to gently work the soap into the bristles, ensuring all paint residues are removed. Rinse the brush again under warm water until the water runs clear.
3. Removing Stubborn Paint Residues
In some cases, there may be stubborn paint residues that are difficult to remove with just soap and water. To tackle these, you can use a solvent such as mineral spirits or paint thinner. Dip the bristles into the solvent and gently swish them around. Be sure to follow the manufacturer's instructions and work in a well-ventilated area. Once the paint residues have dissolved, rinse the brush under warm water and proceed with the cleaning process described in the previous step.
4. Restoring the Shape of the Bristles
Over time, paint brush bristles can become misshapen and lose their original form. To restore the shape, gently reshape the damp bristles with your fingers, starting from the ferrule (the metal part that holds the bristles) and working towards the tip. If the bristles are particularly stubborn, you can use a brush comb or a fine-toothed comb to carefully comb through them. This will help separate any clumped bristles and ensure an even shape.
5. Reviving Hardened Bristles
If your paint brush has hardened bristles, fear not! There are a few tricks you can try to revive them. One method is to soak the bristles in a mixture of warm water and fabric softener for a few hours. The fabric softener helps to soften the bristles, making them more pliable. After soaking, rinse the brush thoroughly and reshape the bristles as mentioned in the previous step.
6. Drying and Storing Paint Brushes
Proper drying and storage are crucial to maintaining the restored condition of your paint brushes. After cleaning, gently squeeze out any excess water from the bristles. Then, reshape the bristles and lay the brush flat on a clean towel or hang it upside down to dry. Avoid storing brushes upright while wet, as this can cause water to collect in the ferrule and damage the brush over time. Once dry, store your brushes in a clean and dry place, preferably in a brush holder or container to prevent dust accumulation.
7. Choosing the Right Brush for the Job
While restoring your paint brushes, it's essential to consider their suitability for different painting tasks. Different brushes are designed for specific mediums and techniques. For example, natural bristle brushes are ideal for oil-based paints, while synthetic brushes work well with water-based paints. Investing in the right brush for each job will not only enhance your painting experience but also prolong the lifespan of your brushes.
8. Extending the Lifespan of Your Paint Brushes
Once you have successfully restored your paint brushes, it's important to adopt good practices to extend their lifespan. Avoid leaving brushes sitting in water or solvents for extended periods, as this can damage the bristles. Clean your brushes immediately after use to prevent paint from drying and hardening. Additionally, store your brushes in a way that prevents them from being squashed or bent, as this can cause permanent damage to the bristles.
9. Seeking Professional Help
If your paint brushes are severely damaged or you're unsure about how to restore them, it's always a good idea to seek professional help. Professional brush restorers have the expertise and tools to rejuvenate even the most neglected brushes. They can assess the condition of your brushes and provide the necessary treatments to restore them to their former glory.
10. Embracing the Restored Brush Experience
Once you've successfully restored your paint brushes, it's time to embrace the renewed painting experience. Take your restored brushes for a test run and notice the difference in their performance. With proper care and maintenance, your brushes will continue to serve you well for many more painting projects to come.
Quote Inquiry
Contact us!
What Are Paintbrushes Made Of? A Comprehensive Guide
Introduction
Paintbrushes are essential tools for artists, craftsmen, and DIY enthusiasts alike. They come in various shapes, sizes, and materials, each serving a specific purpose. In this article, we will explore the different components that make up a paintbrush and discuss the materials commonly used in their construction.
The Handle of Paintbrushes : Providing Comfort and Control
The handle of a paintbrush is crucial for providing comfort and control during the painting process. It is typically made of wood, plastic, or a combination of both. Wooden handles are often preferred for their natural feel and durability, while plastic handles are lightweight and more affordable. Some high-end brushes may feature ergonomic or rubberized handles to enhance grip and reduce hand fatigue.
The Ferruleof Paintbrushes: Holding It All Together
The ferrule is the metal or plastic part of the brush that holds the bristles in place. It is typically made of aluminum, nickel-plated brass, or stainless steel. Aluminum ferrules are lightweight and resistant to rust, making them a popular choice. Nickel-plated brass ferrules offer enhanced durability and are less prone to damage. Stainless steel ferrules are exceptionally durable and ideal for heavy-duty use.
Natural Bristles: Traditional and Versatile
Natural bristles are derived from animal hair and have been used for centuries in paintbrushes. Common animal sources include hog, ox, pony, and squirrel hair. Natural bristles are known for their excellent paint-holding capacity and flexibility, allowing for smooth brushstrokes. They are particularly well-suited for oil-based paints, varnishes, and stains. However, natural bristles are not recommended for water-based paints as they tend to absorb water and become limp.
Synthetic Bristles: An Alternative for Water-Based Paints
Synthetic bristles are made from various artificial materials such as nylon, polyester, or a blend of both. They are designed to mimic the properties of natural bristles while offering certain advantages. Synthetic bristles are less absorbent than natural bristles, making them ideal for water-based paints. They also tend to be more durable and easier to clean, making them a popular choice for artists working with acrylic or latex paints.
Bristle Shapes: Choosing the Right Tool for the Job
Paintbrushes come in a variety of shapes, each designed for specific applications. Flat brushes have a rectangular-shaped bristle arrangement, making them suitable for large, even strokes and covering large areas. Round brushes have a pointed tip and are versatile, allowing for both fine details and broader strokes. Filbert brushes have a flat, oval-shaped tip that combines the features of flat and round brushes, making them ideal for blending and creating soft edges.
Bristle Sizes of Paintbrushes: Finding the Perfect Fit
Paintbrushes are available in a range of sizes, often indicated by a number. The size of a brush determines its width and the amount of paint it can hold. Smaller brushes, such as those labeled 0 or 1, are suitable for intricate details and fine lines. Larger brushes, such as those labeled 10 or 12, are better suited for broader strokes and covering larger areas. It's important to have a variety of brush sizes to accommodate different painting techniques and projects.
Cleaning and Care: Extending the Lifespan of Your Brushes
Proper cleaning and care are essential for maintaining the longevity of your paintbrushes. After each use, it is important to thoroughly clean the bristles to remove any paint residue. For water-based paints, warm water and mild soap are usually sufficient. Oil-based paints may require the use of solvents such as mineral spirits. Brushes should be gently washed and reshaped before being left to dry horizontally or bristle-down to prevent damage to the ferrule.
Choosing the Right Paintbrushes for Your Project
With the plethora of paintbrush options available, selecting the right brush for your project can be overwhelming. Consider the type of paint you will be using, the surface you will be painting on, and the desired effect you wish to achieve. Natural bristles are well-suited for oil-based paints and varnishes, while synthetic bristles excel with water-based paints. Experimenting with different brush shapes and sizes can also help you discover new techniques and styles.
Conclusion
Paintbrushes are an indispensable tool for artists and craftsmen, allowing them to express their creativity and bring their visions to life. Understanding the materials and components that make up a paintbrush can help you make informed choices when selecting the right brush for your projects. Whether you prefer natural or synthetic bristles, it is important to care for your brushes properly to ensure their longevity. So go ahead, explore the world of paintbrushes, and unleash your artistic potential!
Quote Inquiry
Contact us!