

Art Centres
The Ultimate Guide to Professional Painting Brushes: Everything You Need to Know
The Ultimate Guide to professional painting brushes: Everything You Need to Know
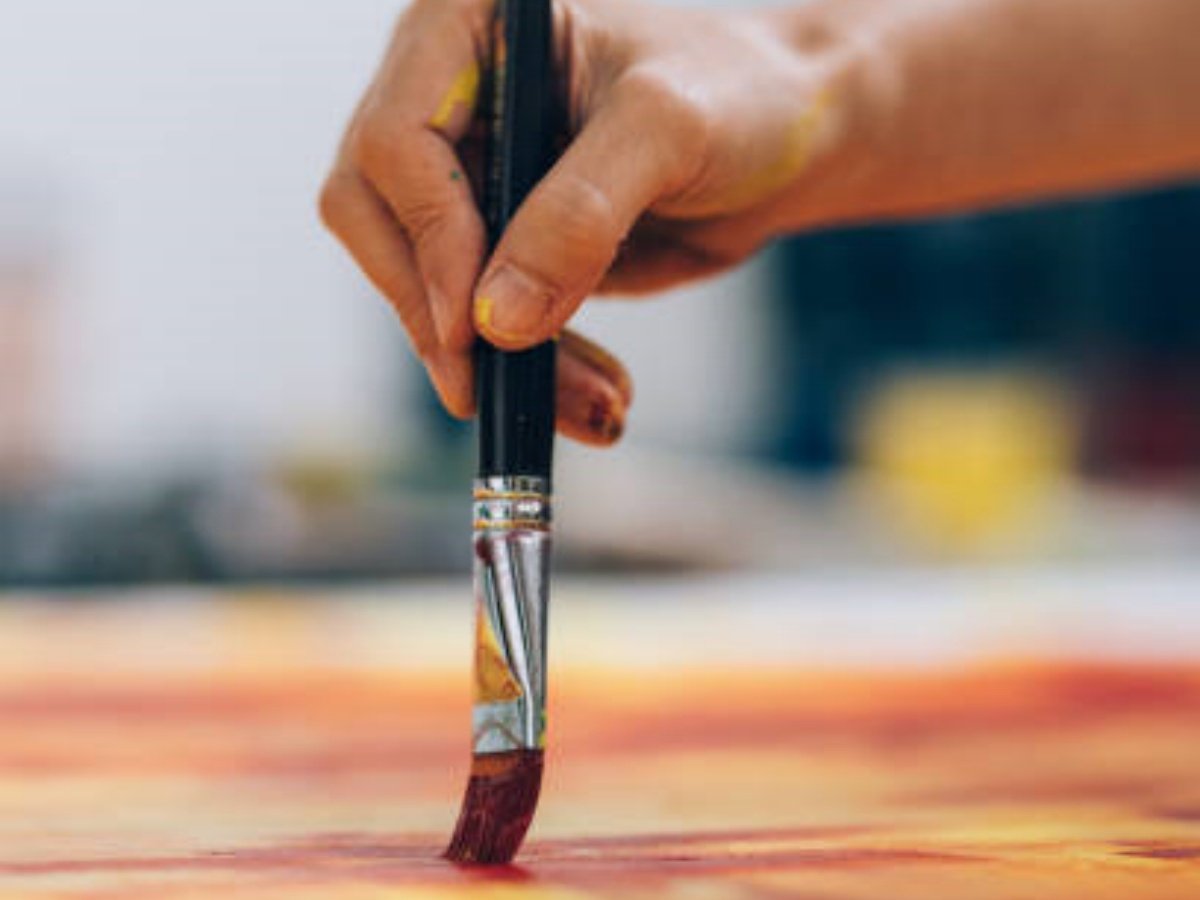
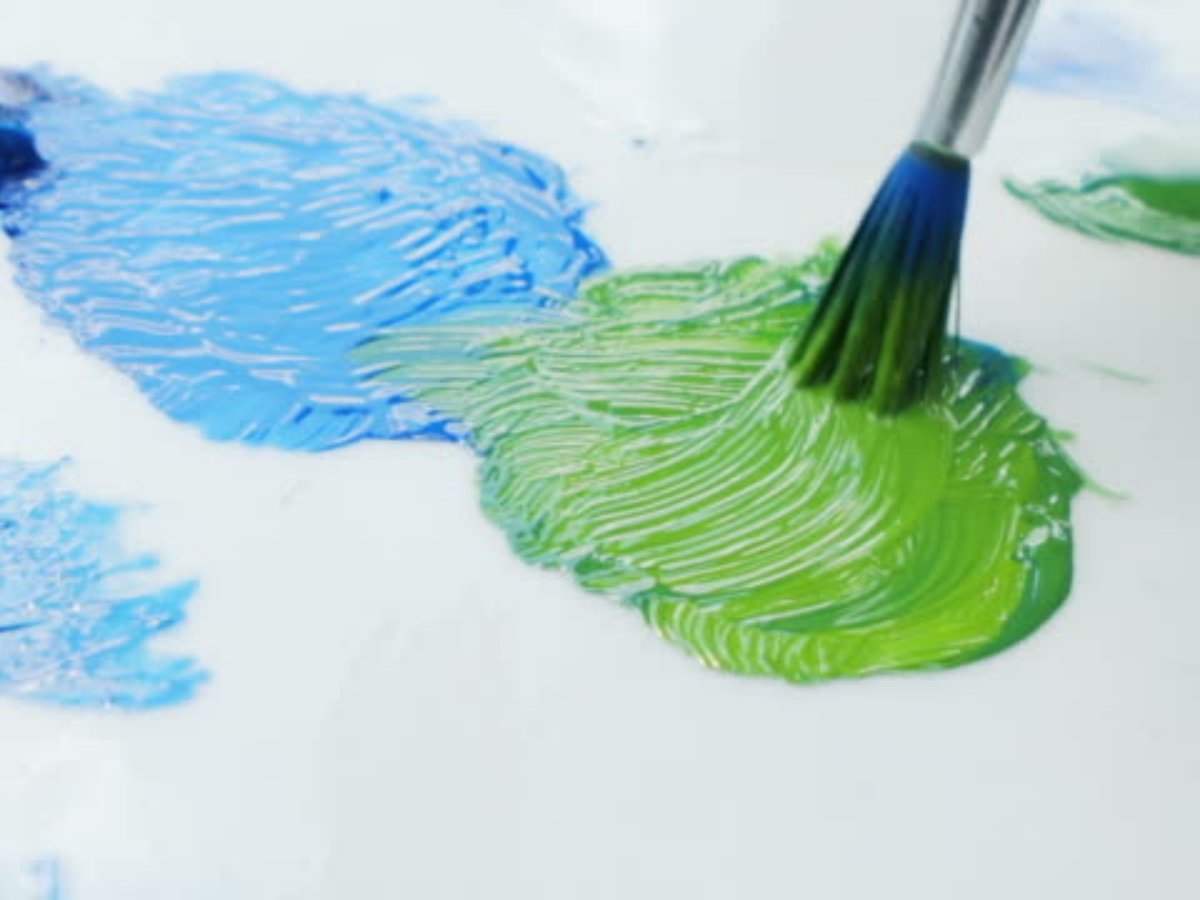
When it comes to creating a masterpiece, having the right tools is essential. Professional painting brushes are a vital part of any artist's toolkit, enabling them to bring their vision to life with precision and finesse. In this comprehensive guide, we will explore the world of professional painting brushes, from their different types and uses to how to care for and choose the best ones for your artistic needs.
1. Understanding the Importance of Professional Painting Brushes
Professional painting brushes are more than just ordinary tools. They are the extensions of an artist's hands, allowing them to translate their creativity onto the canvas. These brushes are specifically designed to offer superior control, flexibility, and durability, enabling artists to achieve the desired effects and textures in their artwork.
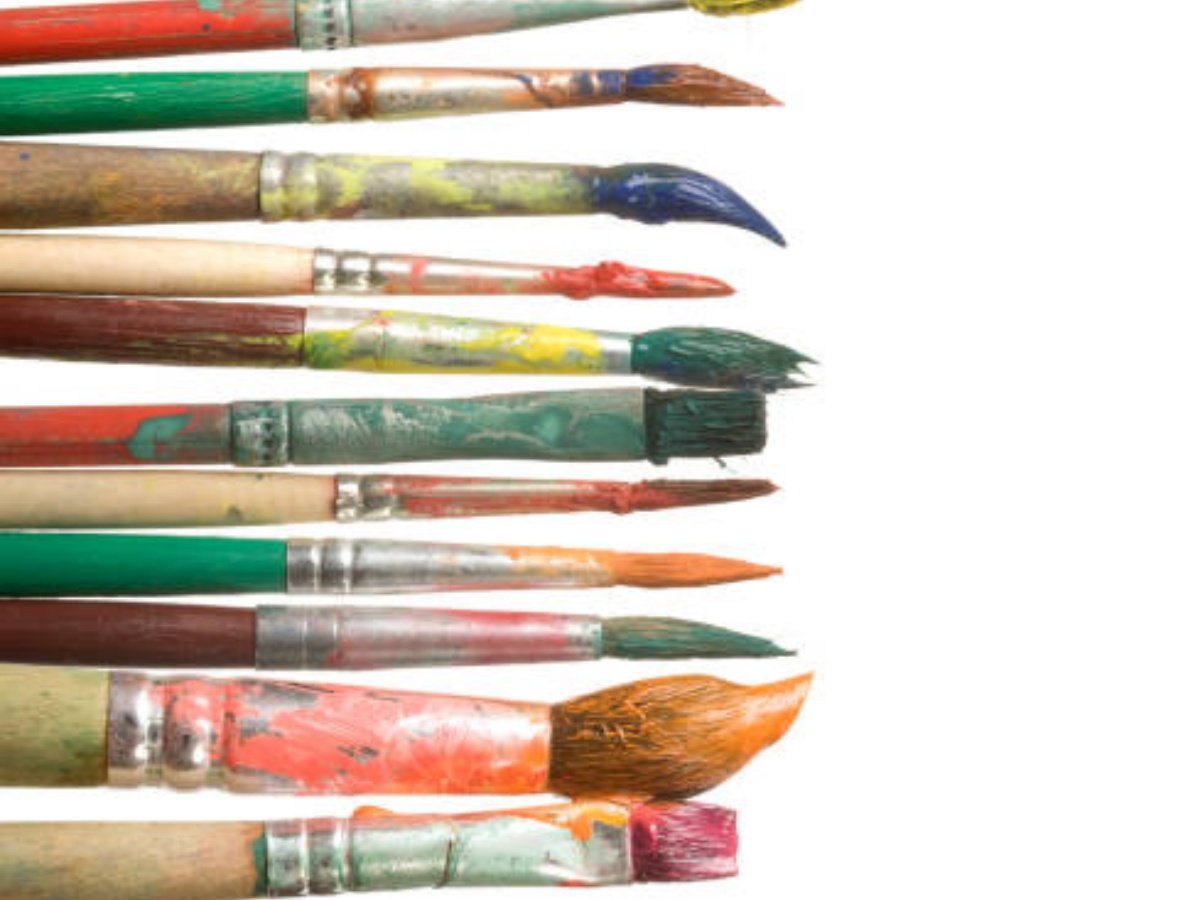
2. Types of Professional Painting Brushes
There are various types of professional painting brushes available, each designed for specific purposes. Some common types include:
Round Brushes: These brushes have a pointed tip and are ideal for creating fine lines, details, and delicate brushwork.
Flat Brushes: Flat brushes have a square end and are great for covering large areas, blending, and creating sharp edges.
Filbert Brushes: Filbert brushes have a rounded tip and are versatile, allowing artists to create both broad strokes and fine details.
Angular Brushes: Angular brushes have slanted bristles, making them perfect for creating precise lines, curves, and corners.
Fan Brushes: Fan brushes have spread-out bristles, resembling a fan. They are commonly used for blending, creating textures, and adding foliage or hair details.
3. Choosing the Right Professional Painting Brushes for Your Artwork
Choosing the right professional painting brushes can greatly impact the outcome of your artwork. Consider the following factors when selecting your brushes:
Bristle Material: Brushes can have natural or synthetic bristles. Natural bristles, such as those made from hog hair, are better for oil-based paints, while synthetic bristles are suitable for acrylics and watercolors.
Bristle Shape: Different bristle shapes offer various effects. Experiment with different shapes to find the ones that best suit your style and technique.
Brush Size: Brushes come in various sizes, ranging from 000 (smallest) to 24 (largest). Consider the size of your artwork and the level of detail you wish to achieve.
Handle Length: Short handles offer more control, while long handles are ideal for easel painting and working at a distance.
4. Caring for Your Professional Painting Brushes
Proper care and maintenance of your professional painting brushes are crucial for their longevity and performance. Follow these tips to keep your brushes in top condition:
Clean your brushes: After each painting session, thoroughly clean your brushes using mild soap and water or a specialized brush cleaner. Rinse them until the water runs clear.
Reshape the bristles: Gently reshape the bristles with your fingers after cleaning to restore their original shape.
Avoid excessive pressure: When painting, avoid applying excessive pressure on the bristles as it can damage their shape and compromise their performance.
Store them properly: Store your brushes with the bristles facing upward or hang them to prevent deformation. Avoid storing them in airtight containers as it can lead to mold growth.
5. Professional Painting Brushes for Different Mediums
While some brushes are suitable for multiple mediums, certain brushes work best with specific types of paint. Here are some recommendations:
Oil Painting: For oil-based paints, opt for brushes with natural bristles, such as hog hair brushes. They can hold and distribute oil-based paints effectively.
Acrylic Painting: Synthetic brushes are ideal for acrylic paints as they are more resistant to the harsh nature of acrylics and are easier to clean.
Watercolor Painting: Watercolor brushes are specifically designed to hold and release water efficiently. Sable brushes are often favored by watercolor artists for their superior water-holding capacity.
6. The Role of Quality in Professional Painting Brushes
Investing in high-quality professional painting brushes is essential for achieving the best results in your artwork. While they may come at a higher price, quality brushes offer several advantages:
Better Performance: Quality brushes provide superior control, allowing you to execute your artistic vision more accurately.
Longevity: High-quality brushes are more durable and can withstand frequent use and proper maintenance.
Consistency: Quality brushes have more consistent bristles, ensuring even paint distribution and minimizing streaks or unevenness.
7. Professional Painting Brushes for Different Techniques
Various painting techniques require different types of brushes. Here are some popular techniques and the brushes that work best for them:
Glazing: Glazing requires soft and flat brushes, such as soft synthetic brushes or camel hair brushes.
Impasto: Impasto techniques demand brushes with strong bristles, such as hog hair brushes, to handle thick and heavy paint application.
Wet-on-Wet: Wet-on-wet techniques benefit from soft and absorbent brushes, like squirrel hair brushes, which hold more moisture.
Dry Brushing: Dry brushing is best achieved with stiff brushes, like bristle brushes, to create textured and rough effects.
8. Exploring Specialty Professional Painting Brushes
In addition to the standard brushes, there are specialty brushes designed for specific purposes:
Palette Knives: Palette knives are flat, blunt tools used for mixing colors, applying thick paint, and creating textured effects.
Detail Brushes: Detail brushes have extremely fine and pointed bristles, allowing artists to add intricate details to their artwork.
Calligraphy Brushes: Calligraphy brushes have long and tapered bristles, making them perfect for creating elegant and flowing strokes.
9. Professional Painting Brushes for Different Surfaces
Consider the painting surface when selecting your brushes. Some brushes are better suited for specific surfaces, such as:
Canvas: Canvas surfaces work well with a variety of brushes, offering versatility in brush choice.
Paper: Paper surfaces are more delicate, making softer brushes, like synthetic or squirrel hair brushes, ideal to prevent damage.
Wood: Wood surfaces can handle stiffer brushes, like bristle brushes, for more aggressive paint application.
10. Conclusion
Professional painting brushes are indispensable tools for artists of all levels. With a wide range of brushes available for different mediums, techniques, and surfaces, there is a brush for every artistic need. By understanding the various types, caring for them properly, and choosing high-quality brushes, you can enhance your artistic abilities and bring your creative visions to life.
Quote Inquiry
Contact us!
Types of Brushes for Acrylic Painting: A Comprehensive Guide
Choosing the Right Brush for Acrylic Painting
Acrylic painting is a versatile and popular medium among artists. It allows for vibrant colors, quick drying time, and various application techniques. One crucial aspect of acrylic painting is selecting the right brushes. With numerous options available, it can be overwhelming to determine which brushes are best suited for your acrylic painting needs. In this article, we will explore the different types of brushes for acrylic painting, their characteristics, and when to use them.
1. Flat Brushes
Flat brushes are a commonly used brush shape for acrylic painting. These brushes have a flat, rectangular-shaped tip with straight edges. They are ideal for creating bold strokes, filling large areas, and applying even layers of paint. Flat brushes are also useful for blending and creating sharp edges. They come in various sizes, allowing artists to choose the appropriate brush width for their desired effect.
2. Round Brushes
Round brushes have a round-shaped tip and a pointed end. They are versatile brushes that can be used for various painting techniques. Round brushes are excellent for creating detailed work, such as fine lines, intricate patterns, and small dots. They can also be used for blending and adding texture to your acrylic paintings. Available in different sizes, round brushes offer flexibility for different painting styles and purposes.
3. Filbert Brushes
Filbert brushes have an oval-shaped tip with tapered edges. They combine the characteristics of flat and round brushes, making them a popular choice for many acrylic painters. Filbert brushes are perfect for creating curved strokes, blending colors smoothly, and creating soft edges. The rounded shape of the brush enables artists to achieve a natural, brushstroke-free finish. They are also suitable for painting foliage, petals, and other organic shapes.
4. Fan Brushes
Fan brushes have thin, spread-out bristles that resemble a fan shape. They are primarily used for creating texture and special effects in acrylic paintings. Fan brushes are perfect for painting realistic grass, foliage, and hair. They can also be used to blend colors, soften edges, and create gentle, wispy strokes. These brushes are available in various sizes, allowing artists to create different textures and effects with ease.
5. Angular Brushes
Angular brushes have an angled tip, similar to a flat brush. These brushes are versatile and can be used for both precise lines and broader strokes. Angular brushes are particularly useful for painting sharp corners, edges, and details in still life or architectural subjects. They can also be used to create expressive brushwork and add dimension to your acrylic paintings.
6. Mop Brushes
Mop brushes, also known as wash brushes, have soft, rounded bristles and a large, full head. These brushes are excellent for creating washes, blending colors, and applying broad strokes. Mop brushes hold a significant amount of paint, allowing artists to cover large areas quickly. They are particularly useful for creating soft backgrounds, skies, and smooth gradations in acrylic paintings.
7. Rigger Brushes
Rigger brushes, also called liner brushes, have long, thin bristles that come to a fine point. These brushes are primarily used for creating fine lines, intricate details, and delicate brushwork. Rigger brushes are perfect for painting thin branches, hair strands, and other small elements that require precision. They can also be used for calligraphy and signing your artwork.
8. Scrubber Brushes
Scrubber brushes have stiff, short bristles and a flat or angled tip. These brushes are designed for lifting off paint, correcting mistakes, and creating texture. Scrubber brushes can be used to remove paint from the canvas or to create rough and textured effects. They are particularly useful for creating fur, foliage, and other textured surfaces in acrylic paintings.
9. Dagger Brushes
Dagger brushes have a unique shape with a slanted edge and a flat tip. These brushes are versatile and can be used for a variety of painting techniques. Dagger brushes are excellent for creating long, flowing strokes, expressive marks, and adding texture. They can also be used for painting leaves, petals, and other organic shapes with ease.
10. Stippling Brushes
Stippling brushes have short, stubby bristles that are tightly packed together. They are used for creating stippled or dotted effects in acrylic paintings. Stippling brushes allow artists to create texture, add depth, and create interesting patterns. They are particularly useful for painting landscapes, skies, and other textured surfaces.
Conclusion
Choosing the right brushes for acrylic painting is essential for achieving the desired effects and creating stunning artwork. Flat brushes are ideal for bold strokes and filling large areas, while round brushes are perfect for detailed work and blending. Filbert brushes provide smooth edges and are great for organic shapes, while fan brushes add texture and special effects. Angular brushes are versatile and suitable for precise lines and broad strokes. Mop brushes are excellent for washes and smooth backgrounds, and rigger brushes are perfect for fine lines and delicate details. Scrubber brushes create texture and correct mistakes, while dagger brushes allow for expressive marks and long strokes. Stippling brushes create interesting patterns and texture. By understanding the characteristics and uses of different brush types, artists can enhance their acrylic painting techniques and bring their artistic vision to life.
Quote Inquiry
Contact us!
How to Soften a Paint Brush: Tips and Tricks
Introduction
Paint brushes are an essential tool for any painter, but over time they can become stiff and difficult to work with. However, there are simple and effective ways to soften a paint brush and restore it to its original condition. In this article, we will explore various methods and techniques to help you soften your paint brushes and keep them in top shape.
1. Soaking in Warm Water to Soften a Paint Brush
One of the easiest and most common methods to soften a paint brush is to soak it in warm water. Fill a container with warm water, enough to submerge the bristles of the brush. Let the brush soak for about 20 minutes, allowing the warm water to loosen the dried paint from the bristles. After soaking, rinse the brush with clean water and gently reshape the bristles with your fingers. This method is particularly effective for water-based paints.
2. Vinegar Solution
If your paint brushes have become stiff due to dried acrylic or oil-based paints, a vinegar solution can work wonders. Mix equal parts of white vinegar and hot water in a container. Soak the brush in the solution for 30 minutes, allowing the vinegar to soften the paint. After soaking, rinse the brush with clean water and reshape the bristles. Vinegar helps break down the paint and restore flexibility to the brush.
3. Fabric Softener to Soften a Paint Brush
Believe it or not, fabric softener can also be used to soften paint brushes. Dilute fabric softener with water in a ratio of 1:2 and soak the brush in the solution overnight. The fabric softener helps to loosen the paint and make the bristles more pliable. After soaking, rinse the brush thoroughly with water and reshape the bristles. This method is particularly effective for oil-based paints.
4. Using Conditioner to Soften a Paint Brush
If you don't have fabric softener on hand, hair conditioner can be a suitable alternative. Apply a generous amount of hair conditioner to the bristles and work it in with your fingers. Leave the conditioner on the brush for a few hours or overnight. Rinse the brush with clean water and reshape the bristles. The conditioner helps to soften the bristles and restore their flexibility.
5. Boiling Method
For brushes with extremely stubborn and hardened paint, the boiling method can be employed. Boil a pot of water and carefully place the brush in the boiling water. Let the brush simmer for 15 minutes to soften the paint. After boiling, remove the brush and rinse it under cold water. Gently reshape the bristles with your fingers. This method should only be used for brushes with metal ferrules and sturdy handles.
6. Brush Cleaner to Soften a Paint Brush
Brush cleaners are specially formulated to remove dried paint from paint brushes and restore their softness. Follow the instructions on the brush cleaner product and soak the brush accordingly. After soaking, rinse the brush thoroughly with water and reshape the bristles. Brush cleaners are particularly effective for oil-based paints.
7. Combing the Bristles to Soften a Paint Brush
If your paint brush bristles have become stiff, combing them can help restore their softness. Use a fine-toothed comb or a brush comb specifically designed for paint brushes. Gently comb through the bristles, starting from the base and working your way towards the tips. This helps to remove any dried paint and separate the bristles, making them softer and more flexible.
8. Brush Restorer
If you have old, hardened paint brushes that seem beyond repair, a brush restorer can be a game-changer. Brush restorers are powerful solutions that can break down tough, dried paint and restore brushes to their original condition. Follow the instructions on the brush restorer product for best results. After using a brush restorer, make sure to rinse the brush thoroughly with water and reshape the bristles.
9. Proper Brush Storage
Prevention is always better than cure, and this holds true for paint brushes as well. To keep your brushes soft and in good condition, it is important to store them properly. After cleaning the brush, reshape the bristles and hang the brush upside down or store it horizontally. This helps to prevent the bristles from becoming misshapen and keeps them soft and ready for the next use.
10. Regular Cleaning
The key to maintaining soft paint brushes is regular cleaning. After each use, rinse the brush thoroughly with water to remove any excess paint. Use a mild soap or brush cleaner to clean the bristles gently. Rinse again and reshape the bristles. By cleaning your brushes regularly, you can prevent paint from drying and hardening, ensuring that your brushes stay soft and in great condition.
Quote Inquiry
Contact us!
Types of Paint Brushes: A Comprehensive Guide
The Ultimate Guide to Different types of paint brushes
If you are a painter, whether professional or amateur, you understand the importance of using the right tools for the job. One of the most essential tools in any painter's arsenal is the paint brush. However, with so many different types of paint brushes available on the market, it can be overwhelming to choose the right one for your specific needs. In this article, we will explore the various types of paint brushes and their uses, helping you make an informed decision when selecting the perfect brush for your next painting project.
1. Round Brushes: Versatile and Precise
Round brushes are one of the most versatile types of paint brushes available. Their round shape and pointed tip make them ideal for intricate and detailed work. They are commonly used for creating fine lines, outlining, and adding small details to a painting. Round brushes are available in various sizes, with smaller sizes being suitable for delicate work, while larger sizes are great for broader strokes.
2. Flat Brushes: Perfect for Large Areas
Flat brushes, as the name suggests, have a flat shape with square edges. They are excellent for covering large areas quickly and efficiently. Flat brushes are commonly used for applying washes, varnishes, and glazes. They are also suitable for creating bold strokes and blending colors. The size of the brush determines the width of the stroke it will create, with wider brushes covering more surface area.
3. Filbert Brushes: The All-Purpose Brush
Filbert brushes are a combination of flat and round brushes. They have a flat, oval-shaped bristle with rounded edges. Filbert brushes are incredibly versatile and can be used for a variety of painting techniques. Their shape allows for both precise lines and broad strokes, making them a popular choice among artists. They are particularly useful for blending, softening edges, and creating smooth transitions between colors.
4. Angular Brushes: Perfect for Angled Strokes
Angular brushes have a flat, angled bristle that comes to a point. They are specifically designed for creating sharp, angular strokes. Angular brushes are commonly used for painting corners, edges, and for adding texture to a painting. They are also great for creating calligraphy-style strokes and can be used with both acrylic and oil paints.
5. Fan Brushes: For Special Effects and Textures
Fan brushes have a flat, fan-shaped bristle that resembles a fan. They are primarily used for creating special effects, textures, and blending. Fan brushes are commonly used in landscape paintings to create foliage, grass, and clouds. They can also be used for dry brushing techniques to add texture to a painting. The size of the fan brush determines the width and density of the stroke it creates.
6. Mop Brushes: Ideal for Washes and Blending
Mop brushes have a large, round shape with a full-bodied bristle. They are designed to hold a large amount of paint and are commonly used for washes, blending, and softening edges. Mop brushes are ideal for creating smooth gradients and applying thin glazes. They can also be used for painting backgrounds and large areas where a softer, more diffuse effect is desired.
7. Rigger Brushes: Perfect for Fine Lines
Rigger brushes, also known as liner brushes or script brushes, have long and thin bristles that come to a fine point. They are specifically designed for creating long, thin lines. Rigger brushes are commonly used for painting fine details such as hair, branches, or intricate patterns. They are a favorite among watercolor artists but can also be used with other mediums.
8. Dagger Brushes: Unique and Versatile
Dagger brushes have a unique shape with a flat, angled bristle that tapers to a point. They offer a wide range of brush strokes, from broad to fine lines. Dagger brushes are excellent for creating expressive strokes, foliage, and decorative elements. They are also great for blending and glazing techniques. Dagger brushes can be used with various mediums, including acrylics, oils, and watercolors.
9. Stencil Brushes: Perfect for Stenciling
Stencil brushes have short, stiff bristles and a flat top. They are specifically designed for stenciling and can be used with both paint and ink. Stencil brushes are great for applying paint evenly through the openings of a stencil, creating crisp and clean designs. They are available in various sizes to accommodate different stencil designs.
10. Detail Brushes: Small and Precise
Detail brushes, as the name suggests, are small brushes used for adding fine details to a painting. They come in various shapes, such as round, flat, and filbert, and are available in different sizes. Detail brushes are commonly used for painting small objects, intricate patterns, and adding the final touches to a painting. They are a must-have for artists who focus on precision and fine detailing.
Quote Inquiry
Contact us!
How to Clean Paint Brushes: A Comprehensive Guide
Introduction
Paint brushes are essential tools for any artist or DIY enthusiast. However, if not properly cleaned and maintained, they can become clogged with dried paint, rendering them useless. Learning how to clean paint brushes effectively will not only extend their lifespan but also ensure optimal performance. In this article, we will provide you with a step-by-step guide on how to clean paint brushes, using simple yet effective methods.
1. Gather Your Materials of Paint Brushes
Before you begin cleaning your paint brushes, make sure you have all the necessary materials on hand. You will need:
Warm water
Mild dish soap or paint brush cleaner
Old rag or paper towels
A clean container
A wire brush or comb
2. Remove Excess Paint of Paint Brushes
The first step in cleaning your paint brushes is to remove any excess paint. You can do this by gently wiping the brush against the rim of your paint can or a piece of scrap paper. Be careful not to apply too much pressure as it may damage the bristles.
3. Rinse with Warm Water
Next, rinse the paint brush under warm water to remove any remaining paint. Hold the brush by the handle and let the water flow over the bristles, working from the base towards the tip. Use your fingers to gently massage the bristles to help loosen any trapped paint.
4. Use Dish Soap or Paint Brush Cleaner
Apply a small amount of mild dish soap or paint brush cleaner to the bristles of the paint brush. Work the soap into a lather by gently rubbing the bristles together. This will help break down any remaining paint particles and remove any built-up residue.
5. Rinse and Repeat
Rinse the paint brush thoroughly under warm water to remove the soap and paint residue. Repeat the process of applying dish soap or paint brush cleaner and rinsing until the water runs clear and no more paint is being washed out.
6. Comb the Bristles of Paint Brushes
Once the brush is clean, use a wire brush or comb to gently comb through the bristles. This will help remove any remaining paint or debris that may be stuck between the bristles. Start from the base of the bristles and work your way towards the tip, being careful not to apply too much pressure.
7. Dry the Brush
After thoroughly rinsing and combing the bristles, shake off any excess water and gently pat the brush dry using an old rag or paper towels. Avoid using excessive force or twisting the bristles, as this can cause damage. Allow the brush to air dry completely before storing or using it again.
8. Store Properly of Paint Brushes
Once your paint brushes are clean and dry, it is important to store them properly to maintain their shape and quality. Store them horizontally or vertically with the bristles facing up to prevent them from bending or becoming misshapen. Avoid storing them in airtight containers, as this can lead to mold or mildew growth.
9. Deep Cleaning for Stubborn Paint
If your paint brushes have dried paint that is particularly stubborn to remove, you can try a deep cleaning method. Fill a container with enough warm water to submerge the bristles and add a few drops of dish soap. Place the brush in the solution and let it soak for a few hours or overnight. Rinse and repeat the steps mentioned earlier to remove the loosened paint.
10. Tips for Maintaining Clean Brushes
Here are some additional tips to help you maintain clean paint brushes:
Never leave brushes sitting in water or solvent for extended periods, as this can damage the bristles.
Avoid using harsh chemicals or solvents to clean your brushes, as they can deteriorate the bristles over time.
Regularly inspect your brushes for any signs of damage or wear. Replace brushes that have frayed or splayed bristles.
Clean your brushes immediately after use to prevent paint from drying and hardening.
how to clean paint brushes, clean paint brushes, cleaning paint brushes, paint brush cleaning, maintaining paint brushes How to Clean Paint Brushes: A Comprehensive Guide Learn how to clean paint brushes effectively with this step-by-step guide. Maintain the lifespan and performance of your brushes with simple yet effective cleaning methods.
Quote Inquiry
Contact us!
Clay Sculpting Tools and Their Uses: A Comprehensive Guide
clay sculpting tools and their uses: A Comprehensive Guide
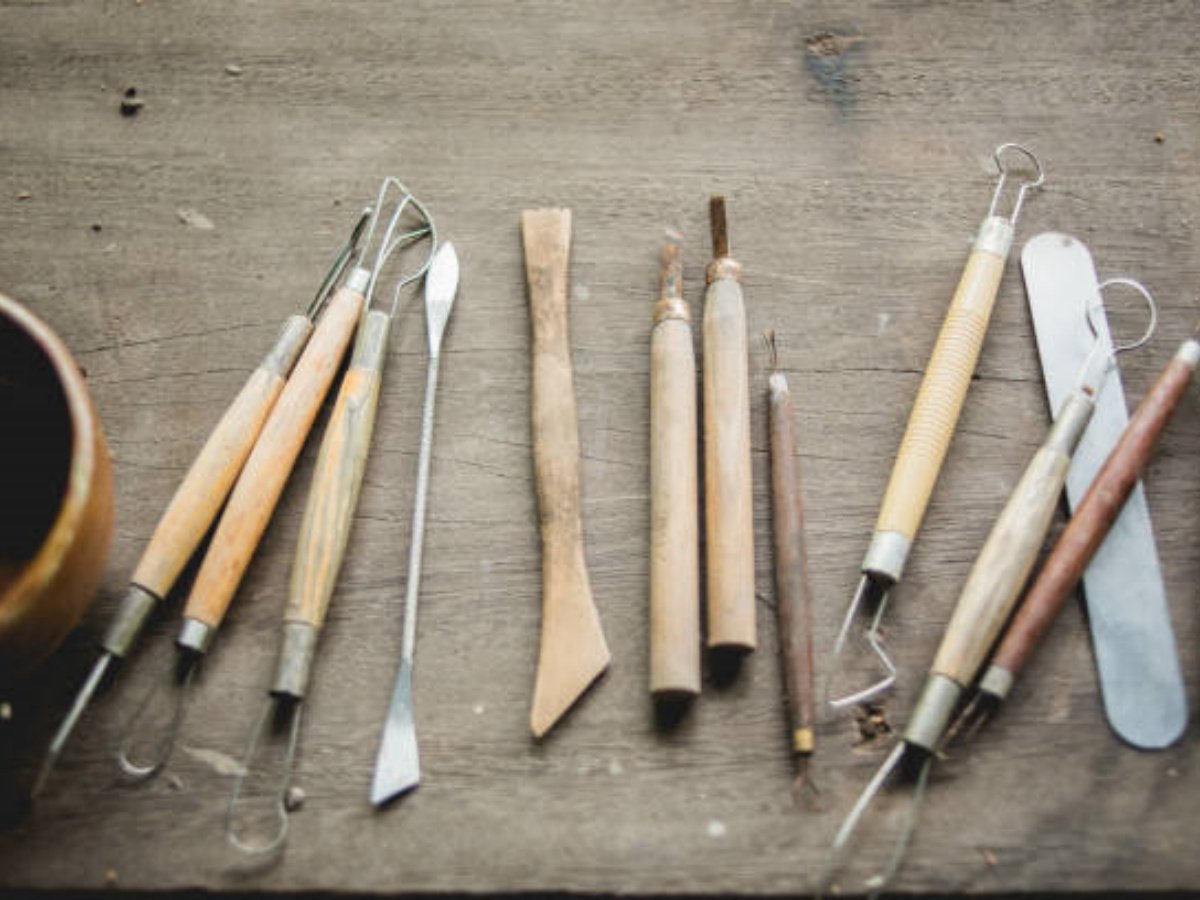
Clay sculpting is a timeless art form that allows artists to bring their imagination to life. Whether you're a beginner or a professional, having the right tools is crucial for achieving the desired results. In this article, we will explore the various clay sculpting tools and their uses, helping you understand which tools to use for different sculpting techniques.
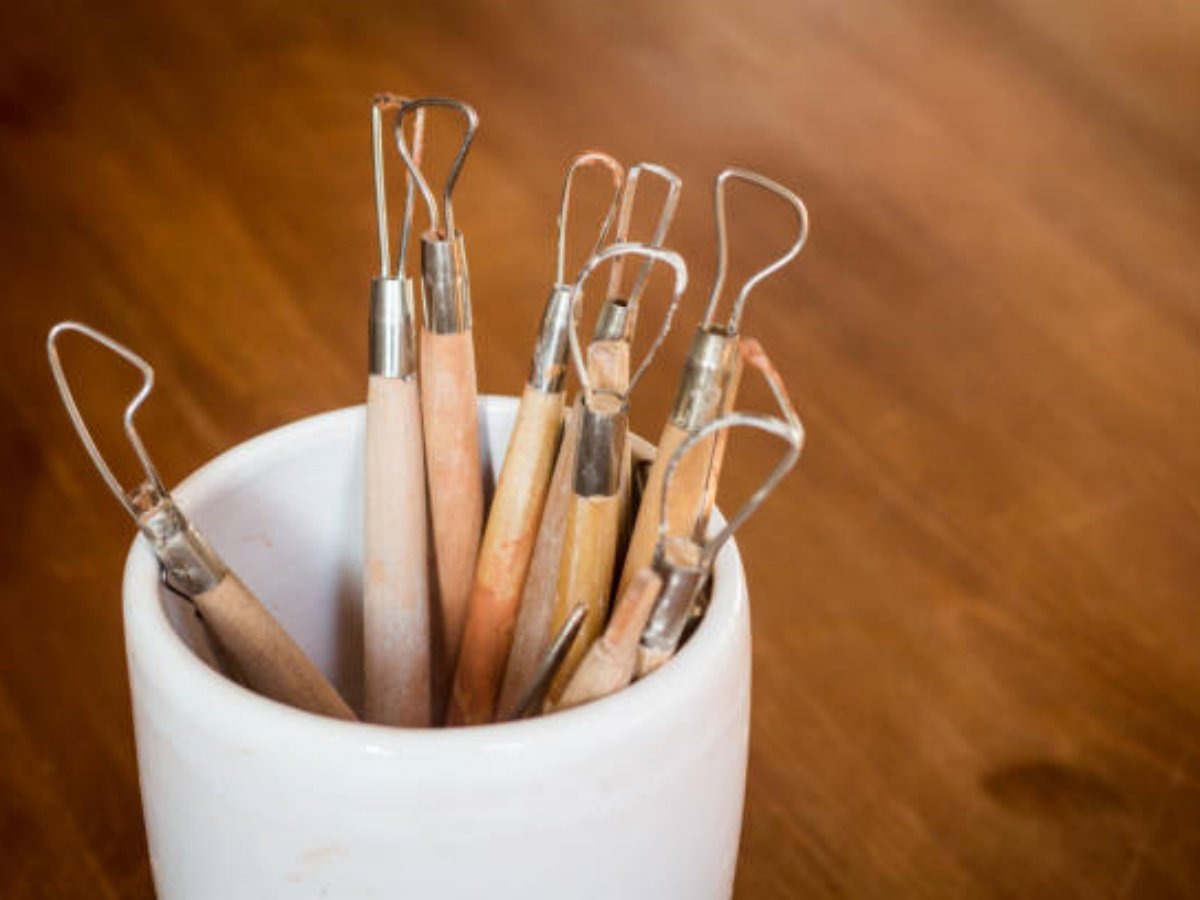
1. Wire Tools of clay sculpting tools
Wire tools are an essential part of any sculptor's toolkit. They come in various shapes and sizes, including loop tools, wire-end tools, and ribbon tools. These tools are ideal for cutting, shaping, and removing clay from a sculpture. Loop tools are great for carving out fine details, while wire-end tools can be used to create texture and add depth. Ribbon tools, on the other hand, are perfect for smoothing and refining the surface of the clay.
2. Sculpting Knives
Sculpting knives are versatile tools that allow artists to carve precise lines and create intricate details. They come in different blade shapes, such as flat, rounded, and pointed, each serving a specific purpose. Flat blades are great for shaping and smoothing clay, while rounded blades are ideal for creating curves and contours. Pointed blades, on the other hand, are perfect for adding fine details and texture.
3. Modeling Tools
Modeling tools are commonly used for shaping and sculpting clay. They come in various shapes, including spatula-shaped, ball-ended, and needle-ended tools. Spatula-shaped tools are ideal for smoothing and blending clay, while ball-ended tools can be used to create rounded shapes and textures. Needle-ended tools, also known as stylus tools, are perfect for adding fine details and creating texture on the surface of the clay.
4. Clay Rollers of clay sculpting tools
Clay rollers are great tools for flattening clay and creating even surfaces. They come in different sizes and materials, including wooden, acrylic, and rubber rollers. Wooden rollers are ideal for larger projects, while acrylic and rubber rollers are perfect for smaller and more detailed work. Clay rollers not only save time but also ensure that the clay is evenly distributed, making it easier to work with.
5. Texture Tools of clay sculpting tools
Texture tools are used to add patterns and textures to the surface of a sculpture. They come in various forms, including texture mats, texture stamps, and texture wheels. Texture mats are flexible sheets with raised patterns that can be pressed onto the clay to create unique textures. Texture stamps are similar but come in the form of handheld stamps. Texture wheels, on the other hand, have interchangeable wheels with different patterns, allowing artists to create a variety of textures.
6. Armature Tools
Armature tools are used to create a sturdy internal support structure for sculptures. They include materials such as wire, aluminum foil, and wooden dowels. Wire is commonly used to create the basic shape of the sculpture and provide stability. Aluminum foil can be used to bulk up certain areas or create lightweight structures. Wooden dowels are perfect for creating armatures in larger sculptures, providing extra support and stability.
7. Sculpting Brushes
Sculpting brushes are essential for adding fine details and blending clay. They come in various shapes and sizes, including flat, round, and fan brushes. Flat brushes are great for smoothing and blending clay, while round brushes can be used for adding texture and creating organic shapes. Fan brushes, with their delicate bristles, are perfect for creating subtle effects and adding finishing touches.
8. Calipers of clay sculpting tools
Calipers are precision measuring tools that are used to ensure accurate proportions and dimensions in a sculpture. They come in various types, such as inside calipers, outside calipers, and divider calipers. Inside calipers are used to measure internal dimensions, while outside calipers are used for external measurements. Divider calipers, also known as compass calipers, are versatile tools that can be used for both measuring and transferring measurements onto clay.
9. Clay Extruders of clay sculpting tools
Clay extruders are specialized tools that allow artists to create consistent shapes and patterns in clay. They work by pushing clay through a shaped nozzle, resulting in various extruded shapes. Clay extruders are commonly used for creating handles, coils, and intricate decorations. They come in manual and electric versions, with the latter providing more power and control.
10. Cutting Tools of clay sculpting tools
Cutting tools are essential for removing excess clay and refining the shape of a sculpture. They include wire cutters, clay shapers, and scalpel knives. Wire cutters are used to cut through larger chunks of clay, while clay shapers are versatile tools that can be used for cutting, smoothing, and blending clay. Scalpel knives are ideal for precise cutting and shaping, especially when working on intricate details.
Quote Inquiry
Contact us!
Basic Clay Tools Names: A Comprehensive Guide to Essential Tools for Clay Artists
The Importance of Knowing basic clay tools names
As a clay artist, having a good understanding of the basic clay tools names is essential to your craft. Whether you are a beginner or an experienced artist, knowing the names and functions of different clay tools can greatly enhance your work. In this article, we will explore ten essential clay tools and their uses. From shaping to trimming, these tools play a vital role in the creation of beautiful clay art.
1. The Clay Knife
The clay knife is a versatile tool used for cutting, slicing, and shaping clay. It typically consists of a sharp blade attached to a wooden or metal handle. The blade can be straight or serrated, depending on the desired effect. The clay knife is perfect for creating clean edges, trimming excess clay, and carving intricate details.
2. The Clay Needle Tool
A clay needle tool is a fine-pointed instrument used for a variety of purposes. It is ideal for scoring clay surfaces, creating texture, and piercing holes. The needle tool helps to join pieces of clay together, allowing for a stronger bond. It is also useful for adding fine details and patterns to your clay creations.
3. The Clay Wire Cutter
A clay wire cutter is an essential tool for dividing and slicing clay. It consists of a metal wire stretched between two handles. This tool allows you to cut through large clay blocks, creating even sections for easier handling. The wire cutter is particularly useful when working with thicker clay or when dividing clay into smaller portions.
4. The Clay Rolling Pin
A clay rolling pin is a cylindrical tool used for rolling out clay evenly. It helps to create a smooth and consistent thickness throughout the clay slab. The rolling pin is essential for tasks such as slab building, where an even surface is crucial. It is also useful for blending and smoothing clay surfaces.
5. The Clay Rib
A clay rib is a curved tool made of metal or flexible material, such as rubber or wood. It comes in various shapes and sizes and is used for shaping and smoothing clay surfaces. The rib is perfect for creating clean lines, refining curves, and removing excess moisture from the clay. It can also be used to create texture and patterns on the clay surface.
6. The Clay Sponge
A clay sponge is a soft and absorbent tool used for adding or removing moisture from clay. It is particularly useful for smoothing out surfaces, blending seams, and correcting imperfections. The sponge can be used damp or dry, depending on the desired effect. It is essential for achieving a smooth and polished finish on your clay creations.
7. The Clay Modeling Tool
A clay modeling tool is a versatile instrument with various interchangeable tips. It is used for shaping, sculpting, and adding details to clay. The tips can be made of metal, plastic, or wood, each serving a different purpose. The modeling tool allows for precise control and can be used for tasks such as creating texture, refining edges, and adding fine lines to your clay art.
8. The Clay Loop Tool
A clay loop tool is a handheld instrument with a loop-shaped blade at one end. It is primarily used for cutting, trimming, and hollowing out clay. The loop tool is perfect for shaping clay sculptures, creating negative spaces, and removing excess material. It allows for precise and controlled cuts, making it a valuable tool for both beginners and experienced clay artists.
9. The Clay Rake
A clay rake, also known as a texture comb, is a tool with multiple pointed tines. It is used for creating texture and patterns on the clay surface. The rake is dragged across the clay, leaving behind uniform lines or grooves. It is an excellent tool for adding visual interest and depth to your clay art.
10. The Clay Kiln
The clay kiln is not exactly a tool but an essential element in the clay artist's toolkit. It is used for firing clay creations at high temperatures, transforming them into durable ceramic pieces. The kiln allows the clay to undergo a chemical process called vitrification, where it hardens and becomes resistant to water and heat. Without a kiln, the clay art would remain fragile and susceptible to damage.
basic clay tools names, clay artist tools, essential clay tools, clay tool functions, clay knife, clay needle tool, clay wire cutter, clay rolling pin, clay rib, clay sponge, clay modeling tool, clay loop tool, clay rake, clay kiln Basic Clay Tools Names: A Comprehensive Guide to Essential Tools for Clay Artists Discover the basic clay tools names every clay artist should know. From clay knives to kilns, this comprehensive guide explores the essential tools and their functions in the world of clay art.
Quote Inquiry
Contact us!
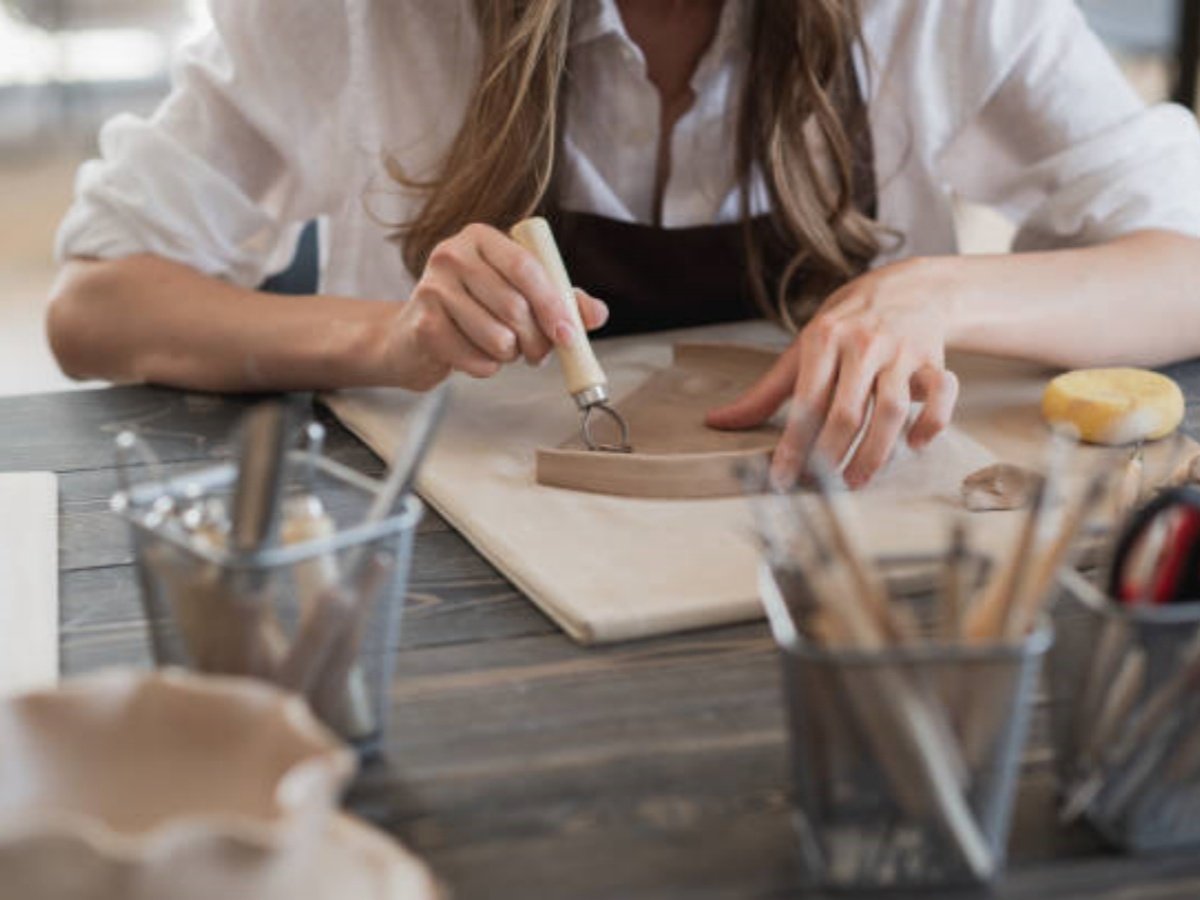
How to Use Clay Tools: A Comprehensive Guide
The Ultimate Guide on how to use clay tools for Beginners
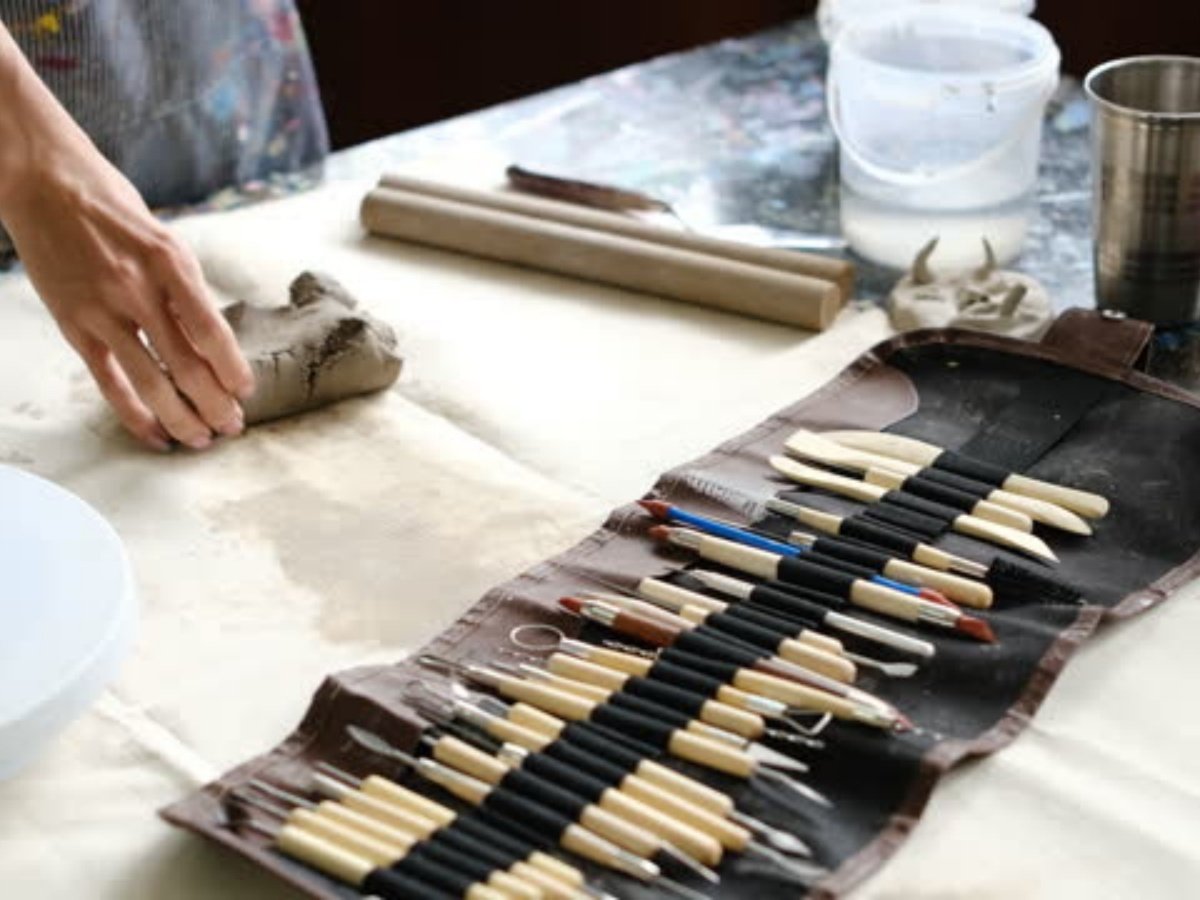
Clay tools are essential for any pottery enthusiast, whether you are a beginner or an experienced artist. These tools help shape, carve, and refine clay, allowing you to bring your creative vision to life. In this article, we will explore the various clay tools available, their uses, and provide some expert tips on how to make the most of them.
1. Understanding the Basic Clay Tools
Before diving into the specifics, it is important to familiarize yourself with the basic clay tools. These include:
Clay Knife: Ideal for cutting and trimming clay.
Wire Cutter: Used to slice through clay blocks or for trimming excess clay.
Loop Tools: These come in various shapes and sizes and are perfect for sculpting and hollowing out clay.
Rib Tools: Used for smoothing and shaping clay surfaces.
Needle Tools: Great for scoring, detailing, and creating patterns on the clay.
Sponges: Essential for keeping your hands and clay moist while working.
Having these tools on hand will set you up for success as you embark on your clay journey.
2. Preparing Your Workstation
Creating a conducive workspace is crucial for a seamless clay sculpting experience. Here are a few tips to set up your workstation:
Cover your work surface with a canvas or plastic sheet to prevent clay from sticking or staining the table.
Have a container of water nearby to keep your hands and tools moist.
Keep a clean sponge handy for wiping excess clay or for smoothing surfaces.
Organize your tools within reach, ensuring they are clean and free from any debris.
By preparing your workstation properly, you can focus on your creative process without any unnecessary interruptions.
3. Basic Techniques for Using Clay Tools
Now that you have your tools and workstation ready, let's delve into some basic techniques:
3.1 Cutting Clay with a Clay Knife
Start by wedging your clay to remove any air bubbles. To cut the clay, hold the knife at a slight angle and apply gentle pressure while moving it through the clay. This technique is useful when dividing clay into smaller sections or trimming excess clay.
3.2 Sculpting with Loop Tools
Loop tools are versatile and can be used to create various shapes and textures. To sculpt with a loop tool, hold it like a pencil and use a sawing motion to remove clay. Experiment with different loop tool shapes to achieve the desired results.
3.3 Smoothing with Rib Tools
Rib tools are excellent for achieving smooth surfaces on your clay creations. Hold the rib tool firmly and drag it across the clay, applying even pressure. This technique helps remove any imperfections and gives your piece a polished look.
3.4 Detailing with Needle Tools
Needle tools are perfect for adding intricate details or creating patterns on your clay. Use the needle tool to gently score the clay or create fine lines and textures. Remember to be cautious while using needle tools to avoid any accidents.
4. Advanced Techniques for Clay Tool Usage
Once you have mastered the basics, you can explore more advanced techniques to enhance your clay sculpting skills:
4.1 Clay Extruder for Unique Shapes
A clay extruder is a tool that allows you to create consistent and intricate shapes. Load the extruder with clay, choose the desired shape disc, and press the clay through the extruder. This technique is perfect for creating handles, ropes, or unique designs.
4.2 Carving Tools for Texture and Detail
Carving tools, such as wood carving knives or dental tools, can add texture and depth to your clay creations. Experiment with different carving techniques to achieve unique patterns and designs on your clay surfaces.
4.3 Texture Tools for Surface Variation
Texture tools, like stamps or found objects, can be pressed into the clay to create interesting patterns and designs. Explore nature or everyday objects to find textures that inspire you. Press them gently onto the clay to transfer the texture.
5. Maintenance and Care of Clay Tools
To ensure the longevity of your clay tools, proper maintenance and care are essential. Here are a few tips:
After each use, clean your tools with a damp cloth or sponge to remove any clay residue.
Dry your tools thoroughly to prevent rust or damage.
Store your tools in a clean and dry area to avoid moisture buildup.
Regularly inspect your tools for any signs of wear and tear, and replace them if necessary.
By taking care of your clay tools, you can enjoy their benefits for years to come.
6. Conclusion
Using clay tools is an art form in itself. With the right tools and techniques, you can bring your clay creations to life. Remember to start with the basics, experiment with different tools and techniques, and always practice proper maintenance and care. Whether you are a beginner or an experienced artist, the possibilities with clay tools are endless. So, go ahead, unleash your creativity, and enjoy the wonderful world of clay sculpting!
Quote Inquiry
Contact us!
Clay Sculpting Tools and Their Uses: A Comprehensive Guide
clay sculpting tools and their uses: A Comprehensive Guide
Clay sculpting is a versatile and creative art form that allows artists to bring their imagination to life. Whether you are a beginner or an experienced sculptor, having the right tools is essential to achieve the desired results. In this article, we will explore the various clay sculpting tools and their uses, helping you enhance your sculpting skills and create stunning clay artworks.
1. Wire Tools for Shaping and Cutting
Wire tools are a fundamental part of any clay sculptor's toolkit. They come in various shapes and sizes and are used for shaping, cutting, and removing excess clay. The most common wire tools include loop tools, cutting wires, and wire end tools.
2. Sculpting Knives for Detailing
Sculpting knives are precision tools used for fine detailing and carving intricate patterns in clay sculptures. They come in different blade shapes and sizes, allowing artists to achieve precise cuts and create intricate textures.
3. Modeling Tools for Sculpting and Smoothing
Modeling tools are versatile instruments that serve multiple purposes in clay sculpting. They are used for shaping, smoothing, and blending clay. With a variety of tips and shapes, these tools enable artists to create curves, indentations, and intricate textures on their sculptures.
4. Ball Stylus Tools for Texture and Detailing
Ball stylus tools are commonly used for adding texture and fine details to clay sculptures. They have a small ball at one end that can be used to create indentations, dots, or lines on the surface of the clay. They are perfect for creating realistic textures like hair, fur, or scales.
5. Ribbon Tools for Sculpting and Carving
Ribbon tools are thin, flat metal strips with a variety of shapes at each end. They are primarily used for sculpting, carving, and shaping clay. The different shapes and edges allow artists to create clean lines, remove excess clay, and add intricate details to their sculptures.
6. Clay Extruders for Creating Consistent Shapes
Clay extruders are specialized tools used to create consistent shapes and patterns in clay. They work by pushing the clay through a die, resulting in uniform shapes like coils, ropes, or tubes. These tools are particularly useful for creating repetitive elements or adding decorative accents to sculptures.
7. Texture Tools for Adding Depth and Interest
Texture tools come in various forms, such as texture stamps, texture rollers, or texture mats. They are used to add depth and interest to the surface of clay sculptures. By pressing or rolling these tools onto the clay, artists can create realistic textures like wood grain, stone patterns, or fabric textures.
8. Brushes for Applying Finishing Touches
Brushes are not only essential for painting but also for applying finishing touches to clay sculptures. They can be used to smooth surfaces, blend colors, or remove excess dust or debris. Different brush sizes and types are suitable for various sculpting techniques and provide artists with greater control over their artworks.
9. Armature Tools for Supporting Larger Sculptures
When working on larger clay sculptures, armature tools come into play. These tools are used to create a supportive framework for the sculpture, ensuring its stability throughout the sculpting process. Armature tools can be made of various materials, such as wire, wood, or metal, depending on the size and complexity of the sculpture.
10. Storage and Cleaning Tools for Maintenance
Proper storage and maintenance of clay sculpting tools are crucial for their longevity. Storage tools such as toolboxes, racks, or containers help keep the tools organized and protected. Cleaning tools like brushes, sponges, or specialized cleaning solutions are used to remove clay residue and prevent the tools from getting damaged.
clay sculpting tools and their uses, clay sculpting tools, wire tools, sculpting knives, modeling tools, ball stylus tools, ribbon tools, clay extruders, texture tools, brushes, armature tools, storage and cleaning tools Clay Sculpting Tools and Their Uses: A Comprehensive Guide Discover the wide range of clay sculpting tools and their uses to enhance your sculpting skills. Explore wire tools, sculpting knives, modeling tools, and more for creating stunning clay artworks.
Quote Inquiry
Contact us!